
The theme for Eileen's March creations is fibers, fabrics and felt. It's been a while since I created a shabby chic journal so I just dove right in to this project using fabrics and laces and lots of fun mixed media techniques!
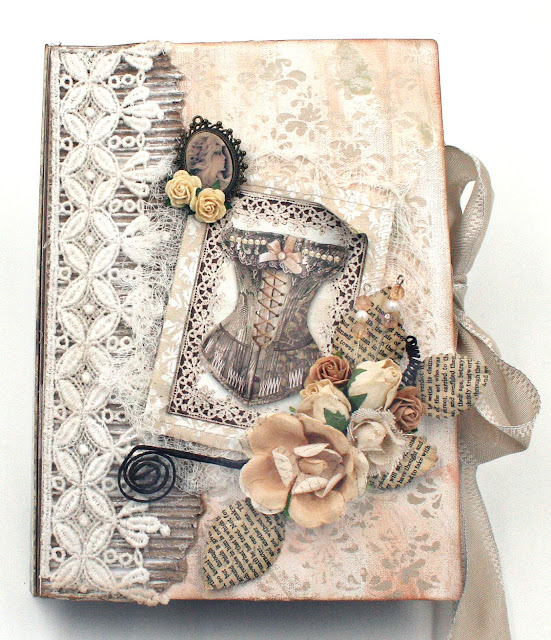
I have lots of photos and a tutorial for the cover to share with you so get comfy and let's go!
Tutorial
This journal is a great size at 6.25" x 8.75"; plenty of room for notes and lots of photos. I used Eileen Hull by Sizzix Full Size Journal to cut the cover. You do need a BIG machine to cut the cover and I just got Sizzix's new Switch Machine. Woo-hoo!! I confess, I made this particular journal because I wanted to see how my Switch worked.
Okay, okay, 😄😄let's get to the tutorial part!
Step 1: First thing I did was adhere sticky back canvas to 2 pieces of chipboard and diecut the two covers.
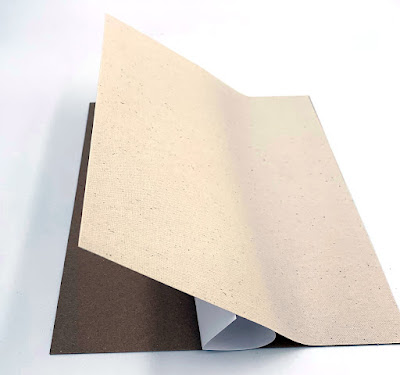
Step 2: I used thin chip board for the covers and the score lines were about to come apart so I reinforced the area where the scorelines are with fabric washi tape to keep the chipboard from separating at the scorelines.

Step 3: Now we get to the fun part! I prepared a Gel-Press plate with white, beige and peach acrylic paints and the outsides of the front and back covers. Sorry, I didn't photo this process but you can learn more about Gel-Press in this blog post.
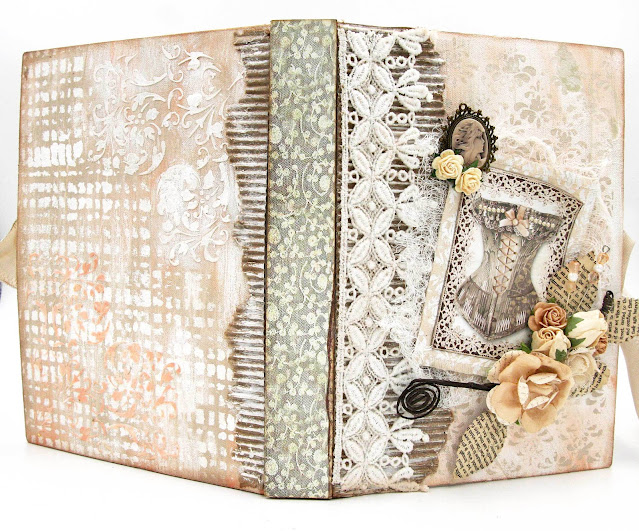
Step 4: After allowing the paint to dry, it's time to do some stenciling. On the front cover I used a stenciling brush to dab paint instead of using molding paste.

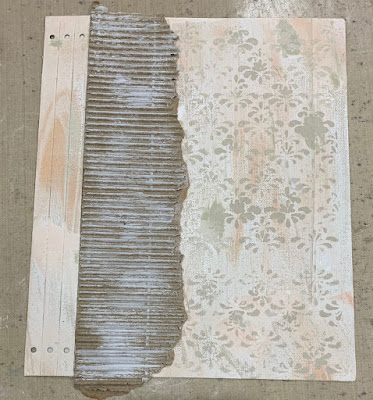
Step 5: On the back cover, I used white molding paste and after stenciling on the pattern, I went over it with white paint (before removing the stencil) so that the stenciled image would be bright white.
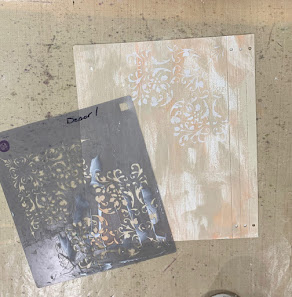
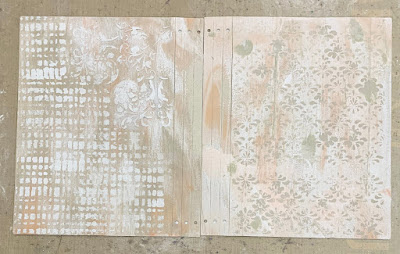
Step 6: Here are the two covers together. You can see that I did some additional stenciling on the back cover with a different stencil.
Step 7: Add some corrugated cardboard near the edge and dry brush with white paint to add to the shabby chic look.
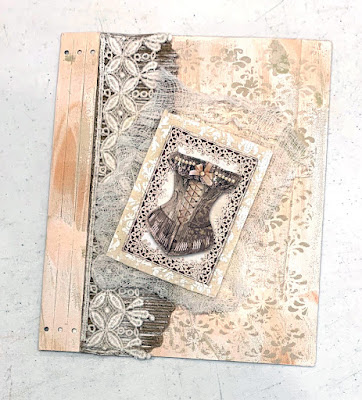
Step 8: Add a strip of lace over the cardboard using mat medium to adhere it.

Step 9: Then I layered the vintage corset image over a scrap of fabric and and some distressed cheesecloth.
Step 10: Of course the final step is to add flowers and leaves, along with a vintage cameo and a couple of stick pins.
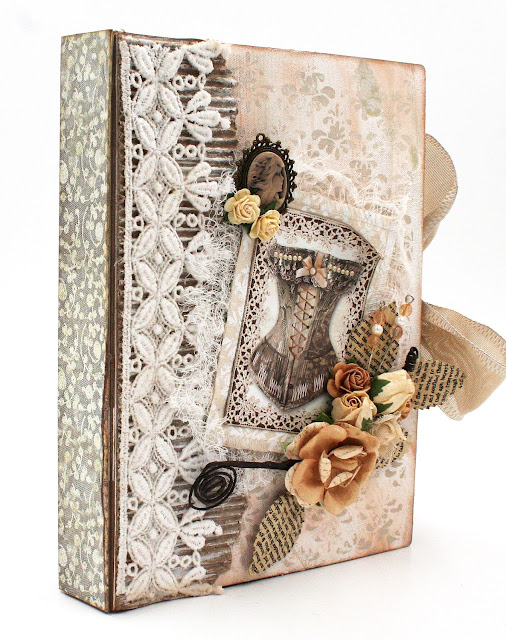
I added a ribbon closure by gluing ribbon on the inside of the covers. I used design paper overtop the ribbons as you can see in this photo. The chipboard sentiment on the right is heat embossed with Aged Ivory embossing enamel.

I embossed a piece of black cardstock with Eileen's Vintage Buttons folder and then went over the embossed images with Sizzix wax in rose gold. I love the effect of the wax on black cardstock. I added fussy cuts from the paper collections and bits and pieces of lace and trim from my stash.

The page on the left has a little page that opens up to reveal a journaling spot and another place for photos.
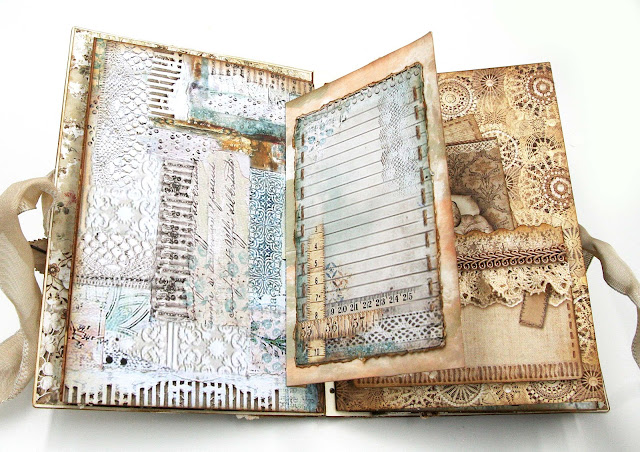
I made a pocket on the left by covering a piece of cardstock with lace. On the right is a tuck spot and more of the Vintage Buttons embossed cardstock.

On the right is a pocket for tags, notes, etc.
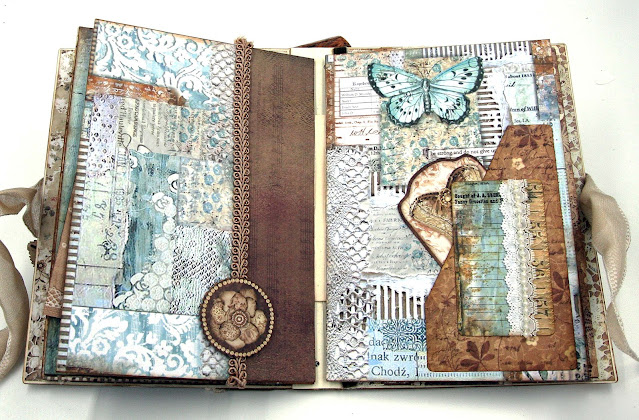
On the right is an envelope that is one of the images in the design papers. I just cut it out and folded it into an envelope. Its a perfect spot for notes and photos!

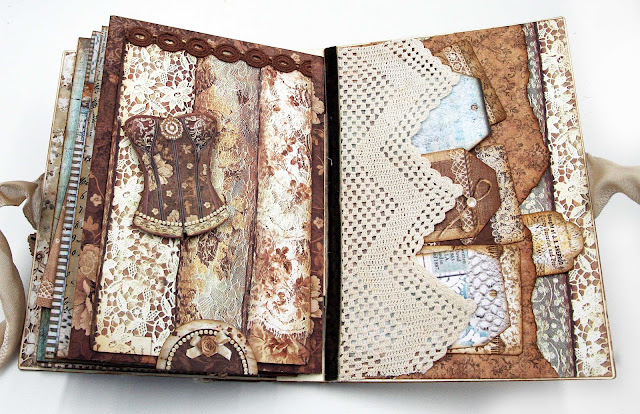
The left side has a page that lifts up and the right side has two pockets. Making the lace pocket was fun. I adhered the lace onto a piece of vellum and then glued it onto the brown paper which is also a pocket. Iliked the torn edge on the brown scrap and decided to just leave it au naturel!
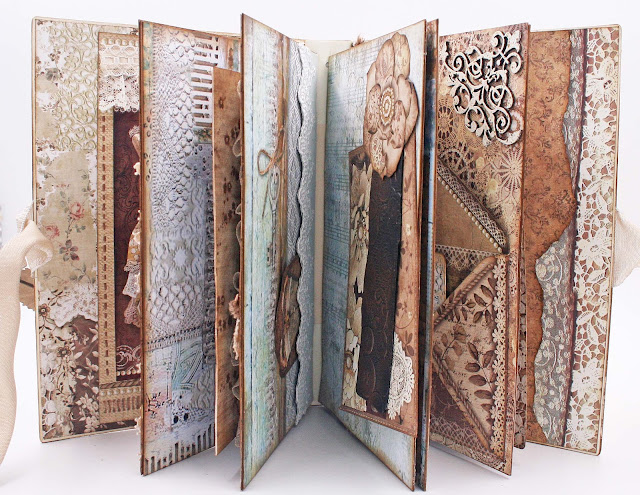
All of the pages in this book are made from covered thin chipboard, so I guess it's technically a "board" book right?
To make the spine stronger, I covered a piece of chipboard with design paper and glued it to the spine.
If you've managed to stay with me through this entire post, thank you!! It's a long one. This was a really fun journal to make, I enjoyed working with vintage images and laces! Thanks for stopping by.
Maggi xoxo
Supplies
Sizzix Thinlits Die Set - Card, Waterfall & Tags by Eileen HullSizzix 3-D Textured Impressions Embossing Folder - Vintage Buttons by Eileen Hull
Stamperia Atelier Paper Collection
Stamperia Old Lace Paper Collection
Creative Embellishments Chipboard Quotes
Stampendous Aged Ivory
Ranger Sticky Back Canvas
Assorted Flowers, Laces, Fabric from my stash


