Pages

Monday, January 31, 2022

Blog Hop Featuring New Products from Eileen Hull Designs


I am so excited to share Eileen Hull Designs Chapter 1 release with you! The dies in this collection are versatile, practical and fun to embellish.

The Phone Stand, an XL ScoreBoards die, is a MUST- you need one for every room! Make for yourself, family, friends, for gifts, or to sell.  The die cuts the Phone Stand in one pass and is very easy to assemble.

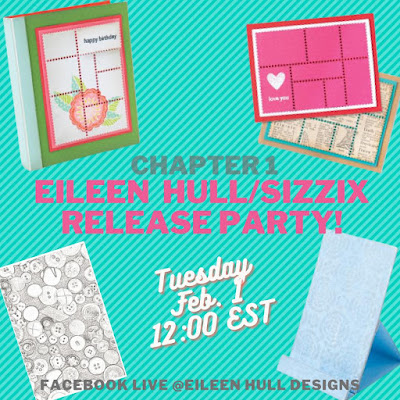
The Book Box can be used to make a book or a box that holds A-2 greeting cards. What a great way to package handmade cards ... or a quick and easy book!

Add the Vintage Buttons folder to create vintage backgrounds for cards, journals, pages and tags. The 3D effect is stunning when you add a little Luster Wax to bring out the highlights...

The Snail Mail Thinlits die cuts a postal pane that coordinates with two of Eileen's Snail Mail Maker Forte stamps. This die was designed to use on the front of an A-2 card!

To celebrate this great new release, we're having a blog hop and it starts tomorrow (Tuesday, February 1) on Eileen's blog, so hop on over!


The Book Box by Eileen Hull


The new Book Box die is amazing!!!!!  I am loving it. I made this adorable button box using the new Book Box die and a new Vintage Buttons embossing folder.  At 5" x 6.5", the box is just perfect for stashing my collection of vintage buttons.  It's also perfect for holding small gifts, candies, oh so many possibilities!


Facebook Live

Join me and Eileen Hull February 3 at 4 pm EST for a Facebook Live.  I'll show you  some fun techniques using the Textured Impressions Vintage Button Embossing Impressions and an easy closure for the box!


I used a stamp from Eileen's Maker Forte Stamp Set, Buttons, Cards and More, to make the "Sunshine Buttons" title.


I found this adorable sewing machine charm on Amazon.  


I made a Vintage Buttons embossed panel to use in the bottom of the box.


Products from Eileen Hull


Hope to see you on Facebook Live February 3rd.  If you can't make it, there will be a video playback available.

Maggi xoxo

Tuesday, January 11, 2022

Gel Press Collaboration with Eileen Hull Designs


Eileen and Teams are collaborating with GelPress all through January to see what magic can be made when both products are combined. Make sure to check in at Eileen's blog at http://eileenhull.com each week to see what comes of our GelPress journeys. And check out the GelPress blog too to see what the Gel Press team is doing with Eileen's journal bases at https://gelpress.com/.  It's a match made in heaven 💓!

I've been having tons of fun with the Gel Press! I started out with a simple technique using an 8" x 10" Gel Press Printing Plate to create a background print for to use with Eileen's Full Size Journal.

I started out with black, white and silver paints dripped onto the printing plate.


Next I used a Gel Press brayer to roll the paint over the Prining Plate.


 Then I pressed a piece of black cardstock onto the printing plate being sure to press all of the paper into the plate.  I pulled up the paper and this is the result.  Looks a bit like marble doesn't it?

I printed several sheets so that I would have enough paper to cover both the inside and outside of the journal covers.


To make the journal covers I cut chipboard panels 7.5" x 9.25",  just slightly larger than the Full Size Journal cover.  I also cut the Gel Press printed black cardstock to the same size.  Now I put the journal covers together in my normal fashion.  That is, applying adhesive to the back of the cardstock and then adhering the cardstock to the chipboard journal covers.  

Tip:  I find that sometimes when I go to pull the adhesive paper backing off my cardstock, it starts pulling the cardstock apart or it doesn't adhere to the cardstock at all.  One of the cures for this is to rub the adhesive soqn really well before pulling the backing away.  Here's an easier way, just run the adhesive covered cardstock through your diecut machine without a die and presto, it is rubbed down quite nicely and the adhesive backing pulls away leaving a perfect adhesive covered piece of cardstock.

Prepare 4 pieces of cardstock covered with adhesive and adhere it to the chipboard pieces, front, back, inside and out.  Now lay the chipboard frontside facedown on the journal die and run it through your diecut machine. 

This is what I ended up with!  Note, I wanted to add just a smidgen of color to the black/white and I wanted it to be translucent so I used a bit of Ken Oliver's Chartreuse Color Bursts.  I picked through my stash and found the chartreuse ribbons and bling.  

The two corner pieces and the bow are Creative Embellishments chipboard covered with Eileen's Molten Dimensions embossing powder in Polished Silver.  It's kinda funky but I like it!


Inside I changed up my painted colors using black, red and ivory but used the same technique, just brayered the paint from side to side, instead of from top to bottom.


For my 2nd project I decided to get a bit more girly and created this.  I used the very same technique with blue, white and yellow acrylic paints.  


I used a thinlit die from an older set of Eileen's, the Bookplate, Hinges & Label Die Set, to make the title.  I diecut the label from some of the Gel Press printed papers and then stamped it using a sentiment stamp from Eileen's Snail Mail Inspiration stamp set.  The little flags were also punched from papers I printed.


That gorgeous doily you see is a fairly new die release from Eileen; again I diecut it from papers I had printed with the Gel Press.  A fussy cut bird, flowers, and a pretty bow finish the look.  Oh yes, and that cute little wooden fence!  I think this is classic me, LOL!  


Eileen Hull Products Used


Gel Press Products

Other Supplies

Black, White, Silver Acrylic Paint
Black Cardstock
Blue, Green, Yellow, White Acrylic Paint
Stamperia Dream Paper Collection
EK Success Banner Punches
Grafix 12 x 12 Chipboard


LinkWithin

Related Posts Plugin for WordPress, Blogger...