
Sunday, June 30, 2013


Saturday, June 29, 2013
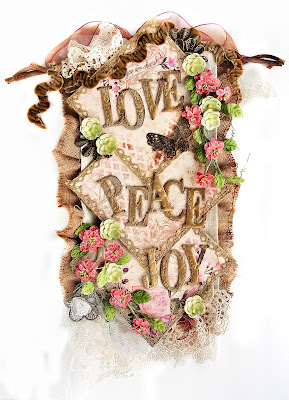
Using my stash for the Use Your Stash Challenge at the Flying Unicorn
We have a great challenge going at the Flying Unicorn, it's Use your Stash, and like all of our Flying Unicorn challenges, you can use any products you like. You do not have to use our kits or items from the store! We welcome everyone to our forum!
This is just a fun LO that I did of my Dad using an old G45 collection, Communique. Its one of my favorite collections as I love the reds, blacks and creams in this collection. And it is very appropriate for this layout as my Dad worked in communications, teletype machines, radios, etc, during his 28 years serving in the US Army.
I popped up the letters and some of the embellies with foam dots and then painted them with Diamond Glaze to make them stand out. This is a great way to add a little extra pizazz to your projects. This is really a simple layout and it needed a little something extra.
Journaling:
"General Price presenting the Legion of Merit medal to Dad for exceptionally meritorious conduct in the performance of his duties. Dad earned two Legion of Merit awards during his 28 years in the Army, one for service in


Supplies:
Patterned paper: Graphic45 Communique collection: diecut - Pen
in Hand 4500058, Red plaid - Typography 4500065, frame - photogenic 4500063.
black check - society page 4500064, tags,
Letters: G45 Alphabetstickers 4500235, script Websters in Love stickers lette
Diecuts and punches: WRMK
Lucky 8 Fancy Scroll
Flowers: Prima
564575 Engraver flowers light brown
Ink: distress black
soot
Other: Diamond glaze,
Jolee's fleur de lis
Thanks for stopping by, hope to see you at the Flying Unicorn in the challenges forum!
Sunday, June 23, 2013
Steampunk Spells, loving this paper!
I love the rich colors of Graphic 45, no matter which line you choose, the colors are always so deep and vibrant. Steampunk Spells is no disappointment and I sure had fun this weekend playing with this new collection, available in the Flying Unicorn store.
First up Lucky Spells. Graphic 45 papers always include lots of tags and fun things to cut out. I did a lot of fussy cutting and also layered banners, tags, and tickets to complete my look.

I used some inked cheesecloth and an Alterations harlequin diecut underneath this fabulous ScrapFx steampunk chippy that I embossed with Stampendous aged gold embossing enamel. I wove some rhinestone strips through the chipping and banner cluster. The black cat is fussy cut and painted with Diamond Glaze .


Patterned paper: SteampunkSpells collection: base - Tick Tock,
Lucky Spells & Book of Spells cards - Vintage Voyage 4500683, Fussy cut
flowers - Fanciful Floral 450 681, Blk/white gears & cat - Beware, black
dot - Frigntful Folly, Steampunk Spells stickers 4500698, balloon - Mechanical
Marvels 4500684, Tags and Pockets
4500697, Banners 4500695
Chipboard: ScrapFX steampunk
Diecuts and punches: Alterations gears and clock
Flowers: Prima gallery roses 533304
Mist: Lindy's Rhododendron red rose, bourgainvillea fuschia,
I wanted to do something different from the Halloween aspect of Steampunk Spells so I made this tag using a Julie Nutting Prima tag for the base. Then I embossed the tag with TCW Tiny Circles and Liquitex modeling paste. I diecut the gears with an Alterations die and then painted them with Viva Décor 3D stamp paint in gold. The compass came from the dollar bin at Michael's and it is mounted on a Stamped Geometric Metal Tag from G45.

Supplies:
Unknown: ribbons, bead fringe
First up Lucky Spells. Graphic 45 papers always include lots of tags and fun things to cut out. I did a lot of fussy cutting and also layered banners, tags, and tickets to complete my look.


I made the two smaller flowers and use some old Prima small flowers for the centers. I fussy cut flowers from the G45 papers to put underneath my 3D flowers.


Supplies
Cardstock: Bazzill
Chipboard: ScrapFX steampunk
Embossing powder: Stampendous Aged Gold, Gold UTEE,
Diecuts and punches: Alterations gears and clock
Flowers: Prima gallery roses 533304
Mist: Lindy's Rhododendron red rose, bourgainvillea fuschia,
Stickles: Gold,
tropical tangerine
I wanted to do something different from the Halloween aspect of Steampunk Spells so I made this tag using a Julie Nutting Prima tag for the base. Then I embossed the tag with TCW Tiny Circles and Liquitex modeling paste. I diecut the gears with an Alterations die and then painted them with Viva Décor 3D stamp paint in gold. The compass came from the dollar bin at Michael's and it is mounted on a Stamped Geometric Metal Tag from G45.

Patterned paper: Julie
Nutting Prima tag, G45 Steampunk Spells collection: hot air balloon - Pumpkin
power 4500688, Steampunk Spells stickers 4500698
Diecuts and punches: Alterations
Gears
Flowers: Petaloo
Frosted Roses Blue/green1468-403
Ink: Distress black
soot
Mist: Lindy's Frosted
Forget Me Not, Edelweiss moss green
Masks: TCW Tiny
Circles
Other: G45 Stamped
Geometric Metal Tag 4500301; compass-Studio 18
Unknown: ribbons, bead fringe
Friday, June 21, 2013
Mixed Media Inspiration!
The Flying Unicorn Mixed Media Inspiration will be released each month on the 15th. Its purpose is to provide you with a collection of products that will stimulate your imagination, provoke your inner muse, and inspire you to create! Originally I set out to make a canvas mini but after creating a couple pages I decided I liked them better a little pieces of art.
This was done with one of the black 6 x 6 chipboards that came in the kit.


Hiiii everyone Tammy here, hope you ladies got your hands on one of these kits!!! They are so much fun to play with!!!! Here is my project that I did with this awesome mixed media kit! I will also show you close ups and explain a little on my process. First up the whole project!!!!

This actually is free standing, but photoed so much better laying flat to see the details. I have it joined together in the back with wide burlap ribbon, with just a little space between, to give it room to fold the sides in a wee bit, so it stands up! Here are the close ups and what I did..

Here is what I did to create the outside pieces of the project. This is Nika, one of Maggi's adorable Spoo's and Chena her other Spoo is on the opposite side! They are so Beautiful I couldn't resist using them!! LOL
I took the canvas banner and cut it to fit the black chipboard pieces. Note: the canvas shrinks so cut it a little bit bigger than the project if your gonna give this a whirl!! Then I used the Creative Medium that we got in last month's kit and did a photo transfer to the canvas piece. I used a ink jet printer and regular copy paper and printed out my photo in the size that I needed.. I did both of these 5x7 with the adjust fit turned off. I then cut it to fit the canvas where I wanted it to go.. Note: I didn't attach it yet to the black chippy square.
I traced around it with the pencil that comes with the kit and then used the fan brush to apply the medium to my canvas. I only put the medium in the outlined area that I created with my pencil. I made sure it was coated well and then laid my photo over it. Using my outlined pencil mark as guides. Then I used a rubber brayer to flatten it well. Next I started peeling the photo right off.. If you are using this medium it dries really quick so it doesn't need to set for any length of time. Be gentle and peel really slow!! I started at the corners and peeled back.
After it was all peeled off, I used the Mr Huey's mist in "clay grey" that came in the kit to soak the remaining areas. then gently rubbed the remaining off. I saturated the whole piece with this mist! So be sure to cover it really well! After I had as much as possible removed, I dried it. When it was really dry I used the chalk and pencil that was in the kit and highlighted the photo in areas to make it pop! When doing the transfer some of the detail didn't shine as much as I wanted it too. So the chalks that came in the kit were really wonderful for the highlights!! Now after I did this I covered the outside of the photo with the Stephanie Barnard "Artichoke" that came in the kit as well. I did this to get the whole image to blend really nice and a some color. I then tweaked it a little more with the chalks after it was dry.
Then I used the mask that came in the kit and some molding paste. Took out some Lindy's and painted on the color to the molding paste areas. I used "Afternoon Delight Denium", then covered it in some Lumiere Metallic gold. Then attached my piece after it was dry to my black chipboard that came in the kit.
The big Letter "N" that came in the kit (whole bunch of yummy Maya Road letters!) was covered with Stampendous Embossing Enamel in "Aged Copper". I covered the Yummy Metal flower Flying Unicorn Adornment in it as well!! Love this stuff!!!!!! Oh and the flower Adornment is in this kit too!!! This kit is loaded with yumminess!!! I covered one of the Petaloo vines in the same Lindy's mist that I used on the masked area. Then twined it together with the other piece. The vines are in the kit as well! :) The DA chippy from my stash, was covered in the "Aged Ivory" embossing enamel. Then I attached a lace trim to the bottom, also from my stash. The little Offray flower center is from my stash as well. I attached them all to my main piece. Time for the next piece! Sorry the next ones won't be as long! LOL

Note: Lots on this piece is from my stash, but most can be found in the Flying Unicorn store!! Here is what I used.
From the kit:
Petaloo vines, Flower Flying Unicorn Adornment, Base piece (black chipboard).
From My stash:
DA Chippies, Bricks and corners.
Lindy's mist: Coco Bean Copper
Flying Unicorn Metal Adornments: Key
Offray: Off white flower
Viva Pearl Pen: Copper
Prima: Dark Rust Edger, Flower (rusty orangish one), Junk yard findings light bulb, Doors, Letters, PP BG is Engraver,
Pink Paislee: Hope chest collection (rooster and Behind the flowers BG).
Stampendous embossing Enamel: Aged Ivory
Last close up:

The treatment to this panel was the same as the first. So much fun! Hope you give it a try and got one of these amazing kits!!!
I hope you enjoyed!! Have a great day all!! Hugs ~Tammy
I love your project Tammy and can't wait to see it up close and personal!! This is such an awesome project featuring my sweet poodle girls!
This was done with one of the black 6 x 6 chipboards that came in the kit.

Here are my steps for creating this:
1. Mask the upper portion of the chipboard with Studio 490 gold embossing paste using the TCW mini quartrefoil mask that came in the kit. Let that dry thoroughly.
2. While that is drying cut a 5" circle from the center of a 6 x 6 piece of paper. I used a sheet from Prima's Nature Garden.
3. Make a flower using McGill's Floriano punch - punch two flowers, mist them and give each petal a twist, then dry. Cut a couple retro flowers for the center and give them a twist and mist. Cut a starburst. Put the two large flowers on the bottom offsetting the petals, then the retro flowers, then the starburst. Add some stickles around the edges and on the flower stamens.
4. Tear of some Lindy's fusible webbing and stamp with whatever colors you like and then add colors of embossing powder. Use your heat gun to melt the embossing powder and watch the webbing turn to a lacey web.
5. The lovely frame in the background is one that Alda made for me, I used antique gold Rub 'n Buff to color it. The cherub is a Prima Ingvild Bohme resin.
6. By now the embossing paste should be dry, so back to the chippy. One odd thing about the black boards is that they "bleed" a pink color so I could not get a white cloud with white paint or gesso so I ended up using Stampendous chunky white embossing powder to make my cloud. Actually I love the effect of the embossing powder anyway so it worked out quite well!
7. Next I just layered all the pieces on beginning first with the fusible webbing placing it so that it would peek out from the circle frame. Then I added the rectangle frame and the popped up the cherub. Then I added the two Flying Unicorn metal flowers ( used Rub 'n Buff to make them gold) and the large handmade flower and two leaves.
8. I used the cream metallic rubon that came in the kit around the edges of the circle frame and I used some gold cream metallic rubon from my stash, same as in the kit, just different colors. I used foam squares on the circle frame to pop it up so that the piece has lots of depth.
9. And that's all there is to it!

Closeup of Lindy's fusible webbing

Floriano flower
I can't wait to see where your muse takes you with the inspiration packed in this collection of goodies! ~~Maggi
Now take a look at what Tammy has made. Oh my goodness, I love love love what she has done and best of all, she has promised to give this to me!! Weeeeeee!!
Hiiii everyone Tammy here, hope you ladies got your hands on one of these kits!!! They are so much fun to play with!!!! Here is my project that I did with this awesome mixed media kit! I will also show you close ups and explain a little on my process. First up the whole project!!!!

This actually is free standing, but photoed so much better laying flat to see the details. I have it joined together in the back with wide burlap ribbon, with just a little space between, to give it room to fold the sides in a wee bit, so it stands up! Here are the close ups and what I did..

Here is what I did to create the outside pieces of the project. This is Nika, one of Maggi's adorable Spoo's and Chena her other Spoo is on the opposite side! They are so Beautiful I couldn't resist using them!! LOL
I took the canvas banner and cut it to fit the black chipboard pieces. Note: the canvas shrinks so cut it a little bit bigger than the project if your gonna give this a whirl!! Then I used the Creative Medium that we got in last month's kit and did a photo transfer to the canvas piece. I used a ink jet printer and regular copy paper and printed out my photo in the size that I needed.. I did both of these 5x7 with the adjust fit turned off. I then cut it to fit the canvas where I wanted it to go.. Note: I didn't attach it yet to the black chippy square.
I traced around it with the pencil that comes with the kit and then used the fan brush to apply the medium to my canvas. I only put the medium in the outlined area that I created with my pencil. I made sure it was coated well and then laid my photo over it. Using my outlined pencil mark as guides. Then I used a rubber brayer to flatten it well. Next I started peeling the photo right off.. If you are using this medium it dries really quick so it doesn't need to set for any length of time. Be gentle and peel really slow!! I started at the corners and peeled back.
After it was all peeled off, I used the Mr Huey's mist in "clay grey" that came in the kit to soak the remaining areas. then gently rubbed the remaining off. I saturated the whole piece with this mist! So be sure to cover it really well! After I had as much as possible removed, I dried it. When it was really dry I used the chalk and pencil that was in the kit and highlighted the photo in areas to make it pop! When doing the transfer some of the detail didn't shine as much as I wanted it too. So the chalks that came in the kit were really wonderful for the highlights!! Now after I did this I covered the outside of the photo with the Stephanie Barnard "Artichoke" that came in the kit as well. I did this to get the whole image to blend really nice and a some color. I then tweaked it a little more with the chalks after it was dry.
Then I used the mask that came in the kit and some molding paste. Took out some Lindy's and painted on the color to the molding paste areas. I used "Afternoon Delight Denium", then covered it in some Lumiere Metallic gold. Then attached my piece after it was dry to my black chipboard that came in the kit.
The big Letter "N" that came in the kit (whole bunch of yummy Maya Road letters!) was covered with Stampendous Embossing Enamel in "Aged Copper". I covered the Yummy Metal flower Flying Unicorn Adornment in it as well!! Love this stuff!!!!!! Oh and the flower Adornment is in this kit too!!! This kit is loaded with yumminess!!! I covered one of the Petaloo vines in the same Lindy's mist that I used on the masked area. Then twined it together with the other piece. The vines are in the kit as well! :) The DA chippy from my stash, was covered in the "Aged Ivory" embossing enamel. Then I attached a lace trim to the bottom, also from my stash. The little Offray flower center is from my stash as well. I attached them all to my main piece. Time for the next piece! Sorry the next ones won't be as long! LOL

Note: Lots on this piece is from my stash, but most can be found in the Flying Unicorn store!! Here is what I used.
From the kit:
Petaloo vines, Flower Flying Unicorn Adornment, Base piece (black chipboard).
From My stash:
DA Chippies, Bricks and corners.
Lindy's mist: Coco Bean Copper
Flying Unicorn Metal Adornments: Key
Offray: Off white flower
Viva Pearl Pen: Copper
Prima: Dark Rust Edger, Flower (rusty orangish one), Junk yard findings light bulb, Doors, Letters, PP BG is Engraver,
Pink Paislee: Hope chest collection (rooster and Behind the flowers BG).
Stampendous embossing Enamel: Aged Ivory
Last close up:

The treatment to this panel was the same as the first. So much fun! Hope you give it a try and got one of these amazing kits!!!
I hope you enjoyed!! Have a great day all!! Hugs ~Tammy
I love your project Tammy and can't wait to see it up close and personal!! This is such an awesome project featuring my sweet poodle girls!
Tuesday, June 18, 2013
Prima from the June KOM kit and from my stash.
I really love the Prima Fairy Rhymes paper in the Flying Unicorn June KOM. It has such a soft color palette that is perfect for those girly pages that we like to do!
This is another layout of one of the Dance Hall gals from the days of the Klondike Gold Rush. That really is such an interesting period of history and the women who were there were rather amazing living in such a difficult environment and doing whatever they had to do to provide for themselves and family. Many of these women became "respectable" members of society and went on to be quite wealthy.


This is another layout of one of the Dance Hall gals from the days of the Klondike Gold Rush. That really is such an interesting period of history and the women who were there were rather amazing living in such a difficult environment and doing whatever they had to do to provide for themselves and family. Many of these women became "respectable" members of society and went on to be quite wealthy.

I first masked the background with the Lattice stencil and Lindy's Fuzzy Navel Peach mist. Then I used the 6 x 6 Hollyhock mask and Shimmerz Patina Texturez paste. After that dried I dabbed on some Prima Turquoise Stone chalk ink to add a little depth to the masking.

I made a little peek-a-boo and tucked in some vintage lace that my dear friend Peggy gave me, thanks Pegs!

Flowers from my stash, the kit, and last month's kit, all Prima.

Prima resin bird and window from my stash, trimed with a bit of lace dyed with Glimmer Mist Old Lace and Prima baubles from an older kit I believe.

I did this for Escape Kitty's package it up challenge. You know how Kitty loves to play with boxes and packaging! LOL! I used some Prima packaging as a photomat.
Come play with us in our challenges, you do not have to use our kits or products. We welcome you to use anything you want!
Monday, June 17, 2013
Another mixed media creation!
When I first received my Mid Month Mixed Media Inspiration collection of goodies, I was a bit stumped. I just didn't know what to do with that very large piece of canvas but after a little thought, I was inspired to create so many things. I now realize that what I loved the most about the kit is that it is meant to push your creativity and combine it with things you already own to make your own unique mixed media projects.
For this project I indulged in my favorite colors of black, white and red! I cut a piece of canvas and glued it to the black squares in the kit. First I painted it with clear gesso and then misted with a couple colors of red. Next I masked with TCW's mini harlequin mask and Studio 490 black embossing paste.
Then I dug deep into my stash and gathered these IOD Devotion stickers. That is one of my all time favorite collections. I am really excited that IOD is moving to Prima, can't wait to see what they come out with.
I used a little Studio 490 gold embossing paste and Prima's static mask on one of the tags. At the top I've added some Lindy's fusible webbing embossed with gold UTEE. The gorgeous heart is from the Flying Unicorn's Adornments collection. Definitely one of the most gorgeous metal hearts on the market!

Flowers: Prima tiny red roses
Ink: Mixed Media Inx black
Mist: Lindy's Cajun Carnelian red, Rudolph's Nose red; Gator Gumbo olive
Masks: TCW min harlequin; Prima static
Other: Canvas painted with clear gesso cut to 6x6 and mounted on chipboard; Studio 490 black & goldembossing paste; Lindy's Fusible Webbing; FUL Adornment metal heart; gold UTEE; Sharpie gold pen;
For this project I indulged in my favorite colors of black, white and red! I cut a piece of canvas and glued it to the black squares in the kit. First I painted it with clear gesso and then misted with a couple colors of red. Next I masked with TCW's mini harlequin mask and Studio 490 black embossing paste.
Then I dug deep into my stash and gathered these IOD Devotion stickers. That is one of my all time favorite collections. I am really excited that IOD is moving to Prima, can't wait to see what they come out with.
I used a little Studio 490 gold embossing paste and Prima's static mask on one of the tags. At the top I've added some Lindy's fusible webbing embossed with gold UTEE. The gorgeous heart is from the Flying Unicorn's Adornments collection. Definitely one of the most gorgeous metal hearts on the market!

Supplies:
Patterned paper: CreativeImaginations IOD Devotion stickers and tags
Diecuts and punches: JoyCraft flourish branchFlowers: Prima tiny red roses
Ink: Mixed Media Inx black
Mist: Lindy's Cajun Carnelian red, Rudolph's Nose red; Gator Gumbo olive
Masks: TCW min harlequin; Prima static
Other: Canvas painted with clear gesso cut to 6x6 and mounted on chipboard; Studio 490 black & goldembossing paste; Lindy's Fusible Webbing; FUL Adornment metal heart; gold UTEE; Sharpie gold pen;
Sunday, June 16, 2013
More Mixed Media Inspiration
The Mixed Media Inspiration collection included 3 6 x 6 chipboard squares that I decided to use as little canvases. I cut a piece of canvas from the very large canvas sheet that came in the kit and glued it to the square. I added some modeling paste using the mask that came in the kit. The I applied several different colors of mist to the canvas.
I wasn't quite satisfied with the look after the mists dried so I got out white and green chalk from the kit and rubbed the green around the edges and white over the canvas. Then I sprayed the canvas with a matte finish sealant spray. You have to do this or the chalk will rub off.
The two words were diecut with Alterations Artful Words. I heat embossed VISION with STampendous Aged Black. I stamped Enjoy the Journey with a tiny script stamp and then embossed with clear embossing powder.
The metallic leaves you see under the FUL flower Adornment are made from Lindy's Fusible Webbing. First I added several colors or embossing powder to the Fusible Webbing, applied heat and then after it cooled off, I used a McGill leaf punch. I also added some embossing powder to the Flying Unicorn Adornments flower and leaves.
Here's what I came up with!

Thanks for stopping by!
Saturday, June 15, 2013
My Mixed Media Frenzy and the new Flying Unicorn Mixed Media June Kit!
The Flying Unicorn's Mixed Media Inspiration kit sent me into a real frenzy these last couple of days! It looks like my supplies all got together and did a frenetic dance in the middle of the floor and then just collapsed wherever they were! Ha! My husband says to me, "I thought you were sucking up the floor, you had the vacuum on for so long."
So what got me on this mad creative kick? Well the Flying Unicorn kit included an 18" x 27" canvas banner. That's a lot of canvas to cut up and turn into projects. The kit also included some mists, a burlap flower, Flying Unicorn Adornments metal flowers, TCW mini quatrefoil mask among other things. There are plenty of things in the kit to get your mind whirling. For my first project I decided to make a wall plaque. You know how one person's trash is another's treasure? Well thank you to my friends, Kathy and Kathi, I don't know which of them tossed out the unfinished wood plaque but it is now my treasure, LOL!!


So what got me on this mad creative kick? Well the Flying Unicorn kit included an 18" x 27" canvas banner. That's a lot of canvas to cut up and turn into projects. The kit also included some mists, a burlap flower, Flying Unicorn Adornments metal flowers, TCW mini quatrefoil mask among other things. There are plenty of things in the kit to get your mind whirling. For my first project I decided to make a wall plaque. You know how one person's trash is another's treasure? Well thank you to my friends, Kathy and Kathi, I don't know which of them tossed out the unfinished wood plaque but it is now my treasure, LOL!!

Here are the steps for making this wall plaque:
1. First cut a piece of canvas to fit your frame. A word of caution here, the canvas shrank quite a bit after coating with gesso so if you are going to coat the canvas with gesso, I suggest that you gesso it first and cut it out after the gesso dries. Fortunately I cut an oversize piece with the idea in mind that I would fray the edges. There was not enough fabric left for fraying but at least it still did fit in my frame!
2. I found it easier to do most of my work on the canvas before gluing it into the frame. First I applied mists in different colors.
3. Then I did some masking, most of which got covered up. If you look closely, peeking out from behind the image on the left and under the floral cluster, I used the TCW quatrefoil mask and gold embossing paste.
4. Then I rubbed white chalk over the canvas in places. Now you need to spray a fixative on the canvas so that the chalk doesn't rub off. You can see a little of the chalking under the word "my."
5. At this point I painted the plaque first with white gesso and then with white acrylic paint. After that dried, I glued the canvas into the frame.
6. Now its time to alter the chipboard letters that came in the kit. First I painted on a coat of gesso. Then I dabbed on Antique Linen distress paint and snowcap white. Now the fun part, I dabbed on some embossing ink, taking care not to coat the entire letter and embossed with Stampendous Shabby white embossing enamel. After the enamel cooled, I applied some glossy accents glue here and there and sprinkled the letters with Diamond Dust. The overall effect is that the letters have a multi-dimensional appearance. The Diamond Dust looks a tad like sea foam to me. When I placed the letters in the frame, I popped them up so that they'd really stand out.
7. Now take some Viva Stone Art and carefully apply in the corners and along the bottom edge. Press some small seashells into the Stone Art, it will hold them in place when it dries. I found that a palette knife worked well for applying the Stone Art.
8.Next I took a Pink Paislee Hope Chest scrap of paper and an image from Prima's Fairy Rhymes paper, both from June KOM, and distressed and ink.
9. Now its time to glue the braid around the frame, I used hot glue for this.
10. Ok assembly time! First glue in the strip of paper, it should fit from side to side. Figure out the approximate placement of your letters and then add the fairy image which is also popped up with sticky foam. Add the letters.
11. Last step - add your flowers! I used the burlap flower than came in the kit, I dabbed some white paint on the flower to tie it in with the rest of the piece. I used a metal Flying Unicorn Adornment for the center. The berries and greenery are from Hobby Lobby's floral department. I cut apart the blue flower vine that came in the kit and worked that into the cluster.

Closeup of the gold from the embossing enamel and the Diamond Dust on the letters in this photo.

Supplies:
Patterned paper: Pink
Paislee Hope Chest scrap (from the June KOM)
Letters: Maya Road
Embossing powder:
Stampendous shabby white on letters,
Flowers: Canvas
Corp burlap flower (6/15 Mixed Media Inpiration kit) , Petaloo blue flower vine (6/15 Mixed Media Inpiration kit),
Berries green sprigs from Hobby Lobby
Ink: Mixed Media Inx
patina
Mist: Stephanie
Barnard Artichoke, Mr Huey clay, (both from 6/15 Mixed Media Inpiration kit), Glimmer Mist Gumdrop , Bronze, Lindy's Cape Cod
Coral, Royal Emerald Fire Glitz Spritz, Edelweis Moss Green,
Paint: clear gesso painted on canvas, white gesso
panted on letters, snow cap dabber, Antique linen distress paint, white acrylic
Other: Canvas (6/15 Mixed Media Inpiration kit) cut to
fit inside wooden frame from Hobby Lobby; Viva Decor Stone Art, Royal
Langnickel chalk-white (6/15 Mixed Media Inpiration kit) ; Diamond Dust on letters, seashells from M's
Unknown: Braid
The Flying Unicorn's Newest product collection!


On the 15th of each month we will make available a collection of paper crafting supplies that will sure to inspire and create projects or add to projects that you are or will be creating. Flying Unicorn is looking for you to have fun experimenting and combining various materials for creating art. The items that are chosen will help you discover new styles and techniques. Unleash your passion and lets get creative !
Our creative team let their imagination soar and without further adieu their creations :


Subscribe to:
Posts (Atom)
LinkWithin
