Pages

Tuesday, July 31, 2018

Sizzix Wrapped Journal and ColorBox Blends Tutorial by Eileen Hull Designs

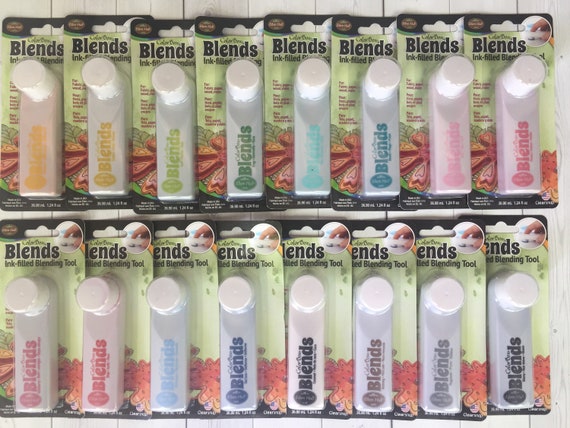
Have you seen Eileen's new ColorBox Blends Inks by Clearsnap?  They are so unique as they are an inker, applicator and re-inker all in one and they come in 16 colors.


The Journal

 I did the background of this wrapped journal with green, pink and blue Blends.  Love how it came out!  Scroll on down for a tutorial on how I did the cover.

The Wrapped Journal die makes the cutest mini.  The covers wrap over each other and the inside holds 4 signatures (the booklets inside the journal.)  Ok, I just know you are wondering why the journals are on the right side and why they appear to open from the back instead of the front.  Well...I am left handed and sometimes my left handedness just takes over and compels me to make things for lefties.  😁 (In other words I goofed!  But, it is perfect for a lefty!)


Inside the cover and for the signatures, I used papers from Stamperia's Wonderland collection.


There are 4 signatures - these are what the interior booklets are called.  I used dies from Eileen's newest BookClub 2 collection that includes the Wrapped Journal as well as from her original BookClub collection to cut tags and flowers to use on the signatures.

One of my favorite dies from the new Book Club 2 collection is the  Credit Card Sleeve and Tags.  This die set makes to neatest pocket that is just perfect for holding gift cards and little notes.

Tutorial

 Diecut a Wrapped Journal from white mat board.  Tape the covers together with removable tape so that the covers align properly.  Then mark the placement of the brads on the two covers.  (You can do this after inking, but be sure you attach them before adding paper on the inside, otherwise the brad backs will show.)
Use ColorBox Blends to completely ink both the inside and outside covers.  The Blends stay wet long enough that you can easily blend your colors.   I used Bay, Beach and Leaf on my covers.
Tip:  When your Blends are new, you will need to press the pads down on a scrap piece of paper to get the ink flowing and to fill the inkpad with ink.


After the inks have dried you can add design paper inside and outside if you like.  I used some great Steampunk stamps from Stamperia to stamp images on my covers (4) but decided the one on the front cover looked to dark, so I stamped it again on white paper and fussy cut it out and glued to the cover.  I liked that much better (5)!  I also blended in a little Tutu pink ink to bring the cover and design paper together.

(6)  I added some flowers and clock charms to gussy up the cover.


I added design paper to the inside right cover and stamped that with another image from the same stamp set.

Eileen Hull Designs by Sizzix Products:


Other Supplies:
ColorBox Blends by Eileen Hull - Nutmeg, Leaf, Bay, Beach, Tutu
Stamperia High Definition Stamps


That's it for today, time to make something else!  Happy crafting.

Maggi


Wednesday, July 18, 2018

Travel Card for the latest Frillie & Funkie Challenge

Hey ya'll!  (That's what we say here in the South 😊) It's time for a new challenge at the Frilly and Funkie Challenge Blog.  I love to see you over there.  The challenges are always fun and open to your interpretation.  The best thing is you can make what you want, i.e. it could be a tag, card, layout, 3D, whatever you like!

Kathy Clement is our challenge host this time around and she's thinking about all the great summer travel.  The challenge is to create a vintage or shabby chic travel themed project. Think folded maps, cruise ships, road signs, compasses, passports, trains, planes or automobiles. As long as your project features a travel theme, you're headed in the right direction.

My travel themed card

Travel card and tag,
I started thinking about air travel, and from there, my mind went to Kitty Hawk, on the coast of North Carolina, where the Wright Brothers made their famous first flight.  That led me to thinking about how you have to believe in what only seems impossible, and then, have the courage to make the impossible reality.   With all those philosophical thoughts running around in my head, I ended up with an inspirational travel card!

Travel card and tag,

The card has a hidden tag on the front made from a Graphic 45 regular tag.  I stamped a motivational message on a scrap of map paper with a stamp from Tim Holtz's Mini Motivation stamp set and adhered that to the tag.  At the bottom of the tag I used a words sticker that I've had forever.  Nice to use that little bit of my stash!


Travel card and tag,
The tag slips nicely behind one of the layers into a hidden pocket on the cover.  On the back of the tag you can add a photo or message.  The bow on the tag nicely complements those pretty Little Birdie flowers, I love the Swiss Coffee color of the blooms.


Travel card and tag,
The cover has two layers from the Memoranda paper stack by Tim Holtz.  I stenciled some texture paste on the lighter layer to add some interest.  Then I used washi tape to outline the layer creating a frame of sorts.  The next layer is popped up with foam tape and is a die-cut map paper, just visible at the top and bottom of the clock.  I topped that with a chipboard frame that I heat embossed with Emerald Creek Baked Texture Ancient Amber.  Now take a good look at the next layer, that gorgeous die-cut clock!  I used Tim Holtz gold Metallic card stock and Graphic 45's new Square Tag and Clock Dies.  I love the detail on that clock die and it looks so fabulous cut from the gold paper!  The flying clock key is symbolic of my thoughts, that time is passing so quickly, you have to enjoy life and act on your beliefs, it's all an adventure, go for it!


Travel Card & Tag
I added a rub on from Tim Holtz's Life Quotes right over the vintage airplane photo.

Travel card and tag,

I used a piece of French Vanilla card stock for my card base and inside I added cuts from Tim's Memoranda pad.  Then, at the bottom right, I added another rub on from Life Quotes and on the left I added a really ancient burlap tag from my stash.


How to Enter the Challenge
Now it's time for you to have some fun with this challenge!!  Create your travel themed project and link it up to the Frilly and Funkie Challenge Blog.  If you win, you'll have an opportunity to be a 
Guest Designer here at Frilly and Funkie!  We also award Top 3 Badges for three further outstanding entries, chosen by the Design Team, because we can’t pick just one favorite!

AND, everyone who enters and follows the rules for the challenge is entered into a draw to win a $25 spending spree at The Funkie Junkie Boutique. Woo-hoo!

You have until 11:59PM EDT on Tuesday, July 31st,to link your project.


Thanks for stopping by today!


Tuesday, July 10, 2018

Using the Wrapped Journal Die by Eileen Hull Designs to Make a Purse

When we make a big purchase, it needs to have more than one use, right?  Well friends, take a look at this because this is Eileen Hull's Wrapped Journal "disguised" as a purse! It is just the cutest little purse and, bonus,  it's really easy to make!  Check it out below and make one with me in this complete process video! (Here's a link to another purse mini I made. )


After you die-cut Sizzix Mat Board, you can  run it through your die-cut machine and emboss it as I did here.  The mat board embosses so nicely  and it doesn't take a special embossing folder.  I just used an old Cuttlebug folder that I've had for years. Then I had fun inking it all up with Eileen Hull's ColorBox Blends inks.  Blends are unique as they are an inker, re-inker and applicator all in one.  

The flowers die-cut into the Wrapped Journal are made with Floral Cutouts which is a Movers & Shapers die that is part of this Book Club 2 release.  The Wrapped Journal die has a cut out space where you can fit in a mover and shaper die and give your journal cover a custom cutout or edge.  For this cut, I simply dropped the Floral Cutout die onto the Wrapped Journal Die and ran it through my Vagabond to cut out the journal with the floral cutout all with just one cut.
What I love best about this purse is that Eileen's Passport Book fits perfectly into the Wrapped Journal purse.  How cool is that?   This would make a great gift for Moms and Grandmothers.  Use Christmas colors to make a Christmas keepsake.

You can view my tutorial to make a Passport Book on YouTube here.  In the video I am using a different paper collection than you see pictured here, but I do show you how to make the cover, string the mini to hold the inside booklets and lots of different ways to make pages.
I used a tag from the Credit Card Sleeve & Tags set to make the closure.  It was the perfect size to make a pretty closure for this bag.

Supplies:


Thanks so much for visiting me today and a special thanks to those of you that leave a comment.  I really appreciate it!  I hope you have a great day and find time to do whatever it is you love most!


Friday, July 6, 2018

Graphic 45 Imagine Mini Album styled as a Travelers Notebook

Graphic 45 Imagine Travelers Notebook Mini Album

Let your imagination take flight and make a fun Travelers Notebook Mini Album using Graphic 45's new Imagine Collection! There are so many great images and sentiments to use in this great collection. 

I've put together a tutorial showing you how to make the cover AND all the inside pages!  There are a lot of steps in the Snapguide Tutorial but it's easy to follow.  Be sure and leave me a comment if you have any questions or need any help.  


And if you want to flip through thepages, check out my video.


 Here's the mini opened up so you can see both the front and back covers.  I love to make dangles and added one on the spine.  It just adds that little extra touch of pizzazz to a project!
Graphic 45 Imagine Travelers Notebook Mini Album
 The roses are Little Birdie and they match this collection PERFECTLY!!  I love how they come with open roses, rosebuds and leaves.  How great is that?
Graphic 45 Imagine Travelers Notebook Mini Album
This would make a wonderful travel mini with its adventure sentiments.  I have a few friends that I bet would love to receive this as a gift!

Graphic 45 Imagine Travelers Notebook Mini Album
Here's a close up of the closure that I made using a ribbon, keyhole and velcro.  It's a great way to make a closure and I show you how in my tutorial.

Graphic 45 Imagine Travelers Notebook Mini Album Signatures
This style of mini has elastic bands inside and you simply slip each of these booklets, called signatures, under the elastic, and presto, instant mini album!

Graphic 45 Supplies:
Graphic 45 Staples - Regular Tags - Ivory
Graphic 45 Staples Metal Keyhole
Graphic 45 Staples Shabby Chic Key

Other Supplies:
Little Birdie Flowers - Florita
Velcro closure
Ribbons


Wednesday, July 4, 2018

Stamperia Rice Paper Mixed Media Canvas

Hello friends and welcome to my FIRST blog post as a design team member of The Funkie Junkie Boutique!  I am "tickled pink," as we say here in the South, to be joining this team of very talented designers!

Over on the The Frilly and Funkie Challeng Blog, it's time for a new challenge!  The challenge is "B Happy" and our hostess is Cec.  Here are her parameters for the challenge, "Create a shabby chic or vintage project that makes you happy and features birds, bees and/or butterflies. You must use at least one of these things with wings and it must have a place of prominence on your creation but if you wish to use two or more, please feel free to do that."

Mixed Media Rice Paper Canvas
Now this is a challenge I can easily meet Because Butterflies and roses make me very happy!  I decided to make a  decorative canvas using a a rice paper sheet from Stamperia.  The rice paper is adhered to the canvas with matte medium.  After that dried, I applied white crackle paste through a stencil in each of the canvas corners.  (Select a stencil with leafy flourish theme. I used a different stencil from the one shown in my supply list as that one is retired.) 

Mixed Media Rice Paper Canvas
To add to the vintage look, apply clear crackle texture paste in random areas on the canvas thickly so that the cracks will develop nicely.  You can see the crackles in this photo on the rose.  Now you need to set the canvas aside and let it dry naturally.  I know, you'd really like to use your heat gun to speed the process, but trust me, you will get much better crackling if you let it air dry.

Mixed Media Rice Paper Canvas
Now, while the canvas is drying, you can search out the "B" component of the challenge, the birds,  butterflies or bees.  I fussy cut 3 lovely butterflies from Stamperia's Wonderland collection. (Oh my, have you seen that gorgeous paper?  It is truly divine and perfect for cards, tags and even layouts.)  Now to give the butterflies a little bulk, I covered them with a generous coat of Glossy Accents and air dried.
Mixed Media Rice Paper Canvas
All dry right?  The fun part begins! Use Distress Antique Ink to age the canvas by rubbing some ink into the crackles and over the white stenciled crackles.  Then rub Aged Bronze Metallique was around the edges of the canvas and lightly over the stenciling to bring out the design.  Arrange some coordinating flowers on the canvas and add a pretty seam binding bow.  Looking good right?  Now add centers to the butterflies and place on the canvas, popping them up with foam dots.  For a finishing touch, dry brush white paint randomly on the canvas, flowers and ribbon.  Add a few paint splatters.  Looks great?  All finished!

Thanks for joining me today.  I am absolutely enthralled by all the great Stamperia products, especially this rice paper.  I have it on good authority that more Stamperia is coming to The Funkie Junkie Boutique and lots of new Stamperia products so keep an eye out!


LinkWithin

Related Posts Plugin for WordPress, Blogger...