Pages

Wednesday, January 29, 2020

Layout for Creative Embellishments

I love this picture of my sweet Nika dancing with my Dad.  I've got a hidden journaling card on the left bottom side inside the little envelope with a little story about my Dad and the dogs.


I am loving all the shakers that are in the Creative Embellishments shop.  I used the Dog Shaker for a title.  The shaker spells out the word dog and uses the paw print for the "O".  I heat embossed the D and G with black embossing powder and heat embossed inside the paw with Stampendous Aged Ivory.  I found it best to assemble the shaker walls and adhering to the paw before embossing the bottom of the paw as I thought the edge would not be smooth and therefore I might not get a good seal if I embossed the entire paw before assembling the shaker.  Hope that makes sense.  I also like to assemble my shaker and set it aside so that it can thoroughly dry; otherwise, I find that the shaker pieces adhere to any glue that may have seeped out when assembling the shaker parts.  Tip:  A toothpick works well to spread a thin line of glue on shaker pieces.


This is another chipboard piece from the Family Word set, heat embossed again with aged ivory embossing enamel.


I really adore these paw print chippys.  I left them in their natural state and just colored in the hearts with a Dyan Reavely paint pen.  They are so doggone cute!!


Creative Embellishments Chipboard Used


Other Supplies
Graphic 45 Raining Cats and Dogs collection
Stampendous Aged Ivory Embossing Enamel
Shaker Material from Buttons Galore & More

Thanks for joining me today! Be sure to join in the monthly challenges because, you could win a $50 gift certificate to the Creative Embellishments store, now that is sweet!! The challenge is usually the first post on our blog.

Tuesday, January 28, 2020

A Valentine's Gift Box - Eileen Hull Designs by Sizzix

Last week I showed you this same box that I used to hold a teacup.  This time I made a Valentine's box suitable for a small gift or lots of chocolates, yum!  The box is made from 2 cuts with Eileen Hull's Gift Box XL Die.


I used an older Graphic 45 collection, Mon Amour to decorate my box.  I chose a simple design paper for the box so that I did not have to worry about having patterns going the same way and all that.  Then I just cut elements from the design paper and adhered around the box.


On the top I stood up a fussy cut card that says I Love You in French (Je t'aime).  I used flowers in front and in back to anchor the card and hold it in an upright position.  I added other flower, ribbon and greenery to complete the look.


The box comes with an optional scalloped edge that you can use for the opening of the box.  I chose to not use that on this box, rather I just left it a simple tab that tucks inside the box.


I would love to receive this filled with chocolates, wouldn't you?


Supplies

Eileen Hull Designs Sizzix ScoreBoards XL Die – Box, Gift w/Scallop Edges

Sizzix Making Essential - Mat Board, 6" x 13", White, 6 Sheets

Eileen Hull Easy Cut Adhesive Sheets 6” x 12” sheets (4 sheets per pack)


Wednesday, January 22, 2020

Graphic 45 Le Romantique Tags for The Funkie Junkie Boutique Blog Challenge

The Challenge - Repeat Performance

Hello friends, time for a new challenge on The Funkie Junkie Boutique Blog.  Sara Emily is hosting this time around and she calls her challenge, Repeat Performance.  Her description, " A popular New Year's resolution is to save money. I challenge you to save money (and the environment) by using at least one thing you would normally throw out on your vintage or shabby chic project. Please be sure to let us know what that one (or more) item is."  

My Tags

I recycled some packaging tags from Graphic 45.  They are exactly the same size as the ones they package for selling so their dies cut a perfect tag to overlay on the recycled tag.  

These are the tags I started with.


I turned them into this with cardboard, layers of paper and flowers, of course!  Graphic 45 released their collection, Le Romantique, as a Deluxe Collector's Edition and that is what I used to fashion my tags.  This is a beautiful romantic collection that is great for all your love stories.  The Funkie Junkie Boutique carries this collection as well as many other Graphci 45 collections and staples.


Making these tags was simple, first I diecut two tags using Graphic 45's regular tag die to cover the base tag.  Then I just layered on the papers, diecutting some onto pretty shapes to add interest to the tags.  

I used cardboard to add dimension between my layers.  Cardboard is a great alternative to dimensional foam as it is free and provides a good sturdy base.  You can see the cardboard layer in the photos below.


On this tag, I diecut a clock face with Graphic 45's clock die from Tim Holtz metallic paper.  I think this clock is one of the prettiest diecuts ever as the design is so intricate.

The top layer is a sticker from the DCE collection.  Add some flowers, a pretty bow and you've got a great tag that could be made entirely from scraps.


I used a fussy cut image as the top layer on this tag and layered it onto a diecut frame. I diecut lace with Tim Holtz Crochet Lace dies for this tag. I love how delicate these cuts are.  I wanted to give some extra emphasis to the flowers so I placed a diecut medallion underneath.  The flowers really stand out against that dark background. 


How to Enter the Challenge

Create a vintage or shabby chic project and link it up to The Funkie Junkie Challenge Blog Challenge, Repeat Performance. The Design Team will choose their top four picks, with the winner being invited to be a guest designer in one of our Funkie Junkie Challenges. The other three winners will receive Top 3 badges to display on their blogs. Everyone who enters and follows the rules will be entered into a draw to have the chance to win a $25 spending spree at The Funkie Junkie Boutique.

Thanks so much for stopping by today. Be sure to take a look at the creations of my talented teammates, you can see their creations here, at 
The Funkie Junkie Blog.


Supplies from The Funkie Junkie Boutique

Graphic 45 - Le Romantique Deluxe Collector's Edition
Graphic 45 - Staples - Regular Tag and Gears Dies
Graphic 45 - Staples - Square Tag and Clock Dies
Tim Holtz Thinlits Crochet Lace
Tim Holtz Idea-ology 8x8 Kraft Stock Paper Metallic 3 - Champagne/Onyx 
Sizzix 3-D Impresslits Embossing Folder - Burst  (I used the Medallion which is out of stock but this one is very similar)
Ranger Tim Holtz Distress Oxide Pad - Tattered Rose


Tuesday, January 21, 2020

New Gift Box from Eileen Hull Designs by Sizzix

Have you seen Eileen Hull's new Gift Box XL Die?  I love it!  The box is 3 3/4" square and will hold a teacup!  I used Stamperia's Alice in Wonderland collection to decorate the box and that got me thinking abou tea.


You can see my teacup very comfortably nested inside!  


To make the box you need to cut 2 pieces with the die.  When assembling, the pieces go different directions so I found it easier to stick with paper that didn't have an up and down direction, that way the patterns are not fighting.  One piece forms three sides of the box and the other piece will form the bottom, 4th side and top.


I love the scalloped edge, it adds a nice dainty touch but the great thing is the scallops are separate pieces so you can choose to leave them off if you wish.  I used a magnet closure to hold the top down.  If you leave off the scallops, there's a  little piece that tucks in, securing the top.


I fussy cut some elements and topped it off with layered flowers and ribbon.


Supplies


Thanks for stopping by!


Wednesday, January 15, 2020

A Tutorial Using Eileen Hull Designs' by Sizzix New Display Stand

The Display Stand

January is such an exciting time of the year for crafters since all the new products are being revealed.  Eileen Hull has done it again with this absolutely adorable Display Stand.


It Makes into a Photo Flip

I love that her products are so versatile, so let me show you what I've done with this XL die.  I assembled it in the normal fashion BUT I punched holes at the top, added some rings and turned it into a flip photo stand or it could be a mini album.

Tutorial

I've recorded a video showing you how to make the display stand and some tips on making this work with 12' chipboard.


I used Graphic 45's Dreamland collection to decorate my Display Stand.  It's a charming collection perfect for displaying photos of your kids and grandkids!  

There are 5 pages to flip through but you could add more.


This is the view from the back.


Thanks for stopping by my blog today, I appreciate it more than you will ever know!
Supplies by Eileen Hull Designs

Eileen Hull Designs by Sizzix ScoreBoards XL Die – Display Stand
Eileen Hull Easy Cut Adhesive Sheets 6” x 12” sheets (4 sheets per pack)

Other Supplies
Graphic 45 Dreamland Collection 8 x 8
Graphic 45 Dreamland Patterns and Solids
1" Binder Rings


Wednesday, January 8, 2020

First Challenge of the Year for The Funkie Junkie Boutique

The Challenge - Let's Play Tic Tac Toe

Cec has a great challenge to kick the New Year off right!  She wants to "play a game of Tic Tac Toe for this first challenge of the year. Choose any vertical, horizontal or diagonal line from the graphic below and create a vintage or shabby chic project using all three items on your chosen line. In addition to using all three items you must include a copy of the graphic in your post and tell us which line you chose."


My Example

I chose the top line of the grid, layers, winter and heat embossing.  This is the cover for my 2020 calendar that was featured in our January 4th Saturday Showcase.  I created layers with Graphic 45's Fashion Forward calendar collection using the Patterns and Solids Pad, Ephemera Cards, as well as the 12 x 12 Collection pack.  The post card you see is the back of one of the ephemera cards, I love the backs as much as the fronts!

 The numbers 2020 are really old G45 numbers, whew had to dig way back into my stash for those.  I used the January calendar cut-aparts to embellish my page and meet the "winter" part of the Tic Tac Toe.


The last square is heat embossing and I have done that on the clock and snowflakes.  I used Ranger Weathered White Antiquities embossing powder on the clock face and snowflakes.  It is a great powder as it has texture that looks a bit like snow.  I used Set Apter Ancient Amber embossing powder on the clock hand.


How to Enter the Challenge

Create a vintage or shabby chic project and link it up to The Funkie Junkie Blog Challenge, Let's Play Tic, Tac, Toe. The Design Team will choose their top four picks, with the winner being invited to be a guest designer in one of our Funkie Junkie Challenges. The other three winners will receive Top 3 badges to display on their blogs. Everyone who enters and follows the rules will be entered into a draw to have the chance to win a $25 spending spree at The Funkie Junkie Boutique.


Thanks so much for stopping by today. Be sure to take a look at the creations of my talented teammates, you can see their creations here, at The Funkie Junkie Blog.


Supplies from The Funkie Junkie Boutique

Ranger Embossing Powder - Weathered White Antiquities
Seth Apter Baked Texture - Ancient Amber

Monday, January 6, 2020

Layout for Creative Embellishments


I haven't done many layouts in the last year so it was really fun to do this one of my parents.  My Mom hated this photo, I don't know why 'cause I love it.  I think it captures them perfectly; my Dad with the silly grin and my Mom smiling at him.


I used Creative Embellishments Scroll Set 1 to frame the photo, and behind the scrolls are layers of paper from the Graphic 45 Love Notes collection. I used a Martha Stewart punch-around-the-page punch set on the first layer.  Does anyone use those punches anymore?  I love them but I don't see them in use too much these days.


I used my favorite method for coloring the chipboard, it's heat embossed with Stampendous Aged Ivory Embossing Enamel.  It's a simple, but effective way to cover chipboard.


Layered flowers supported by pretty papers and chipboard, give this layout a finished look.

Thanks for stopping by today!


Creative Embellishments Supplies Used

Scroll Set 1

Joy Word Border Set

Other Supplies

Graphic 45 Love Notes Collection


Thanks for stopping by today and be sure to enter our monthly challenge 'cause you could win a prize!  Check out the details on the first of each month located at the very top of the Creative Embellishments Blog.


Saturday, January 4, 2020

A Monthly Calendar for The Funkie Junkie Boutique

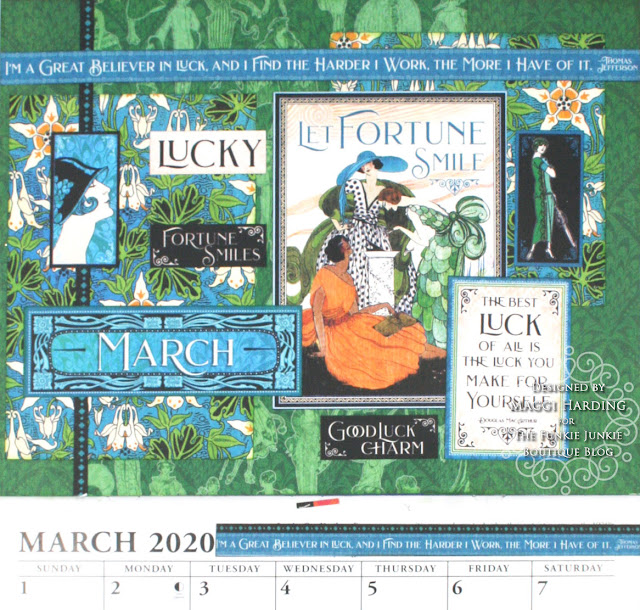
Happy New Year friends!  Join me at The Funkie Junkie Boutique Blog for the first Saturday Showcase of the year!  I'm featuring Graphic 45's Fashion Forward calendar collection today and what could be more appropriate this time of year?  Here's a sample, just click here to see the entire calendar.


Wednesday, January 1, 2020

Celebrate the New Year with Creative Embellishments!

I am so thrilled to be back with the Creative Embellishments Design Team! I really had to step back from crafting the last two years due to illnesses in my family and a move to Tennessee.  Now we are all settled in our new home and I'm ready to get my craft on!

I'm starting the new year right with from Creative Embellishments' Large Tag for their January challenge.  The mood board this month is a serene collection of winter images sure to spark your imagination.  The twist is to add texture to your project which is an easy thing to do!


The Challenge
Here's my take on the challenge, a large snowy tag.  I added texture by first painting the background with white gesso, then stenciling on texture and lastly painting with Stamperia Glamor Gel.

The photo is my sweet Nika, a standard poodle, she doesn't really like the snow as is evidenced by the look on her face!


I used the Falling Snow Set and Chipboard Snowflakes for embellishments.  To make them sparkle I first heat embossed with Soft Fallen Snow Allure Powder by Emerald Creek and then added a coat of Stamperia Sparkling White Glamour Gel.


I used some sugared flowers to complete the icy scene.


Stop by the Creative Embellisments blog for more inspiration from the design team.

Products Used from the Creative Embellishments  Shop:


Other Products Used:
White Gesso
Stamperia Glamour Gel
Emerald Creek Allure Powders - Sparkling Snow
Stamperia Blue Stars


How to enter the challenge
The monthly challenge is always the first post on the Creative Embellishments Blog.  Be sure to check it out, you could win a great gift certificate to the store!  Here are the rules:
  • Create a NEW project layout, mini album, tag, card, canvas, etc….as of January 1st, 2020.
  • It is required that you mention in your blog post that you are playing along at Creative Embellishments together with a link back to our blog page. Please make sure to reference our challenge. Please, no old projects. (meaning projects from previous months that may fit the challenge) Please share only new projects.
  • Please add your entry to the inlinkz tool below to be eligible for the prize. You have until the last day of each month 11:55 pm eastern time to enter.
  • Simply add a link to your FB photo (if you do not have a blog) featuring your challenge entry. Let us know how you were inspired by the photo.
  • Combining with other challenges is permitted.
  • We would love to see you USE AT LEAST 1 OF CE products on your projects but it isn’t required to play along.
  • WINNERS will have 2 weeks to claim their prize. The winner will be announced on this post the day after the challenge ends. Keep an eye out to see if you are a winner.
Thanks for stopping by today!


LinkWithin

Related Posts Plugin for WordPress, Blogger...