Pages

Wednesday, August 30, 2017

Birthday wishes with Cheery Lynn Designs


Step cards are my favorite to make so today I am sharing a step card made with Cheery Lynn's Step Card Bundle Set #4.  This die set really makes step cards easy!  No measuring and cutting with a craft knife!
Here's a view of the card folded up.  I layered up two doiles and topped that with our Birthday Wishes Circle Die.

You know how much I love flowers and of course I had to add one to this card.  I used  Judy's Blooms Die to make this simple flower.  Just diecut 2 large blooms and one small bloom, give the petals a little shape with a stylus and stack and glue them up.  Top with a center and that's it!


Cheery Lynn Dies Used:

Kaisercraft Curiosity paper collection
Thanks for popping by!!

Monday, August 28, 2017

Cheery Lynn Design Fall and Winter Release Blog Hop!

Welcome to the Cheery Lynn Designs Fall and Winter Blog Hop! I LOVE these adorable new dies, there are so many cute images that are perfect for the coming holidays!

If you arrived from Amy's Blog you are on the right track. If not, head on back to the Cheery Lynn Designs Blog and start from the beginning so you don't miss seeing any of the design team's work using these amazing dies.

First, I made a card using the new Happy Haunts die along with the Witch's Brew die set from last year.  Don't you just love those adorable ghosts and that frightful witch?

Then I made a fun folio to hold the card AND I did a tutorial for you.  Scroll down a little ways to find the YouTube video.  I used a ton of different dies on the folio and there's a list of dies I used at the end of this post.


In case you'd like to make a fun folio like this, I put together a video tutorial for you!


Here's a view of the inside of the card.  Oh!  Watch out for the black widow!  😃

I used the Pierced Stacker 2 6 Piece Die Set to cut the edge on the pocket on the left and I show you how to do that in my video.
The pocket on the left holds the card.  On the right side of the folio, there are flips and tags where you can place photos or journaling. 
 Not only does the left side flip out sideways, it also flips up to reveal more fun places where you can add some photos.
There's another flip up and a pocket filled with fun tags!


Remember, there is a $20 Cheery Lynn gift certificate prize to be won by some lucky person!  It is awarded randomly to a lucky comment who answers one or more of the questions on the Cheery Lynn blog. So, be sure to follow the hop and leave a comment and answer the question(s) on the Cheery Lynn blog to be entered to win.

Your next stop on the blog hop is Cheryl's Blog so hop on over and see her fantastic creation!

Thanks so much for stopping by today.  Do leave a comment so I'll know you were here and remember to leave a comment on the Cheery Lynn blog for a chance to win.

Cherry Lynn Designs Dies Used:


Other Supplies:
2 sheets black cardstock
Echo Park Paper Co. Halloween Town collection:
1 sheet - Journaling Cards (vertical-spider web B side)
1 or 2 sheets (depending on which journaling cards you use) - Journaling Cards (vertical-purple B side)
1 sheet - Journaling Cards (horizontal)
1 sheet - Journaling Cards (horizontal B side skeletons)
1 sheet - Candy Fun
1 sheet -Bewitching Pumpkins
2 sheets- Trick or Treat
1 sheet - Stripes Paper
Element Stickers

Layout for Creative Embellishments

I dug deep into my stash and pulled out this old Kaisercraft collection, Curiosity.  It was just what I needed to get the creative process going!

I used a vintage photo of my family as the focal point of my layout.  I'm the little baby in the photo! 

Creative Embellishments has a great selection of frames and I chose the Scribble Frames 1 to highlight my photo. I painted the frame with a Ranger Lake Mist dabber gray and then finished it off with with Frosted Crystal embossing powder.

In the corners I used the Rose Page Corner.  I love how this design has the cutout roses cacading with the flourish leaves.

 Isn't it pretty how it fills the corners with the leafy vines and roses?   It made the perfect platform for my pretty Petaloo ranunculus.

I used a word from the Celebrate Word Set as a title to finish off my layout.

Creative Embellishments Chipboard Used:

Thanks for stopping by today, I appreciate it so much!  Be sure to stop by the Creative Embellishment store, Nicolle has added some really fun chipboard pieces!

Friday, August 25, 2017

Graphic 45's Winter Wonderland will be in your favorite store SOON!


I love Graphic 45's new Christmas collection with it's traditional reds and greens!  It is so perfect for this layout of my great niece and nephew. I wanted the photo to be the focal point so it is centered on a large punched doily with two floral clusters; simple but effective.You can make really pretty floral clusters by first fussy cutting flowers from design paper and then layering dimensional flowers over the fussy cut ones. In this case I fussy cut some of the poinsettias and topped that with a pine cone and berries branch and a single bloom. Dry brushing a little white paint on the pine cones and flower adds a touch of winter.


To add a festive look, I highlighted some of the flower petals and berries on the design paper with red Stickles.
The Merry Christmas title is a chipboard piece from Creative Embellishments and is heat embossed with embossing enamel.


Graphic 45 Supplies:
Graphic Winter Wonderland 12 x 12 Collection:
Winter Wonderland
Yule Post
Nordic Greetings
Woodland Whimsy

Other Supplies:
Bazzill Cardstock -  French Vanilla
Petaloo Botanica Anemones
Petaloo Pine Cones and Berries
Martha Stewart Cherish Punch Around the Page punch set
WRMK Lucky 8 Frilly Lace Punch
Stickles - Christmas Red
Creative Embellishments Merry Christmas words
Stampendous Aged Ivory Embossing Enamel
White paint


Next, I made a simple card with a beautiful presentation as an easel card.  These look so pretty standing on a mantel or side table.

 To give the card that "WOW factor", I diecut the easel portion. When we are designing for shows we often receive first run papers literally hot off the press and we don't get any embellishments like chipboard, tags, etc to go with it.  So sometimes embellishments are a bit of a challenge. 

Tip:  Make your own embellishments like the button I used!  Just punch a 1" circle from chipboard and then punch a 1" circle from design paper. Glue them together and use a button from another G45 collection to mark the button holes.  Punch the holes with a WRMK Big Bite. Presto, now I have a button embellie! 

Another tip: To give my project a little dimension without going overboard, I fussy cut some poinsettias from design paper and layered them over the diecut bird image, popping them up with foam dots. That added a nice touch without making my card too bulky to mail.

Inside the card, I stamped a sentiment and image and trimmed it with a border strip from the design paper.


Graphic 45 Supplies:
Graphic Winter Wonderland 12 x 12 Collection:
Winter Wonderland
Nordic Greetings
Woodland Whimsy

Other Supplies:
Bazzill Cardstock - Red Rocks, French Vanilla
May Arts Seam Binding Ribbon
Cheery Lynn Dies - French Flair Pierce And Cut Tool, Horizon French
 Flair Boutique Stacker Frames 
EK Success 1" circle punch
Martha Stewart holly punch

Thanks for joining me today.  Look for this new Graphic 45 collection in your favorite scrapbook store soon IR order it from Graphic 45's new online store.


Monday, August 21, 2017

Eileen Hull's Notebook Pocket by Sizzix

Yesterday I shared a pretty friendship card with you and today I want to share this Notebook Pocket that I made to hold the card.  I used Sizzix's Notebook Pocket die designed by Eileen Hull to make the pocket along with Graphic 45's new collection, Penny's Paper Doll Family.

I've recorded a video to show you how I made the pocket and to give you some tips on using this die.


The card measures 3 1/2" across and fits perfectly in the pocket.


Supplies:

Garden Path
Fathers and Sons
Beyond Borders

Other Supplies:
Graffix medium weight chipboard
Yellow Cardstock
Yellow Seam Binding
Jute String
Petaloo Botanica Bloom-yellow

Thanks for stopping by today!

Sunday, August 20, 2017

Friendship Card & Tutorial for Cheery Lynn Designs

Hello friends! Today I'm sharing a friendship card that I made for all of my internet friends.  I have met so many wonderful people online through this obsessive hobby of mine!  Just last week, I traveled to Seattle to meet up with Annette Green and Ginger Ropp, both of whom I met via the internet and scrapbooking.  What a treat it was to spend quality time with them and visiting a place that is near and dear to all of us, Graphic 45 headquarters!

I used Graphic 45's new collection, Penny's Paper Doll Family, and several dies from Cheery Lynn Designs to make this simple card.  I started out with a card base that is 3 1/2" x 6" and then adhered a layer diecut with the  A2 Frames Rectangular Scalloped 7 pc Die Set.  At  the top and bottom I added paper lace diecut with the Dancing Doily Lace Border.  I topped that with a cut-apart from the Paper Doll collection.

I filmed a tutorial showing you how I put this card together.


Close up of the lacy border topped with pearls.


I made this pretty flower with the Black Eyed Susan Flower die. This is definitely a favorite die, I just love the floral center! You can see how to make this flower in my video.


The inside is simple, leaving plenty of room to write a message.

I'm sending all of you cyber-smiles and thanking you for following me and leaving the kind comments that you do on my work!  ðŸ’•

Tomorrow I'll be sharing a Notebook Pocket that I made to hold this card.  Be sure to stop by and see!

Supplies

Cheery Lynn Designs dies used:
DL134 Dancing Doily Lace Border
B338 Black Eyed Susan Flower
B883 Dusty Miller Corner Frame
CM6 A2 Frames Rectangular Scalloped 7 pc Die Set

Graphic 45 Penny's Paperdoll Family Collection:
1 sheet Fathers and Sons cut to 7" x 6"
"When Friends Meet..." cut-apart, cut from Forever Friends
"Dear Friend" border cut from Beyond Borders
Scraps from Garden Path to decorate inside

Other:
Yellow cardstock for flower
Cream cardstock cut to 6 3/4" x 5 7/8
Penny Black Sweet Wishes Stamp Set
Kaisercraft pearls

Cheery Lynn has a large selection of beautiful dies from vintage, elegant to whimsical.  Do stop by and take a peek!

If you are searching for Graphic 45 products and can't find them in you favorite scrapbook store, be sure to visit the new Graphic 45 online retail store.  If it's available, it'll be in the store.

Wednesday, August 16, 2017

A BIG tag for Creative Embellishments

Hello, I hope you're having a stellar Wednesday!  I have something that I think looks  a little bit different from my usual style to share with you today.  I started out with a large (5.5" x 10") tag from the Creative Embellishments store that I painted with white gesso and a cut-apart from Graphic 45's Couture collection.

I popped up a layer of Couture design paper with cardboard as the bottom layer on my tag.  Then I added a Couture cut-apart layer that has also been popped up with cardboard.  I topped that with the Infinite Rectangle Frame.  At the bottom I used  a word from the Gorgeous Small Border Word Set.  I colored all the chipboard pieces with Prima Empress Gold Color Burst mist.  

Next I layered on the Vintage Flourish Set 3 on either side of the frame.  I was trying to achieve an elegant art deco look.  Then I added a metal flower.  To get the look on the metal, I dabbed on some embossing fluid and then sprinkled with Stampendous Aged Gold Embossing Enamel and heated.  If you try this, be careful as that metal does heat up quickly!


 To finish it off, I used Prima Metallique Vintage Gold paste all around the edges of the tag and the design paper.

I didn't have any ribbon or fiber that suited me so I took black seam binding and misted it with Lindy's Golden Lump o' Coal. I really love how that turned out!

Creative Embellishments Products Used:

Thank you so much for joining me today, I do appreciate it.  Be sure to visit the Creative Embellishments store often, Nicolle is always adding new designs!

Another thing you don't want to miss is our monthly challenge.  You can make any kind of project and you don't have to use a CE product, (though we do love it if you do and you get an extra entry)!  The winner is chosen randomly so everyone has a chance to win a great gift certificate to the store.

Thursday, August 10, 2017

Pop Up Card and tutorial for Cheery Lynn Designs

Cheery Lynn Designs recently released a vintage collection of dies that is just full of great dies.  I cut this adorable baby pram with one of the dies in that release.  Isn't it just adorable?


I started with a 5 1/2" square card and added layers of design paper enhance the pram.  The first layer from the bottom is cut with the largest die in the Horizon French Flair Boutique Stacker Frames  and the next layer is cut with the Square Frames 3 Piece Die Set.  


Let's take a closer look at the Baby Pram.  I die cut two prams, one from pink design paper and the other from cream cardstock.  Then I cut the hood from the cream pram and glued it to the pink pram.  Then I used some bling for the wheel hubs and hood attachment.


I love these Horizon Fishtail Banners.   They come in a set of three and I diecut two different sizes  and then cut them to the length I needed for this card.  Then add a sentiment stamp and you've got an adorable card front!  The stamp I used is from Graphic 45's Little Darlings collection.

Now for the pop up part!  I used  Graphic 45's new Penny's Paper Doll Family collection  to make this card and for the inside I fussy cut a baby pram from design paper.  I am a novice at pop-up cards and I will admit that they do intimidate me, so this one is nice and simple, but I think it's really cute!
In this shot, you can see the pop up mechanism.  I simply cut into the card 1 1/4" in two spots (where the wheels of the pram are) and then glued the pram to the face of the pop up mechanism.  Easy peasy right?  Ok, I did make a model from copy paper first.  ðŸ˜ƒ

Cheery Lynn Dies Used:

B898 Baby Pram - 1 Piece Die Set

In making this card, I learned that pop up cards are not as difficult as they look.  I put together this tutorial to encourage you to give it a try!

Step 1:
Cut a piece of cardstock 11" x 5.5" , score at 5.5" making a 5.5" square card.
Step 2:

Cut a piece of design paper 10 3/4" x 5 1/4".  Score at 5 3/8" and fold on the score line to make the inner card.  (Ignore the cut in the card for now).


Step 3:
Use the largest die from the Horizon French Flair Boutique Stacker Frames 3 Piece Die Set to diecut the green layer (Forever Friends). If you don't have that die, you can achieve a similar look by cutting a 5 1/4" square. 

Diecut a large square from the blue print paper (Garden Path) with the Square Frames 3 Piece Die Set , Again if you don't have this die, cut a 4 1/4" square layer from the blue paper

Diecut a pink (B side Garden Path) Baby Pram and a cream cardstock Baby Pram. Then cut the hood from the cream pram and adhere to the pink pram as shown. If you do not have the Baby Pram die, you could fussy cut the pram from the Mothers and Daughters design paper.
Step 4:
Fussy cut the pram and the Special Delivery stamp from Mothers and Daughters design paper.
Step 5:
Take the inner card from step 2 and on the outside (such that the card opens vertically) shown in the below photo, measure in and mark from the left side 1" and 2 7/8". Cut straight down 1 1/4".  Make another 1 1/4"cut at 1 1/2"  making a 1/2" tab.  Cut down from the 2 7/8" mark 1 1/4"  Then make another 1 1/4 cut" down at 3 3/8" making a second tab.  
Step 6:
Score the tabs only and fold the tabs in as shown below creating steps.  Attach scor-tape, or use the adhesive of your choice, to the vertical facing only.

Step 7:
Adhere the baby carriage to the vertical facing, lining the wheels up with the steps so that they are hidden from view.  Be sure that the wheels are just above the crease line so that when the card is folded, the carriage lays flat.
Step 8:
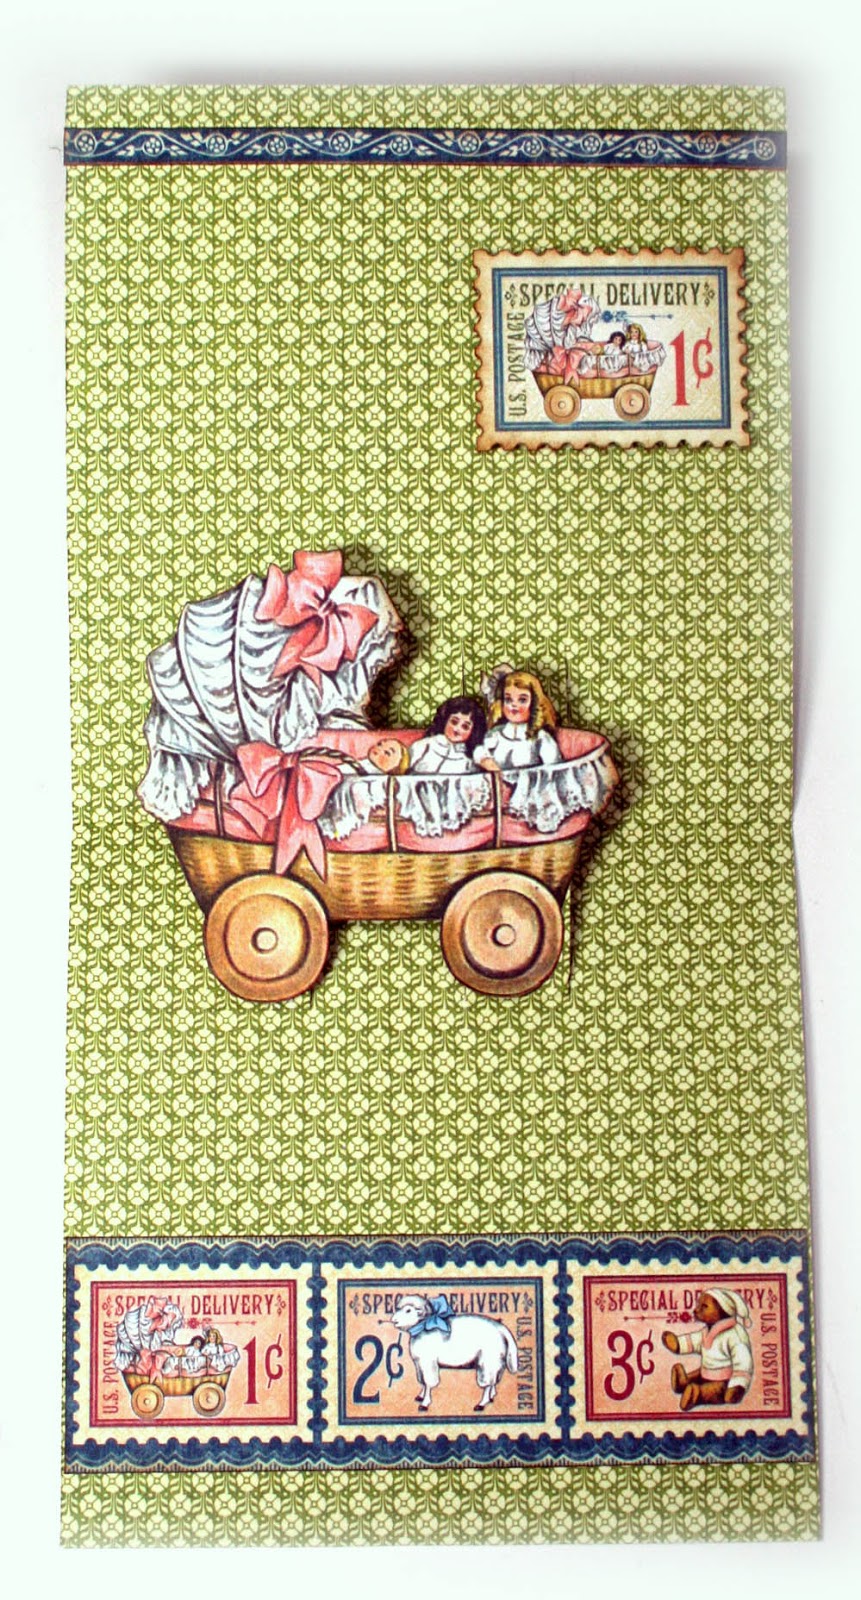
Trim the stamps and narrow blue border from the Beyond Borders paper to 5 1/4".
Step 9:
Adhere the stamps about 3/4" from the bottom and the narrow blue strip about 1/2" from the top as shown. 
Step 10:
Stamp or add a sentiment above the stamp border as shown. 
Step 11:
Now we'll work on the outside of the card.  Adhere the diecut green design paper to the front of the card.  Be sure you have the card situated so it opens vertically.

Step 12:
Center and adhere the blue square over the green paper.
Step 13:
Diecut a fishtail banner with the middle sized die from the Horizon Fishtail Banners 3 Piece Die Set from scraps.  I used a scrap from Fathers and Sons.  Trim the banner to about 2 3/4" and adhere about 1/2" from the right side. 
Step 14:

  Diecut another fishtail banner from the B side of Garden Path using the largest die in the set and trim to about 2".  Stamp a sentiment and adhere over the blue banner, about 1" from the right side as shown.
Step 15:
Tie a cute little bow and attach over the banners.


Step 16:
Now glue the inner card inside the cream outer card taking care not to glue the cut out steps that serve as the pop up mechanism. That's it, you've made an adorable pop up card!


 Thanks for joining me today, hope you like the tutorial.    Do you make pop up cards?  If you do, I'd love to see, leave me a link to your card in the comments section.

Graphic 45 papers used for this card -
Penny's Paper Doll Family collection 12 x 12:
  Garden Path
  Forever Friends
  Mothers and Daughters
  Beyond Borders
  Fathers and Sons


LinkWithin

Related Posts Plugin for WordPress, Blogger...