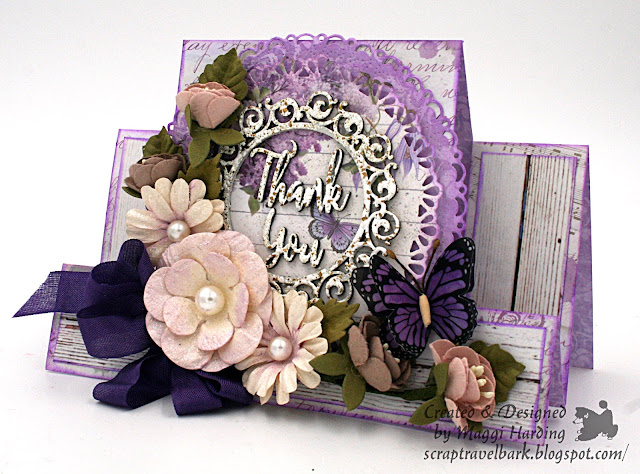
A thank you card
I am excited to be guest designing for Little Birdie Crafts today. I am saying thank you to Little Birdie for inviting me to guest design with a thank you step card! I am a mad fan of their exquisite flowers. In addition to their drop dead gorgeous flowers, Little Birdie Crafts has an extensive range of crafting products. I bet you can shop their store and find many things you need!
Elements of the card
In the center of the card I used 2 pieces of Little Birdie Chipboard. It comes already primed (I love that!) and ready for whatever medium you decide to use. I chose my favorite go to product, embossing enamel.
Of course, we must take a look at these gorgeous flowers!! The 3 center flowers are Symphony Orchid Sparkle flowers, they are divine! They have a subtle orchid color and pretty sparkle. I've flanked them with Pauline Swiss Coffee. I love these, they are like little vines with 2 blooms and leaves on a floral stem. You know what I love most about Little Birdie flowers? It's that they come with beautiful greenery that is so realistic in appearance.
To finish it off I added this gorgeous vellum butterfly that came from a package of Florita flowers.
Now that we've taken a close look at my card, let's see how you can make this card.
Tutorial
Step 1:
Carefully cut out the card base following the template below. You can download the template here. I suggest you make a practice card base first so that you understand the cuts and folds before cutting your good design paper. It is not hard, it can just be a little confusing the first time around. Once you are comfortable with the design, cut the card base from your choice of papers or card stock. It does need to be a heavy weight paper so that the card will stand up appropriately.
Fold where indicated on the dotted lines so that it looks like this:
Here is a side view of the card base with the proper folds.
Step 2:
Cut 2 strips of white wood grain paper from Little Birdie's Texture Brew paper collection,
1 1/4" x 3". Then, cut another strip 1 1/4" x 6 3/4" from the same paper.
Next cut two circles, one with a 4" diameter and one with a 4 3/4" diameter.
Ink the edges of the strips and circles if desired.
Step 3:
Now adhere the two 3" strips to the sides of the card and adhere the long strip at the bottom as shown in the photo below.
Step 4:
Now adhere the larger circle in the center of the card as shown. Next use dimensional foam tape to pop up the smaller circle and adhere it to the larger circle.
Step 5:
Next we'll use a Little Birdie 3" chipboard circle and the chipboard words Thank you. Dab the circle and words with embossing ink and sprinkle with your choice of embossing powder. I've use white as it goes nicely with the wood grain paper. heat set the embossing powder and then adhere to the front of the card as shown in the photo below.
Step 6:
Time for my favorite part, adding the flowers! Arrange the flowers in a manner that is pleasing to you and adhere to the card. Take care to adhere the flowers only to the center panel or bottom of the card. If you glue to the folded step part, your card won't fold out properly.
Tie a pretty bow and tuck in underneath the largest flower.
Supplies Used from Little Birdie Crafts
Primed Circle Chipboard
Primed Thank you chipboard words
Texture Brew Paper Collection
Symphony Orchid Sparkle Flowers
Valerie Orchid Sparkle Flowers
Pauline Swiss Coffee Flowers
Butterfly from Florita Flowers
Other Supplies
Stamperia Lilac Flowers paper collection
Stampendous Shabby White Embossing Enamel
Cheery Lynn circle dies
Distress Oxide Ink Wilted Violet
Thanks so much for joining me today for this very special post!


These two projects are just beautiful! And thank you for the step card template! So generous of you! Its fun to look at all the details and pockets!. TFS!
ReplyDeleteThank you so much!
DeleteThis comment has been removed by the author.
ReplyDeleteThe colors of this card are so lovely, Maggi. A step card is the perfect setting for these dimensional flowers. tfs
ReplyDeleteThanks for the step card template dimensions. Gorgeous card. Directions were helpful. Thanks.
ReplyDelete