Pages

Friday, May 22, 2020

Gift Box for Little Birdie Crafts

Today I'm sharing a Little Birdie Crafts flower bedecked box that anyone would love to receive, especially if you filled it with sweet treats or a special gift.


The box I am using is a plain paper mache box that I purchased. 


 The first thing I did was paint the box inside and out with white gesso.  Then I tore pieces of decoupage paper and applied to the box with decoupage glue but only below where the lid fits.  Be sure to apply glue to both the paper and the box for a good seal.   (If the lid does stick after painting you ca rub on a little wax and that will help keep it from sticking.)


I glue ribbon around the band of the lid and then added a beaded ribbon to add a festive touch!


Foi me, the best part of any project is adding beautiful blooms and I used lots and lots of gorgeous Little Birdie blooms on the lid.  I start off by adhering flowers at the edge and I glue them on their side so that I have some height.


Then I just keep layering up the flowers until I have a look that is pleasing.  I wanted a nice mix of flowers so I used a few flowers from several different packages to acheive the variety that I wanted.


Be sure to tuck in some leaves while you are building the flower layers.

And, don't forget a pretty bow to finish it off!


Little Birdie Crafts Products Used


Monday, May 18, 2020

Easel Cards with Creative Embellishments

Easel cards are easy to make and display so nicely!  You just cut a regular card whatever size you wish and then cut another panel the size of the front of your card.  Fold up the front of the card and then glue the separate panel to the top of the fold.  Inside the card, pop up an element to act as a "stay" for the easel panel.

This first one is made with Graphic 45's Cafe Parsian and chipboard from Creative Embellishments.  Chipboard from Creative Embellishments always adds that extra special something to your projects.


I've used a pretty corner flourish from Creative Embellishments on the right side.  The flourish is heat embossed with Stampendous Shabby White embossing enamel.  I love the sparkle that the glitter in the enamel adds!  


Here you can see how the easel mechanism works.


I left the inside of the card plain so it can be used for any purpose.  The strip at the bottom is popped up with dimensional foam so that it can hold the easel in place.


Here's another easel card and this one is for your dog lovin' friends!  I used Authentique's Purebred collection for this one.


I love the dog frames, they are so cute!  This one says "a dog's life".  I heat embossed it with Stampendous Aged Marine embossing enamel.  


In the upper left corner I used a paw print chipping and lightly inked it with Distress ink and heat embossed the heart in the center with Ranger Distressed Brick embossing glaze.  I love these little paw prints!


Inside the card I adhered a piece of ribbon and topped it with a heat embossed scroll. (The scroll is actually a Christmas Ornament, but on it's side, it makes a great scroll piece.)  Then I topped it with a sticker from the collection and finished it up with another paw print.


Chipboard from the Creative Embellishments Shop


I hope you'll enter our monthly challenge; it's always the first post on the Creative Embellishments Blog.  You could win a great gift certificate to the store!  Here are the rules:
  • Create a NEW project layout, mini album, tag, card, canvas, etc….as of  May 1st, 2020.
  • It is required that you mention in your blog post that you are playing along at Creative Embellishments together with a link back to our blog page. Please make sure to reference our challenge. Please, no old projects. (meaning projects from previous months that may fit the challenge) Please share only new projects.
  • Please add your entry to the inlinkz tool below to be eligible for the prize. You have until the last day of each month 11:55 pm eastern time to enter.
  • Simply add a link to your FB photo (if you do not have a blog) featuring your challenge entry. Let us know how you were inspired by the photo.
  • Combining with other challenges is permitted.
  • We would love to see you USE AT LEAST 1 OF CE products on your projects but it isn’t required to play along.
  • WINNERS will have 2 weeks to claim their prize. The winner will be announced on this post the day after the challenge ends. Keep an eye out to see if you are a winner.


Wednesday, May 13, 2020

OH Man! Challenge at The Funkie Junkie Boutique

Time to create something for the man in your life!  The new challenge, Oh Man!,  at The Funkie Junkie Challenge Blog is hosted by Jenny and she explains it, "Fathers Day may be a way off yet but there are always other occasions and reasons for making something for the men in our lives. For this challenge create something which you feel has a more masculine look."

My Take on the Challenge

I used Stamperia's Imagine collection to create this card for my guy's birthday.  He's a car nut and spends his time turning piles of metal into streetrods.    I layered up some papers from the Imagine collection on the front.

 One thing I love about Stamperia's collections is that they always include lots of cut-apart elements and the circular tag on my card is one of those that I cut out with a scalloped die.  I wanted another layer so I added the oval kraft die cut.  That was kind of plain so I masked on some diamonds withantique gold paste and added the gent from theTim Holtz Baseboard Dolls collection.


I diecut two old jalopies from black cardstock and then smeared a bit of vintage photo paint on them to give them that old rusted look.  They now look just like rat rods! To finish off my card I added two Thought Tokens and a truck charm.


Inside I used Graphic 45's new policy die to make an envelope that is the perfect size for holding a gift card or cash.  I added some design paper to dress up the envelope and used Graphic 45's new Sentiment Stamps to add Happy Birthday.


And that's all there is to it!


How to Enter the Challenge

Create a vintage or shabby chic project and link it up to The Funkie Junkie Challenge Blog Challenge, Oh Man! by 11:55 PM EDST May 26th.  The Design Team will choose their top four picks, with the winner being invited to be a guest designer in one of our Funkie Junkie Challenges. The other three winners will receive Top 3 badges to display on their blogs. Everyone who enters and follows the rules will be entered into a draw to have the chance to win a $25 spending spree at The Funkie Junkie Boutique.

The guidelines for entering are simple; create a new vintage or shabby chic project following the challenge theme, link to your post (not just your blog) and also include a link back to this challenge in your post. You can combine our challenge with up to 10 challenges (including this one) to be in with a chance of winning. If you are entering through a public forum (such as Instagram) you'll need to include the words 'Funkie Junkie Boutique Challenge'. Also, please be sure to turn off your Word Verification so our Design Team can leave comments on your blogs. Make sure you follow these rules as unfortunately, we have had to eliminate entrants from the prize draws in the past.


Friday, May 8, 2020

Easel Card Tutorial for Little Birdie Crafts

Easel Card
Let's make a card that is simple but has a lot of WOW value, the easel card.  These really are very easy to make, just follow along with my instructions.


Tutorial

I'm using Little Birdie Crafts beautiful Celebrate Life collection to make this fun easel card.  Ink the edges of all papers as desired.

1.  Cut the bright pink 12 x 12 paper into two pieces, each 6" x 12".  Then cut one of the pieces in half so that it is 6" x 6".   Take the long piece and score on the long side at 3" and 6". Fold the insides together at the 6" score and then fold the pink sides together at the 3" score.  It should look like this.


2.  Now take a 6" x 6" piece of blue paper from the Songs of the Sea Collection and die-cut or trim to 5 1/2" x 5 1/2".  I used a scalloped edge die to cut mine.  Glue the blue paper to the 6" x 6" pink panel cut in Step 1.  

Sometimes things don't go as planned as you can see below.  I masked on the left side using the Script stencil and made a big mess.  No worries, I just smeared it all around and I think it looks fine!  


3.  After the paste has dried, adhere the top of the 6" x 6" panel to the white side of the 3" piece folded up in Step 1.  It should look like this.


4.  Now let's do the inside of the card.  Cut a piece of the banner paper to a 5 3/4" square and adhere inside the card on the bottom panel, (or use a piece from the 6" x 6" paper pack).  Then from the square left over from the solid pink paper cut a piece 3 1/2" x 4 1/2" and adhere as shown in the photo below.  Select one of the doily punch outs and adhere as shown in the upper right.  To hold the easel in place when displaying the card you need to pop up an element.  Fussy-cut the small tag shown and pop up with dimensional foam tape and place the bottom edge about 1 5/8" from the bottom of the card.  Add a small fussy-cut butterfly on the right side.  Now the inside is complete.


5.  To finish the front of the card, select a rectangular and circle chipboard frame.  I have heat embossed mine with Stampendous Shabby Chic White Embossing Enamel.  Select a journal card and adhere to the right side of the card.  Adhere the rectangular frame over the journaling card as shown below.


6.  Now select one of the doilies and adhere the circle frame over it and attach to the front of the card as shown below.  Now add some flowers and a fussy cut butterfly and it is completed!


See how the small tag acts as a stop to hold the easel in place when you display your pretty card?


This is the view of the card when it is opened and laying flat.


I hope you have enjoyed this tutorial and that you are inspired to make an easel card.  Be sure to post your easel cards to Little Birdie Crafters Cafe Facebook page so that we can admire them!  Thanks for joining me today.


Little Birdie Crafts Products Used


Saturday, May 2, 2020

Step Card Tutorial with Little Birdie Crafts

Step cards are one of my favorite styles because they stand up so well and are so pretty with their dimension shape.    Today I will show you how to make these pretty cards.


Tutorial

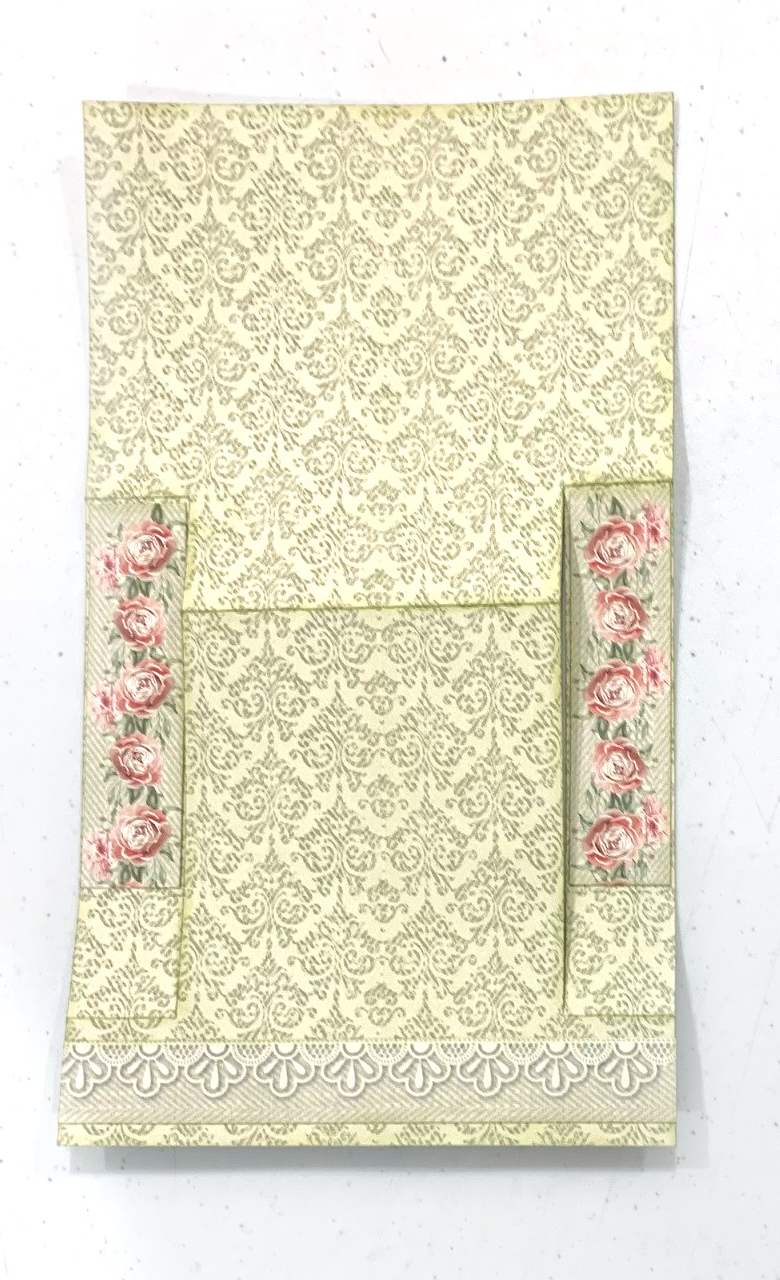
1.  Begin by cutting a card base. I am using Little Birdie's beautiful Shabby Chic Bouquet Collection for my card.  Here is the template for cutting the card base that measures 6.5" x 5.25".  Here is a link where you can download this file.  You just need to carefully measure and cut and fold as shown on the template.  If you have a Cameo or similar machine, you can draw this file in the program and save it to use in the future.  That way you could also adjust the size of the card.


2.  After you have cut out your base and folded where indicated, it should look something like this.


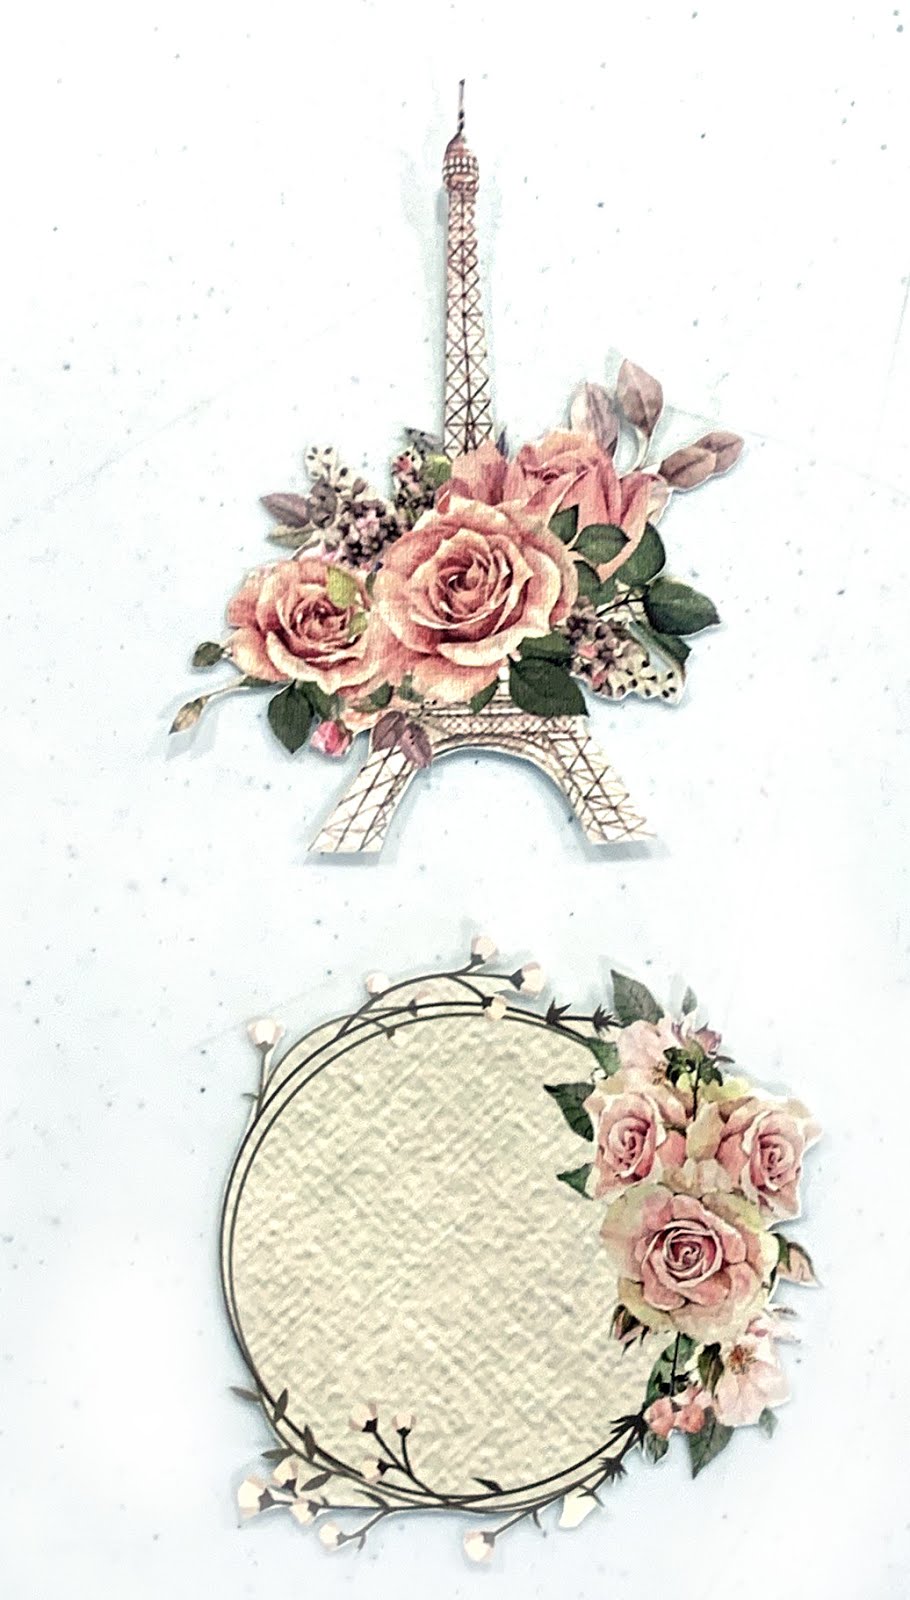
3.  Now fussy cut these two items out from the design paper.


4. Cut 2 floral strips 1 1/16" x 4 1/4".  Cut the long lace piece 6 1/2" x 7/8".  Punch out the doily from the doily sheet and select and clip a cut-apart from the cut-apart sheet.


5.  Adhere the two floral strips on the sides down from the top fold line and adhere the lacy piece at the bottom as shown in the photo below.

6.  Now it's time to decorate the front of the card.  Adhere the two circle elements as shown in the photo below.  Be sure that you only adhere to the center panel and not the side pieces.  Pop up the Eiffel Tower with foam tape and adhere on the left side.  


7.  Add a cluster of flowers on the left corner, again being careful not to adhere to the side panel.  (The card will not open if anything is glued there.)  


7.  Now let's do the inside of the card.  Cut a piece of design paper 4 1/8" x 6 1/2" and adhere to the center of the card.  Adhere the cut-apart from step 4 in the center.  Cut two pieces 1 3/16" x 4 3/8" and adhere on the sides as shown.  That's it, the card is finished!


Your card should look like this when it is finished and standing.


Little Birdie Crafts Supplies:


Thank you for joining me today!


Friday, May 1, 2020

It's a New Challenge at Creative Embellishments

A new challenge is up on the Creative Embellishments Blog and here's the inspiration photo.  Lots of  directions you can go with this!  The twist is to add numbers to your project.


My Take on the Challenge

The browns in the photo inspired me to go with a nature layout so I dug out this photo of a moose.  He crossed the road in front of us last year while on our drive to Alaska.  I used a title phrase from the CE Shop to title my layout as it was a "Magical Moment."  In all the years I lived in Alaska I don't think I ever saw a bull moose outside of Denali National Park though I saw lots of cows, even in my yard.


The twist was to ad numbers to your project.  Well my numbers are small, but they are there in the journaling.


I used two styles of chipboard trees on this layout.  I first covered them with Little Birdie Crafts Fiber Paste.  After that dried, I colored them with Lindy's mists using several green colors.


The title chippy is heat embossed with Emerald Creek Baked Texture in Ancient Amber.


The Creative Embellishments pine cone clusters make a great base under the burlap flowers.  They are colored with Lindy's mists also.  I use mists a lot on chipboard because when the chipboard is etched like the pinecones, the mist doesn't fill in the etching lines like a paint would .  I also tucked in a cute little wood veneer pinecone that I left in its natural state.  Those pretty burlap flowers are from Little Birdie Crafts.


Creative Embellishments Products:

Other Products:
Stamperia Forest and Cosmos Paper Collections
Lindy's Mists
Emerald Creek Baked Texture Embossing Powder - Ancient Amber
Distress Oxide Ink - Walnut Stain


How to enter the challenge


The monthly challenge is always the first post on the Creative Embellishments Blog.  Be sure to check it out, you could win a great gift certificate to the store!  Here are the rules:
  • Create a NEW project layout, mini album, tag, card, canvas, etc….as of  May 1st, 2020.
  • It is required that you mention in your blog post that you are playing along at Creative Embellishments together with a link back to our blog page. Please make sure to reference our challenge. Please, no old projects. (meaning projects from previous months that may fit the challenge) Please share only new projects.
  • Please add your entry to the inlinkz tool below to be eligible for the prize. You have until the last day of each month 11:55 pm eastern time to enter.
  • Simply add a link to your FB photo (if you do not have a blog) featuring your challenge entry. Let us know how you were inspired by the photo.
  • Combining with other challenges is permitted.
  • We would love to see you USE AT LEAST 1 OF CE products on your projects but it isn’t required to play along.
  • WINNERS will have 2 weeks to claim their prize. The winner will be announced on this post the day after the challenge ends. Keep an eye out to see if you are a winner.


Thanks for joining me today!


LinkWithin

Related Posts Plugin for WordPress, Blogger...