Pages

Tuesday, March 24, 2020

Shaker Gift Box

I am loving Eileen Hull's new gift box die and have found lots of fun things to do with it!  This time I made a cute shaker box.  Shakers are addictive, if you ever make one, you won't be able to stop yourself,    You'll want to keep on shaking!


How to Make the Shaker

It takes a little finagling and you have to be REALLY CAREFUL with your die cutting machine but it can be done!

1.  First, the easy part.  Cover two pieces mat board or chipboard with design paper of your choice on both sides and run through your die-cutting machine.  I usually use Sizzix's mat board because it is the perfect length at 13".  However, for this project I only had 12 x 12 chipboard so I used that.  If you look at the panel on the left in the photo below, see the blue strip at the top?  That is where the chipboard is not quite long enough.  It's not a big deal, because I'm going to use that as my top flap and we'll be gluing one of the scalloped flaps to that anyway.  You can position the chipboard on the die such that just a little off each end is missing.  Those end flaps fold inside the box anyway and you'll still have enough of a flap to glue the box together.  (I hope this makes sense, if not be sure to ask questions in the comments section.)

In the photo below the blue is the inside of the box and the patterned paper is the outside.


2.  Now cut a piece of chipboard roughly the size of one of the box sides, 3 3/4" x 3 3/4".  Take the oval die from the Trinket Box and Frame set and die cut out an oval.   You will need the Movers & Shapers Shuttle to die-cut this part.   It should look something like this.


3.  Now the challenging part.   You need to cut out an oval from the box however the box is longer than shuttle and therefore, doesn't fit inside the shuttle.  There are several things you can do.
  • You could cut one panel off the box assembly panel so that it would fit in the shuttle.  After die-cutting the oval you could then re-attach the panel with strong tape on the inside and cover with design paper.  I really think this would work just fine. 
  • Or you could build you own sandwich and die-cut it.  Please note: I AM NOT SUGGESTING YOU DO THIS, BECAUSE IF YOU DO IT WRONG, YOU COULD BREAK YOUR DIE-CUTTING MACHINE.  However, this is what I did.  I experimented with scrap chipboard, the oval die, and several plates until I got a sandwich that die-cut the oval perfectly  Only then did I place the oval die over the center of the box assembly panel and die-cut an oval into the box assembly piece.  (Only do this to one of the two box pieces.)


4.  Take the oval die-cut from step 2 and trim as necessary so that it fits inside the box and perfectly lines up with the oval die-cut on the box panel and then adhere inside the box. Cut a piece of design paper to fit over the back of this assembly inside the box and glue, making sure that you have a good seal all around the oval cut-out, otherwise your shaker material will spill out.  Note that this design paper will show through the shaker window.  Alternatively, if you want to be able to see inside the box through the shaker, you could cover the oval cut-out with clear plastic.  Allow this to dry.

5.  Now we need to die-cut an oval ring.  I ran a small piece of paper through my machine using the shuttle and it die cut the oval out.  But, I wanted an oval ring so I carefully taped the diecut piece onto the die and ran it through the machine again with shims so that what is normally scored, actually cut through.  I had to use my scissors here and there, but I got a nice oval ring.


6.  Trace  along the outer edge of the ring in step 5  onto a clear sheet of plastic and cut out the clear oval.  Then glue the paper oval ring onto the oval plastic.  Set that aside to dry.

7.  Assemble the box in the usual fashion making sure that the oval is the front panel.

8.  Now lay the box such that the oval cut out is face up and carefully add some shaker material.  You don't need a lot, just enough to shake and look pretty,  Then place a thin line of glue around the edge of the oval cut-out and top with the plastic oval from step 6.  Let this dry before moving it as moving it cause the shaker pieces to shift and adhere themselves to any sticky inside the oval window.

Here is the completed shaker.  From the top down the layers are:
  • Oval ring cut from design paper
  • Oval clear plastic
  • Oval cut-out in the box
  • Shaker material
  • Piece from step 2 glued inside the box
  • Design paper glued inside the box over the cut-out


9.  To finish up the box, I added panels of design paper to each side and cut the small flap off the lid so that I could adhere the larger scalloped piece to the lid as a closure flap.   Then I glued the smaller scalloped piece on for decoration and used a BasicGrey magnet to hold the flap down.  I had to add some flowers and ribbon to "gussy" it up.  Now I am imagining this full of easter candy, yummy!


Dies and Materials Used


Thanks for stopping by today!!

Monday, March 23, 2020

Birds and Berries Layout for Little Birdie Crafts

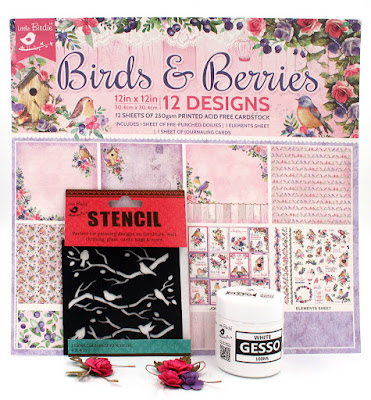
Hello to all my Little Birdie Friends!  I'm back again with another layout, this time using the lovely Birds & Berries 12 x 12 paper collection.


How to Make this Layout

1. Locate this sheet of paper and turn on its side such that the wood planks are on the right side.  Brush the paper lightly with a dry brush using watered down white gesso using a bit more around the edges to create a white brushed border.  After that dries use the Chippy Haven stencil and stencil with medium brown ink on the right side.  Use the Script stencil on the left side and stencil with the same ink.


2. Locate the sheet of paper that has the birdhouse on it and fussy cut the birdhouse.  Cut the remaining paper to 6.5" x 12" with the corner flowers on the right side.  Distress the edges, ink and then adhere to the first sheet of a paper lining up the right side along the stitching line on the paper, 3" from the right side.


3.  Locate the paper that has all the little birds on it and cut a piece 5.75" x 8".  Use watered down white paint or gesso and paint all over the paper to fade the color and design.  Distress and ink the edges and adhere 1.25" from the left side and 1" from the bottom.


4.  Now you are ready to add your photo.  TIP:  Pop up your photo with cardboard cut slightly smaller than your photo instead of dimensional foam tape. (Save some money for more pretty papers!)  

5.  Take the fussy cut birdhouse and pop it up with dimensional foam and adhere on the right side of your layout.  Then adhere a small rose as shown in the photo below.


6.  Select one of the punchout doilies and adhere on the upper left slightly underneath your photo.  Add the small piece of chipboard and some flowers.


7.  Add the large piece of chipboard and flowers on the right side of your photo.


That's all there is to it, just a simple layered layout!

Be sure to stop by the Little Birdie Crafts  completely revamped  website.  You can now make purchases without any minimum order and free shipping for orders over $99 and Little Birdie is now shipping from the USA.  Use this code to get 5% off you purchase.    MAGGI05


Primed Chipboard- Vine, 2Pc (similar to what I have used)

Thanks so much for joining me today!  Maggi


Wednesday, March 18, 2020

Small Things challenge at The Funkie Junkie Boutique Blog


The Challenge

Jenny is hosting out challenge this time around and she calls it Little Things.  She describes her challenge, "Sometimes it can be the littlest of things that can mean the most. For this challenge create a small vintage or shabby chic project (or if you're feeling adventurous even a set!) It could be an Artist Trading Card/Coin, a tag or a little card for example, or you may have something else in mind - we can't wait to see them."


My Take on the Challenge

I decided to make artist trading cards (ATC) and a coin.  They are fun little projects to make and a great way to use up odd bits of paper.


This first ATC is a play with mixed media.  I used a spatula to apply modeling paste to the ATC and then pressed a bit of cotton trim into the paste.  After that dried I painted it with green Dylusions paint and let that dry before stenciling on a pattern with a Dylusions stencil.  Then I added a scrap from the Ciao Bella Seventies paper collection, added a ribbon, flower and metal key.


Stamperia Glamour Gel - Gold Dew


For this ATC, I started with a black corrugated ATC card and first inked it with oxide ink in iced spruce and misted it lightly to muddle the color.  Then I heat embossed all around the edges with gold embossing powder.

The sun face and the blue scrap are from Stamperia's Alchemy paper collection.  I cut out the sun face and backed it with a die-cut 3-D Impresslits medallion.  I heat embossed a circle frame with chunky rust and gold embossing powders and glued that over the sun face.  Then I filled in the frame area with glossy accents.  After that dried I glued it to the ATC over top the sun face.  I added a Little Birdie flower and a metal leaf charm that I accented with Metallique gold wax.


Sizzix 3-D Impresslits Embossing Folder - Burst (I used Medallion, but this one is very similar)


This last one is slightly larger than a regulation Artist Trading Coin.  I used Stamperia Roses and Lace paper collection.   I fussy cut a clock face from the collection and covered it with Crackle Accents and allowed to air dry.  The frame is a Creative Embellishments Frame heat embossed with silver powder.  Then the paper underneath the frame is edged with silver Metallique wax.  I just glued the pieces together and that's all there is to it!


Prima Art Alchemy by Finnabair - Metallique Wax - Antique Silver


How to Enter the Challenge

Create a vintage or shabby chic project and link it up to The Funkie Junkie Challenge Blog Challenge, Little Things. The Design Team will choose their top four picks, with the winner being invited to be a guest designer in one of our Funkie Junkie Challenges. The other three winners will receive Top 3 badges to display on their blogs. Everyone who enters and follows the rules will be entered into a draw to have the chance to win a $25 spending spree at The Funkie Junkie Boutique.

Challenge Guidelines

The guidelines for entering are simple; create a new vintage or shabby chic project following the challenge theme, link to your post (not just your blog) and also include a link back to this challenge in your post. You can combine our challenge with up to 10 challenges (including this one) to be in with a chance of winning. If you are entering through a public forum (such as Instagram) you'll need to include the words 'Funkie Junkie Boutique Challenge'. Also, please be sure to turn off your Word Verification so our Design Team can leave comments on your blogs. Make sure you follow these rules as unfortunately, we have had to eliminate entrants from the prize draws in the past.

Thanks so much for stopping by today. Be sure to take a look at the creations of my talented teammates, you can see their creations here, at The Funkie Junkie Blog.

Tuesday, March 17, 2020

Songs of the Sea Layout for Little Birdie Crafts

Hello friends of Little Birdie Crafts! Today I am sharing a layout using the beautiful collection, Songs of the Sea from Little Birdie Crafts.  I am excited to tell you all about my layout and near the bottom you will find a wee surprise.

My Process

In the lower right corner I first stenciled on a pattern using Little Birdie's Mixed Media Paste White.  This is a great modeling paste, goes on smoothly and has just the right amount of body.

After that dried, I watered down a mix of white and aqua paints and brushed over the modeling paste.  Next I added a layer of cheesecloth.  I used some white corrugated paper behind one of the punchout doilies that come with every 12 x 12 paper collection and placed that over the cheesecloth.  I nestled one of the cut-aparts behind the doily and topped it all with gorgeous Little Birdie flowers.  


To finish it off I dabbled paint on a die-cut flourish that I cut from the design paper.  I think the flourish  mimics the rolling seas.


In the upper right I placed my photo over top a chipboard corner piece.  I lpainted the chippy white with Little Birdie paints.  Then I added more gorgeous Little Birdie flowers, with a bit of cheesecloth and small flourishes tucked in to the cluster.


As a finishing touch, I dry brushed white paint over the flowers and spattered watered down white paint all over.


Coupon Code 5% off

Did you know that Little Birdie Crafts has completely revamped their website and you can now make purchases without any minimum order and free shipping for orders over $99.  Isn't that fabulous?  AND Little Birdie is now shipping from the USA, how awesome is that?  So I have a little present for you, a coupon code good for 5% off you purchase.  Just use the code:  MAGGI05

Coupon Code 5% off - MAGGI05

Monday, March 9, 2020

St Patrick's Day Tag for Creative Embellishments


St Patrick's Day is a fun holiday where for 24 hours everyone is Irish!  When I lived in Alaska the firm I worked for hosted a huge St Patrick's Day party complete with green beer.  I think I will mail this to them to add to the decor for the day.

I started with one of my favorite chipboard pieces from Creative Embellishments, a large tag.  It is a great size to spark my creativity at 5.5" x 10".  I covered the tag with paper from a Simple Stories St Patrick's Day collection from a couple of years ago.  Then I stenciled on some shamrocks.


I used the chipboard Shamrock Shaker Set to make the shaker and filled it with these shaker pieces: Sparkletz in Winter Evergreen and Forest Gems from Buttons Galore.  The Creative Embellishments shop has so many fun shaker sets, something for every occasion.  Stop by and take a look, shakers are so "in" and they really are fun to make.  I just painted around the edges to color mine and cut paper to fit inside.


Add a couple of cut-aparts, a bow at the top, a banner at the bottom, and it's done!

Shamrock Stencil

Thanks so much for stopping by today!  Be sure to join in the monthly challenges because, you could win a $50 gift certificate to the Creative Embellishments store, now that is sweet!! The challenge is usually the first post on our blog.


Wednesday, March 4, 2020

Aquamarine Challenge - The Funkie Junkie Boutique Blog

The Challenge
Cec is hosting The Funkie Junkie Boutique Blog Challenge this time.  Her challenge description:  "Aquamarine, the birthstone of March, has a rich color and has long been a symbol of youth, health and hope. Its mesmerizing color ranges from pale to deep blue and are reminiscent of the sea.The challenge is to create a shabby chic or vintage project using the colour aquamarine in any of its shades along with one other colour (it could be white or brown or whatever you wish). The definition has lots of other prompts you could also use in your creation but the colour requirement is the main focus."  This photo should inspire you!


My Take on the Challenge

This was a hard challenge for me because I didn't have any paper that would work so I turned to my inks and paints.  Well, we all know ink and paint is not my strong suit but here we are with a tag using colors of aquamarines.

I started off with a #8 Etcetera tag and painted it with white gesso.  Then I stenciled on some patterns with paint using two different stencils.  After it all dried, I gave the whole tag a light whitewash to tone all the color down.

The sentiment is so fun to me, it is from Dyan Reaveley's Bigger Back Chat White -set 1.  I cut it up to fit and outlined with a white paint pen.


I stamped the unicorn image with Archival Ink - Cobalt and then used a brush to paint on embossing ink.  I wanted to leave the stamp markings visible and not covered with embossing powder.  I used two colors of embossing enamel, shabby white and shabby blue.  I popped the image up with dimensional foam and added a blingy crown.


To finish it up, I added flowers, a bow and aquamarine gemstones.

Supplies from The Funkie Junkie Boutique

Tim Holtz Etcetera - #8 Tag
Dina Wakley Media Mediums - White Gesso
Dylusions Stamp Set - I Believe in Unicorns
Dyalog Stencil Set - Stencil It Too
Stampers Anonymous Tim Holtz Mini Layering Stencils - Set 36
Dyan Reaveley's Dylusions Paint Pens - white
DYLUSIONS PAINTS, VIBRANT TURQUOISE
DYLUSIONS PAINTS, LONDON BLUE
DYLUSIONS PAINTS, WHITE LINEN
Ranger Dylusions Bigger Back Chat, White Set 2 (Similar to Set 1 that I used)
Ranger Archival Ink Pad - Cobalt

Stampendous Shabby Blue Embossing Enamel
Stampendous Shabby White Embossing Enamel


How to Enter the Challenge

Create a vintage or shabby chic project and link it up to The Funkie Junkie Challenge Blog Challenge, Aquamarine. The Design Team will choose their top four picks, with the winner being invited to be a guest designer in one of our Funkie Junkie Challenges. The other three winners will receive Top 3 badges to display on their blogs. Everyone who enters and follows the rules will be entered into a draw to have the chance to win a $25 spending spree at The Funkie Junkie Boutique.

Challenge Guidelines

The guidelines for entering are simple; create a new vintage or shabby chic project following the challenge theme, link to your post (not just your blog) and also include a link back to this challenge in your post. You can combine our challenge with up to 10 challenges (including this one) to be in with a chance of winning. If you are entering through a public forum (such as Instagram) you'll need to include the words 'Funkie Junkie Boutique Challenge'. Also, please be sure to turn off your Word Verification so our Design Team can leave comments on your blogs. Make sure you follow these rules as unfortunately, we have had to eliminate entrants from the prize draws in the past.
Thanks so much for stopping by today. Be sure to take a look at the creations of my talented teammates, you can see their creations here, at The Funkie Junkie Blog.

Thanks for visiting, hope to see your challenge entry on the Blog!

Tuesday, March 3, 2020

Creative Embellishments - Cards for Dog Lovers!

Hello friends, Maggi here with two entirely different cards, it's my split personality showing through!!  😁


Collaboration with Rinea

This month CE's designers are joining forces with Rinea Spark Your Creativity and creating with Rinea foils and CE's wonderful embellishments.  I used a gold 4" x 6" sheet of gold foil and embossed it with Tim Holtz's 3-D Texture Fades - Gears Embossing Folder.  Then I dampened a paper towel with Alcohol Blending Solution and wiped it over the embossed surface removing much of the gold color revealing the silver tones.  To grunge it up a bit, I misted with black mist and heat dried.

The embossed foil begged for a frame and Creative Embellishments Steampunk Frame was perfect.  I heat embossed the frame with Lindy's Midnight Gold embossing powder.  I topped the frame with a couple gears heat embossed with gold embossing powder.


My favorite part of this card has to be the sentiment (from Tim Holtz Big Talk - Snarky) which I can so relate to!!!  I popped it up with foam tape and mounted on a piece of embossed silver Rinea foil.  I wanted a really grumpy face for the  card and this dog was all I could find.  It's a stamped image (Tim's Crazy Dogs), inked, fussy cut and popped up with foam.


My Poodle Side

You probably know that I have two standard poodles who rule my home and life.  Here they are "fighting" over who gets to sit in the chair.  Tisha, the one in the front, always wins because she gets in the chair and sits on Nika, who then moves.  They are such a comical pair!


Back to card making!  I used the larger of the frames in the Fancy Oval Frame Set and heat embossed it with Eileen Hull Designs Molten Dimensions White Wonder embossing powder.  It is a super chunky powder that retains it's chunkiness when heated.

The poodle die-cut and the stamped sentiment are a set from Tonic Studios.  Many thanks to my dear friend, Billie, who gifted the set to me.  The papers I used are Simple Stories from an old (2017?) Valentine's paper pack.


Supplies from the Creative Embellishments Shop

Steampunk Frame
Mini Gears 3/4" (set of 12)
Fancy Oval Frame Set
Rinea

Metallics Foiled Paper Variety Pack

Thanks so much for stopping by today!  Be sure to join in the monthly challenges because, you could win a $50 gift certificate to the Creative Embellishments store, now that is sweet!! The challenge is usually the first post on our blog.


Sunday, March 1, 2020

Creative Embellishments March Challenge

The Challenge

Time for a new monthly  challenge at Creative Embellishments.  Use this mood board to stir your creativity and then use glitter somewhere on your project as that is the twist for this month's challenge.


My Project

I made a card and tag set using the lighter colors from the mood board and used Stickles on my letters to add glitter to my project.  The paper I used is a new collection from Little Birdie Crafts called Songs of the Sea.

This month Creative Embellishments is collaborating with Rinea and I've used foil from Rinea inside my frames and to make the flowers on the card.  I used the small size foil, 4" x 6", but it is also available in 6" x 12" sheets.  To create the panels inside the frames, I first used an embossing folder to emboss the foil.  Then I  added a little Tim Holtz Alcohol Blending Solution to a paper towel and rubbed lightly over the embossed surface to remove some of the gold color revealing silver underneath.


I used the Intricate Diamond Frame on the card and turned it such that the frame interior was square.  It is heat embossed with Stampendous Aged Silver embossing enamel. Then I used Happy Birthday from the Small Sentiment Words set.  I heat embossed the words with Eileen Hull Designs Aqua Splash Molten Dimensions embossing powder and then Crystal Stickles over the embossing powder (after it had cooled).

To make the flowers, I cut several flowers from Rinea foils with a McGill Floriano flower punch.  Then I gave each petal a twist with my tweezers and layered them up, using a smaller flower punch, EK Success Retro Flower, in the center.  


I used the smaller frame from the Fancy Oblong Frame Set on the tag.  The frame and interior are made the same way as the frame on the card.  Then I added some flowers in the center topped with a stamped "for you" tag.  I outlined the letters with crystal Stickles to add some glitter.  A pretty bow at the top finishes off this simple tag.


How to enter the challenge


The monthly challenge is always the first post on the Creative Embellishments Blog.  Be sure to check it out, you could win a great gift certificate to the store!  Here are the rules:
  • Create a NEW project layout, mini album, tag, card, canvas, etc….as of  March 1st, 2020.
  • It is required that you mention in your blog post that you are playing along at Creative Embellishments together with a link back to our blog page. Please make sure to reference our challenge. Please, no old projects. (meaning projects from previous months that may fit the challenge) Please share only new projects.
  • Please add your entry to the inlinkz tool below to be eligible for the prize. You have until the last day of each month 11:55 pm eastern time to enter.
  • Simply add a link to your FB photo (if you do not have a blog) featuring your challenge entry. Let us know how you were inspired by the photo.
  • Combining with other challenges is permitted.
  • We would love to see you USE AT LEAST 1 OF CE products on your projects but it isn’t required to play along.
  • WINNERS will have 2 weeks to claim their prize. The winner will be announced on this post the day after the challenge ends. Keep an eye out to see if you are a winner.


Supplies from the Creative Embellishments Shop

Thanks for stopping in today, get out your craft supplies and enter this challenge!


LinkWithin

Related Posts Plugin for WordPress, Blogger...