Pages

Monday, October 12, 2020

Post Box - Eileen Hull Designs by Sizzix New Die

Eileen Hull has two new XL dies available and you're going to love them!  Today I am sharing the Post Box XL Die with you.

The XL dies often are longer than 12" and that sometimes makes using our favorite design papers with these dies a challenge.  In today's tutorial I'll show you a couple of ways to make 12" paper work with this new die.

Sizzix ScoreBoards XL Die - Box, Post 


These are the two boxes I made with the Post Box die.  Yep, it's time to get those Christmas projects going!


Christmas Wish Box

The Post Box makes a great Christmas Wish Box.  Give each child their own box to fill with there Christmas wishes.  They'll have so much fun putting their Christmas wishes in the box.  They could cut things out that they see on advertisements, write a letter to Santa, lots of ways to fill the box!


Tutorial 
1.  Cut mat board and design paper 5 1/2" wide.  Apply adhesive to the back of the design paper and adhere to the mat board (6" x 13") lining it up at the bottom edge.  Eileen's Thermoweb adhesive sheets work really well for this application.


2.  Now cut a piece of design paper 5 1/2"W  x 3 1/4"L and adhere over the blank spot on the matboard.


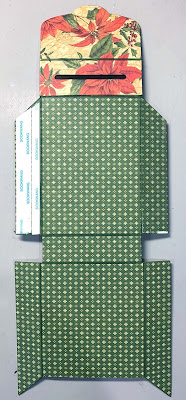
3.  Now place the paper covered  mat board on the die with the small piece of patterned paper covering the scalloped top of the die.  Place the mat board face down so that the scalloped edge is just covered with the mat board and run it through your die cutting machine.  It should come out nicely cut with the edge of the different design paper at the back seam of the slotted top.  In the photo below you can see that I am peeling off a very thin strip of paper that  went over the back scoreline.


4.  Assemble the box using double sided tape.  Note that the bottom flaps in this photo fold over the upper flaps.


5.  I made the sentiment on the front  by printing onto clear transparency film.  I love doing this especially when I want to add journaling to a journaling card.  Use the "T-Shirt Transfer" function on your printer as this prints a mirror image of the text which you will need to do because you have to print on the backside of the transparency film.  Be sure you get the right film for an ink jet printer if that is what you use.

6.  Make a closure for the box, I used velcro.


I finished off the back of the box with a cut-apart.


7.  You could also make cards to write on that fit through the slot.


Christmas Ornament Gift Box


One Christmas my parents bought my brother a golf putter and instead of wrapping it, they hung it right next to the tree trunk where it was effectively hidden!  It was great fun as my brother was really hoping for that putter and was quite mystified that there was no golf club looking package under the tree!  Ever since then I've thought it was fun to hide things in the tree.  So here's an adorable box that holds a gift card or small gift that's also an ornament.


Tutorial 

1.  To utilize 12" paper for this design, cut design paper 5 1/2" x 12 and adhere to 6" x 13" mat board.  (I always trim off the extra 1/2" on the side).  Place the mat board on the die such that the scalloped edge is covered with design paper and the uncovered portion is at the bottom and die cut.  Keep the little piece that comes out of the "mail slot".  Then cut the two triangle pieces off at the top.  In this photo you can see that I've cut the left side off.


2.  Assemble the box in the same manner as above.


3.  Now use a piece of coordinating design paper to make a trim all around the box.  You could use a border trim or ribbon.


4.   Now place the little piece that was diecut out for the slot back in the slot and cover with decorative paper, a sticker, whatever works for you on the outside.  Then punch two holes in the top and thread ribbon, string, twine etc. to make a hanger. 

I used a magnet set on this box as a closure.  The magnet on the box itself is underneath the design paper while the magnet on the flap is visible.


I used a sticker on the top of mine.  


Embelish the box however you like and you're all set with a pretty gift box ornament.


Supplies 


Graphic 45 Winter  Wonderland Collection


Thanks for stopping by!  Be sure to take a look at Eileen's blog to see more projects with the Post Box die!


Thursday, October 1, 2020

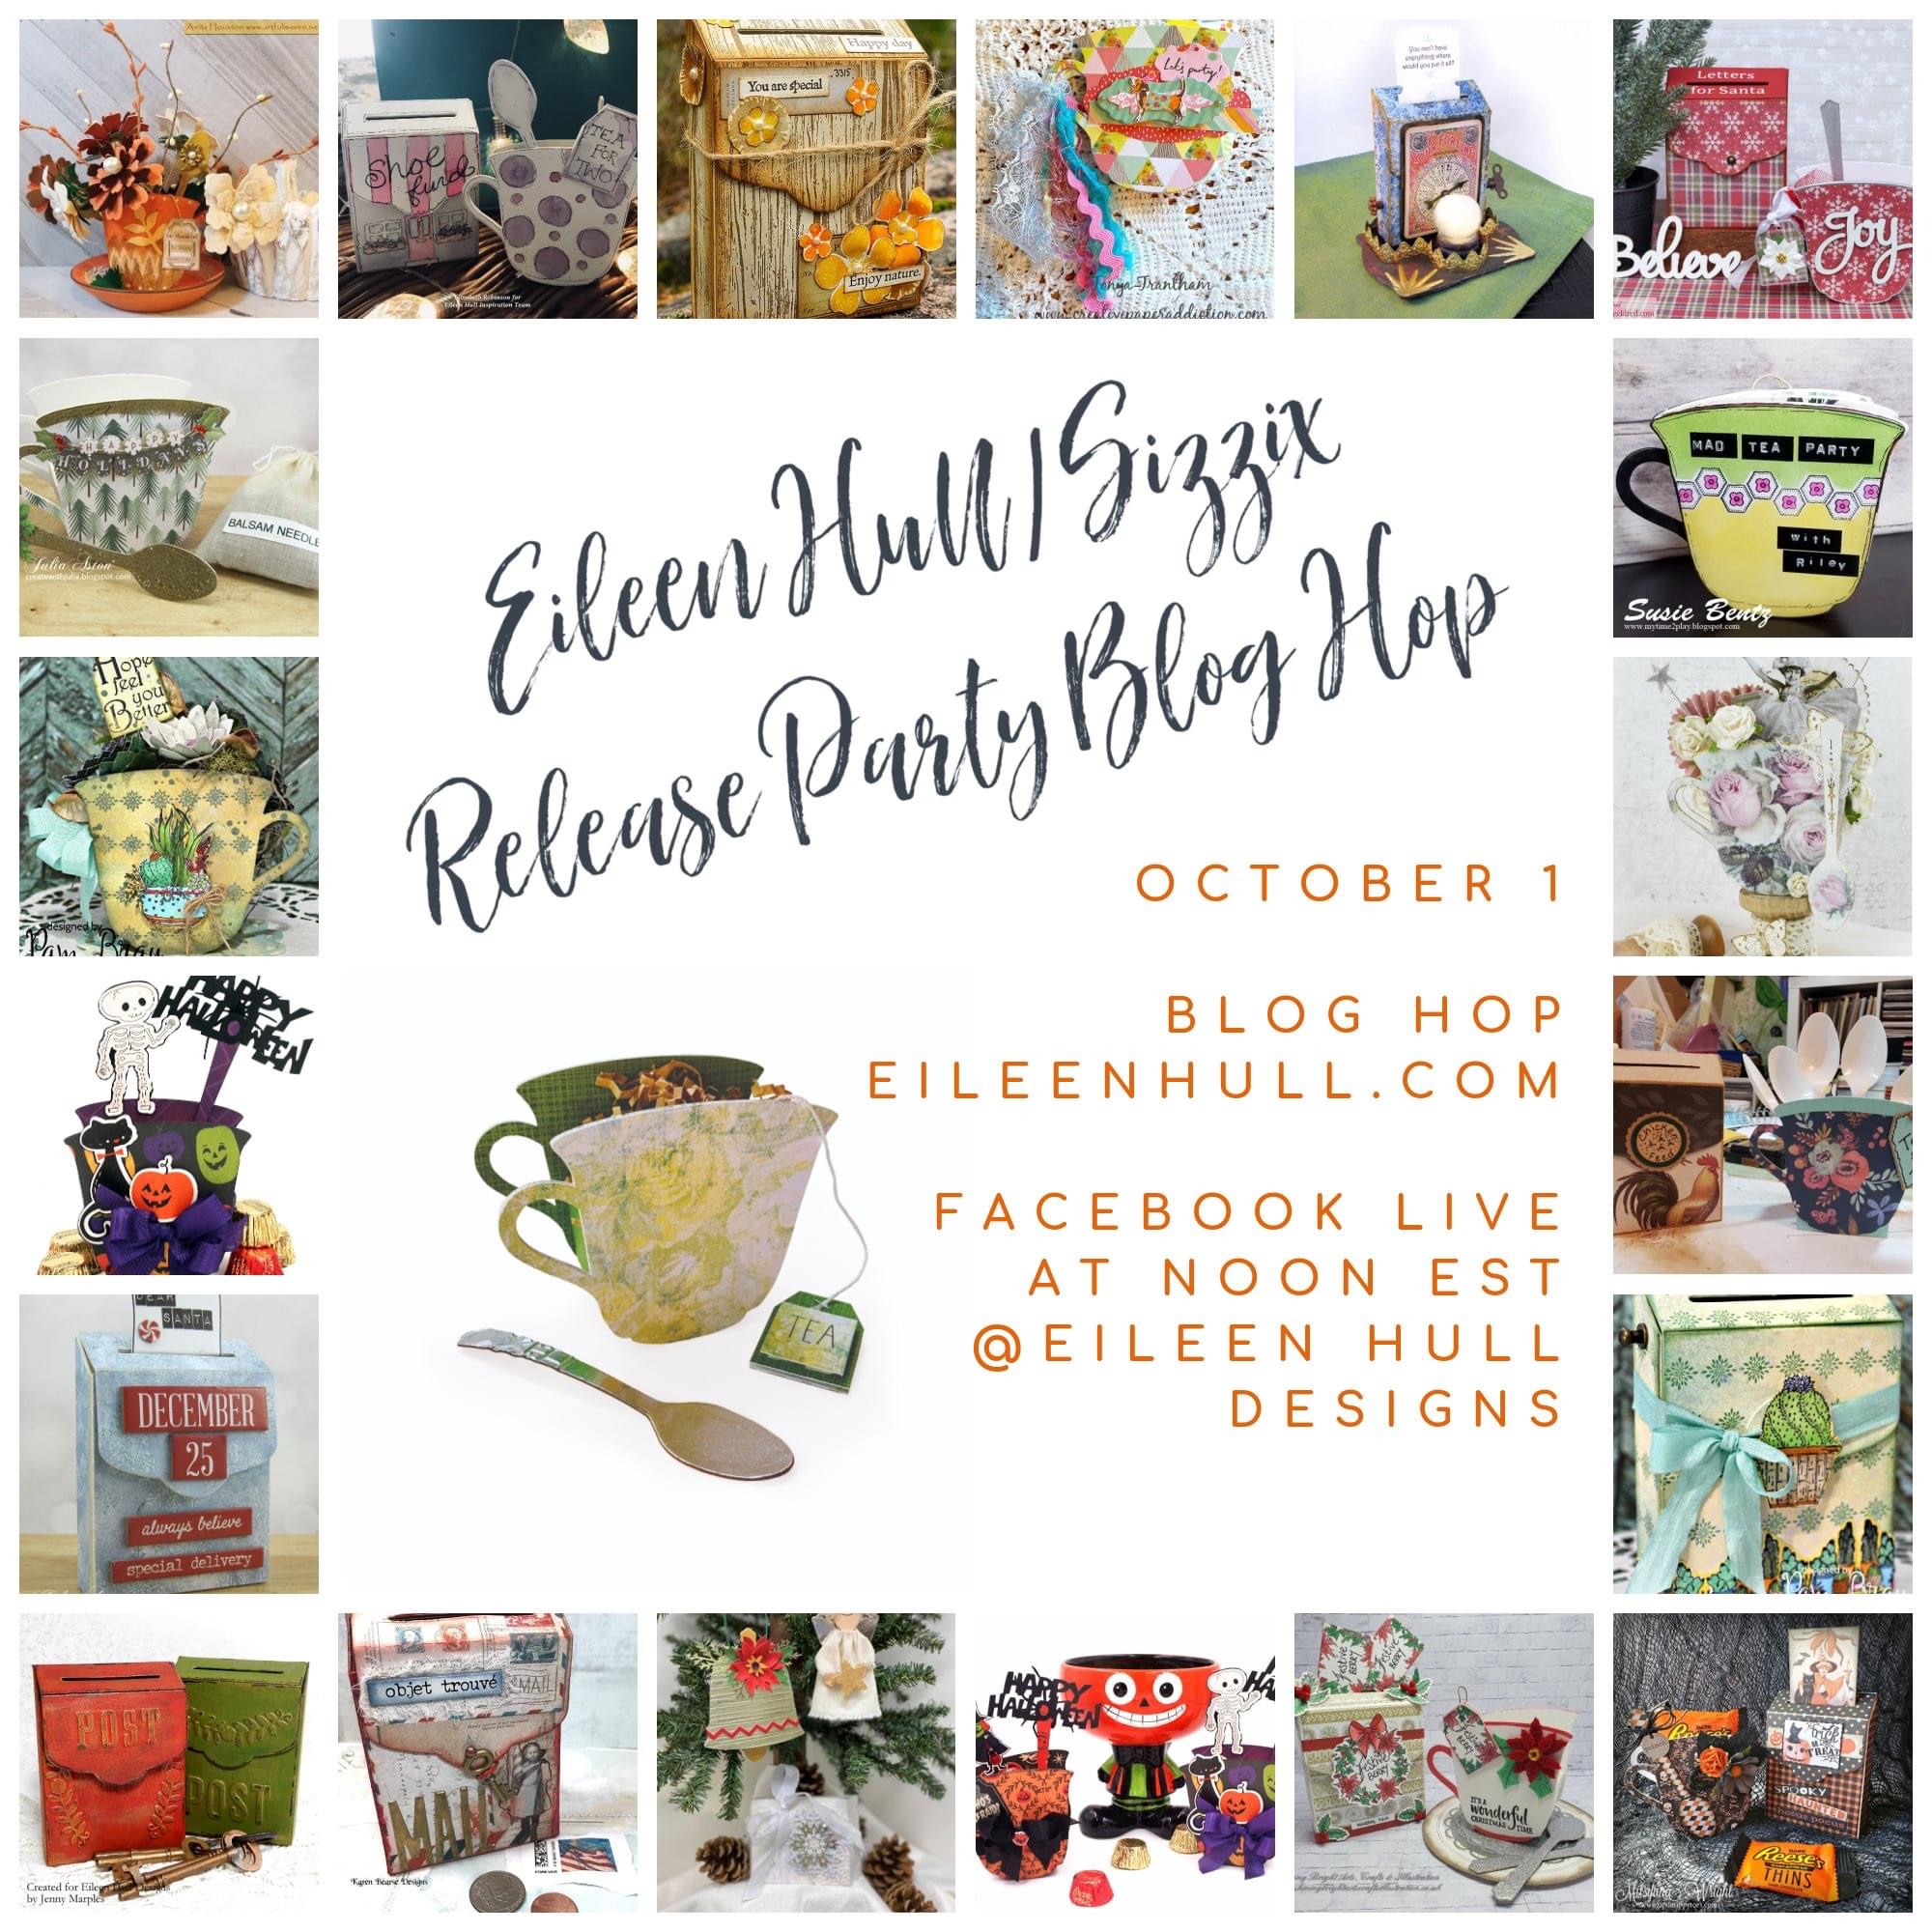
Blog Hop Sharing Eileen Hull Designs Newest Release - Teacup and Spoon Die by Sizzix


Eileen Hull Designs Blog Hop Introducing the New Teacup and Spoon and Post Box Dies.


Hooray- two new ScoreBoards releases from Eileen Hull and Sizzix! Are you ready for a new 3D Bigz L Tea Cup die? Fill it with teabags and other assorted goodies or use the Tea Cup cutout on the front of a card- so many possibilities. Also new is the XL Post Box, a fun little box that goes together in 10 seconds and has a slit in the top to tuck a gift card. You will have fun embellishing in your style to create holiday treats for everyone on your list!

The hop starts at Eileen's blog, and then:

Halloween is my favorite holiday for crafting, there's just something so fun about playing with ghoulish papers and dark images!  Soo...every year I make Halloween Treat treat favors for friends and neighbors.  Eileen's new Teacup and Spoon Die  is just what I needed for this year's treat boxes! Aren't these just adorable?


This is what the assemble teacup looks like if you make up the "stock" version.  Isn't it just adorable?   


For my version, I cut the teacup handle off so that it would be more like a cauldron.  I glued the spoon inside and used it as a post to hold the Happy Halloween sentiment.  I used Carta Bella's Happy Halloween collection for this treat box.


I used an older Echo Park collection for this one, Halloween Town.


Thanks for stopping by today.  Nex on the hop is Lisa Hoel.


Products by Eileen Hull Designs 


Be sure to stop by my blog next week when I'll show you how to make these adorable treats!

Creative Embellishments Challenge for October

It's time for a new challenge on the Creative Embellishments Blog.  This month the challenge mood board is all about spooky!  The twist is to add something with wings to your project.  You can find the challenge entry rules at the bottom of this post. 


I made two Halloween cards for the challenge.


I used a tombstone shaker and walking skeleton from Creative Embellishments for this first card.  I love this skeleton!  I used Distress Stain to add some color to him.  The stain works great as it leaves a mottled effect (doesn't show to much in the photo, it's much better IRL) rather than the flat look you get with paint.

The tombstone shaker is heat embossed on the inside with Ranger Antiquities in Cement.  A tip:  Glue the shaker outlines to the base BEFORE heat embossing as some adhesives don't stick well to the embossing.  I filled the shaker with sequins from Buttons Galore & More -Black Tie Mix.


The twist is to add some thing with wings and I did, on the inside!


On the next card I used a tag in the center and some black fabric rosettes to complete my spooky look.

I stenciled some bats on the tag to meet the twist of adding something with wings.  While that dried I a heat embossed a Halloween ATC coin and backed it with design paper.  I adhered the coin and a sentiment to the tag and glued the whole business to the card base.


I added simple sentiments inside and it's ready to send to someone special!


Other Supplies

Buttons Galore & More Black Tie Sequin Mix
Ranger Antiquities Embossing Powder - Cement


How to Enter the Challenge


The monthly challenge is always the first post on the Creative Embellishments Blog.  Be sure to check it out, you could win a great gift certificate to the store!  Here are the rules:
  • Create a NEW project layout, mini album, tag, card, canvas, etc….as of  October 1st, 2020.
  • It is required that you mention in your blog post that you are playing along at Creative Embellishments together with a link back to our blog page. Please make sure to reference our challenge. Please, no old projects. (meaning projects from previous months that may fit the challenge) Please share only new projects.
  • Please add your entry to the inlinkz tool below to be eligible for the prize. You have until the last day of each month 11:55 pm eastern time to enter.
  • Simply add a link to your FB photo (if you do not have a blog) featuring your challenge entry. Let us know how you were inspired by the photo.
  • Combining with other challenges is permitted.
  • We would love to see you USE AT LEAST 1 OF CE products on your projects but it isn’t required to play along.
  • WINNERS will have 2 weeks to claim their prize. The winner will be announced on this post the day after the challenge ends. Keep an eye out to see if you are a winner.

xoxo


Wednesday, September 30, 2020

It's Time for Halloween Tags!

Creative Embellishments chipboard tags are my favorite tags because they are so nice and big at 5.5 x 10".  There's lots of room for "stuff" and they're big enough to hang as decor. I think I'm going to put this one on my front door!

Shakers are so much fun to put on a tag or card and don'tcha just love this Haunted House Shaker?  I just inked up the chipboard with Distress Oxide Ink in Black Soot and filled with Button Galore & More Spooky Fun sequin mix.


The shakers comes with everything you need to shake shake shake (except shaker material.)  You simply glue 2 shaker outlines to the base shaker.  Set that aside and let it completely dry!  If you don't, some of your shaker material may stick to the glue.While that is drying, glue the acetate to the top shaker outline and let that dry.  Now, and ONLY now, add shaker material to the base, (not too much) and then glue the acetate assembly over the filled shaker.   Caution, DON'T shake it at this point because there is bound to be some oozed glue under the acetate and you don't want your shake material to stick to it.  The name of the game is LET IT DRY!!  I know, you are dying to give it a good shake,  resist the urge and go back to your tag or card and wait for the shaker to dry.


While I was waiting for my shaker to dry, I worked on the tag.  First I  put down 2 layers of design paper.  Then I used the Halloween Stencil and masked spider webbing in the upper and lower corners.  After the masking dried I added a cut-apart and then my shaker.  The Happy Halloween sentiment is two layers of a die-cut from Cherry Lynn dies.  I placed the orange words on black die cut words to make it stand out and then used dimensional foam to pop up the letters.  

Next I added a couple of bats that I heat embossed with Stampendous Aged Black Embossing Enamel.


To complete my tag, I added some chipboard ghoulish pumpkins at the bottom that are simply painted a pumpkin color and backed with black paper to make the eyes and mouths pop.

I topped it off with some ribbon and a fabric flower rosette and venetian lace and roses at the bottom.


Altogether, I find this a fabulously fun tag that's not too scary!

Products from Creative Embellishments


Other Supplies
Pumpkin Paint
Dreamweaver Studio 490 Emblossing Paste - Black


Creative Embellishments Challenge

I hope you'll enter our monthly challenge; it's always the first post on the Creative Embellishments Blog.  You could win a great gift certificate to the store!  Here are the rules:
  • Create a NEW project layout, mini album, tag, card, canvas, etc. as of  the 1st of each month, 2020.
  • It is required that you mention in your blog post that you are playing along at Creative Embellishments together with a link back to our blog page. Please make sure to reference our challenge. Please, no old projects. (meaning projects from previous months that may fit the challenge) Please share only new projects.
  • Please add your entry to the inlinkz tool below to be eligible for the prize. You have until the last day of each month 11:55 pm eastern time to enter.
  • Simply add a link to your FB photo (if you do not have a blog) featuring your challenge entry. Let us know how you were inspired by the photo.
  • Combining with other challenges is permitted.
  • We would love to see you USE AT LEAST 1 OF CE products on your projects but it isn’t required to play along.
  • WINNERS will have 2 weeks to claim their prize. The winner will be announced on this post the day after the challenge ends. Keep an eye out to see if you are a winner.

Tuesday, September 15, 2020

Sweet Baby Layout for Creative Embellishments


Isn't she lovely, my great -niece?  I love this series of photos showing her growth!  I used a Creative Embellishments chipboard 8 x 8 frame to pull the composition together and I think it does that so well!  I heat embossed the frame with American Crafts Zing Mustard Embossing Powder.  I was so happy that I actually had a yellow that matched the Graphic 45 Dreamland paper!

By the way Creative Embellishments has a large selection of frames ranging from big, 12 x 12, down to little frames.  Take a look here.


The detail in the corner scroll work is so pretty and really enhances the frame shape.


Doesn't the scrollwork on the frame look pretty peeking out from under the flowers?


I used one of my favorite Creative Embellishments products, a word border, in the center of the page.  It's from the Small Family Border Word Set. 


Other Supplies


American Crafts Zing Mustard Embossing Powder


Creative Embellishments Challenge

I hope you'll enter our monthly challenge; it's always the first post on the Creative Embellishments Blog.  You could win a great gift certificate to the store!  Here are the rules:
  • Create a NEW project layout, mini album, tag, card, canvas, etc. as of  the 1st of each month, 2020.
  • It is required that you mention in your blog post that you are playing along at Creative Embellishments together with a link back to our blog page. Please make sure to reference our challenge. Please, no old projects. (meaning projects from previous months that may fit the challenge) Please share only new projects.
  • Please add your entry to the inlinkz tool below to be eligible for the prize. You have until the last day of each month 11:55 pm eastern time to enter.
  • Simply add a link to your FB photo (if you do not have a blog) featuring your challenge entry. Let us know how you were inspired by the photo.
  • Combining with other challenges is permitted.
  • We would love to see you USE AT LEAST 1 OF CE products on your projects but it isn’t required to play along.
  • WINNERS will have 2 weeks to claim their prize. The winner will be announced on this post the day after the challenge ends. Keep an eye out to see if you are a winner.

Thanks so much for stopping by,  I really appreciate it!


Tuesday, September 8, 2020

Pocket Notebook for Eileen Hull Designs

Hello friends!  Today I'm sharing a pocket notebook that I made using Eileen Hull Designs XL dies.    It's a great size at  4 1/4" x 6 3/4".

On the front I've used Eileen's Mailable Frame to create a pocket where a photo can be inserted.  A personal photo makes the cover so meaningful.  I used a photo of a Mama Bear looking for her 3 cubs that I took at Katmai National Park in Alaska.  Let me tell you, those cubs were having a blast while Mom was gorging herself on the salmon in the river!!  Later that day Mom got out of the water and took a nap.  Well, while she was napping the cubs were all over a Kubota tractor chewing on the seat and tires.  It was quite funny!


I just know you want to see a photo of those cubs being hooligans so here they are playing on the tractor.  (The tractor was being used as an anchor for a bridge that crossed over the river.  The winds were  so strong that day that they needed to hold the bridge in place.)


There are plenty of tutorials on how to make the pocket notebook so I'm not going to go through that again.  However, let me show you how to make this simple closure.

I didn't want the holes to show up on the front cover so I marked where the picture frame would be and punched a hole just above and just below.  I put eyelets in the holes just because I thought that would give it a finished look.  Note:  I put the front side of the eyelet on the inside of the cover since that is the hole that you will see.  Then just thread elastic through the hole and tie a double or triple knot in the ends. 

This is the inside front cover.  You can see that the elastic wraps over the top and bottom of the cover and is knotted on the inside.


To make the frame, I covered a piece of light weight chipboard with cardstock and ran it through my Vagabond die-cutting machine.  I cut the "V" shaped tab off the bottom and trimmed 1/8" off each side.  Then I just folded it up, glued on the outer edge of each side, and then adhered to the front of the notebook, allowing the right side to "hang" off just a little bit.


Here you can see the frame in place on the cover.  I added design paper over the cardstock.  You can also see that the holes are barely visible and once I added flowers they can't be seen at all.

On the back cover I am using Eileen's Red Liner Tape to hold the two covers together..  I like to use this tape when adhering my covers as it is really strong and holds well.  This is the basic cover design.  Now just need to add embellishments and some design paper.


Be sure to watch this video flip through to see all the details of the signature and a few more hints about putting this all together.


I also like to cover the spine after stringing it so that the strings don't show on the outside. 


Eileen Hull Designs by Sizzix Used


Thanks so much for joining me!  Be sure to visit Eileen's blog to keep up with all the happenings and to see what the rest of the design team has done.

Join us in the Eileen Hull Fan Club on Facebook, there's always lots of great things to see and learn there.


Tuesday, September 1, 2020

New Challenge at Creative Embellishments

Mood Board

Here it is September, already!  That means it's time for a new challenge at Creative Embellishment.  Here's the mood board,  I am drawn to that rusty truck!  The twist this month is to use rust on your project somewhere.  See the challenge entry requirements at the end of this post.


My Take on the Challenge

The old truck in the photo reminded me of this photo of my Dad taken after he wrecked his father's car, I think he rolled it in a ditch.


I used the Steampunk Gear Panel behind the photo to give it emphasis.  The gear panel is heat embossed with Stampendous Aged Copper.  The panel is 6 x 6, so it works well on layouts and cards.


On the left I used the Clock Corner.  This is a really cool Steampunk piece.  Gears and such always work well with masculine layouts, it doesn't have to be Steampunk.


The twist this month is to use rust so I used Prima rusting paste on some loose gears.  Don't you just love this effect, it looks so real!


How to enter the challenge

The monthly challenge is always the first post on the Creative Embellishments Blog.  Be sure to check it out, you could win a great gift certificate to the store!  Here are the rules:
  • Create a NEW project layout, mini album, tag, card, canvas, etc….as of  September 1st, 2020.
  • It is required that you mention in your blog post that you are playing along at Creative Embellishments together with a link back to our blog page. Please make sure to reference our challenge. Please, no old projects. (meaning projects from previous months that may fit the challenge) Please share only new projects.
  • Please add your entry to the inlinkz tool below to be eligible for the prize. You have until the last day of each month 11:55 pm eastern time to enter.
  • Simply add a link to your FB photo (if you do not have a blog) featuring your challenge entry. Let us know how you were inspired by the photo.
  • Combining with other challenges is permitted.
  • We would love to see you USE AT LEAST 1 OF CE products on your projects but it isn’t required to play along.
  • WINNERS will have 2 weeks to claim their prize. The winner will be announced on this post the day after the challenge ends. Keep an eye out to see if you are a winner.


Creative Embellishments Chipboard Used:


Other:

13 Arts Victoriana paper collection (Thanks Sandi!)


LinkWithin

Related Posts Plugin for WordPress, Blogger...