

Aren't these so sweet for Valentine's favors? Just fill them up with chocolate and you will surely please the recipient!
Here's another way you can use these drawers, stack them up. You can view the full post on this drawer stack here.

Tutorial
Supplies
1 sheet 12 x 12 paper
Sizzix Little Sizzles - 6" x 13" Mat Board Pack, 6 White Sheets or Lightweight Chipboard (More about this in the tutorial)
Sizzix Adhesive Sheets - 6" x 6", Permanent, 10 Sheets
Ink
Strong Quick Drying Adhesive
Embellishments
Step 1:
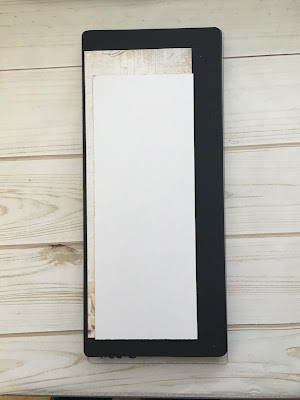
Cut 12 x 12 paper in two pieces, each 6" x 12". Adhere the paper to a similarly sized piece of chipboard using something like Sizzix Adhesive Sheets. If you want your drawers to have design paper inside, cover the chipboard on both sides. Now place the paper with the outside design down on the die and run it through your die-cut machine.
Step 2:
You should have these pieces. Note: I cut an extra bottom.

 Step 4:
Again, carefully fold the drawer assembly (the one with the notch cut out) on the score lines and glue the tab on the inside.


Strong Quick Drying Adhesive
Embellishments
Step 1:
Cut 12 x 12 paper in two pieces, each 6" x 12". Adhere the paper to a similarly sized piece of chipboard using something like Sizzix Adhesive Sheets. If you want your drawers to have design paper inside, cover the chipboard on both sides. Now place the paper with the outside design down on the die and run it through your die-cut machine.

Step 2:
You should have these pieces. Note: I cut an extra bottom.

Step 3:
Carefully bend at the score lines and fold the piece on the left into a rectangle using strong glue to secure the tab on the inside. Clothespins are great for holding it together while the glue dries. This forms the outer body of the drawer set.

Again, carefully fold the drawer assembly (the one with the notch cut out) on the score lines and glue the tab on the inside.

Step 5:
Now here's the important part. If you make this from matboard or medium chipboard, you have to glue the box bottom on the inside of the box so that the tabs are on the outside of the box bottom. If you glue the bottom such that the tabs are on the inside, the drawer will not fit into its slider.
In this photo the tabs are glued on the inside. I used lightweight cardboard, similar to a cereal box or shirt packaging, to make this drawer. Using this lightweight cardboard, allowed me to glue the bottom of the box such that the tabs are inside the box.

Step 6:
Remember that second drawer bottom from Step 2? I glued it inside the drawer, so that the drawer would have a nice finished look inside.
Slide the drawer into its sleeve and that's all there is to it. Now you can embellish however you wish and you've got such a fun little box that makes a great party favor.

Thanks so much for stopping by today. Keep an eye on Eileen's blog to see more great projects from the Eileen Hull Inspiration Team using te Stacking Drawers and Treasure Box dies.

These are beautiful Maggi! Great tips on making this just right and making it fit to slide. TFS! :) Have a wonderful day! Woof woof!
ReplyDeleteThanks so much Roxanne!
ReplyDeleteWhat lovely treat boxes for Valentines Day Maggi! love the papers you used and the beautiful flowers on top!
ReplyDeleteThank you so much Julia!
Deletelove these Maggie- well done!
ReplyDeleteThanks Karen, hope you're doing ok!
DeleteMaggie, I love these and I don't want to leave a negative comment, but I don't see any other way to contact you. The drawers don't look like they fit well - there seems to be gaps all around them. I'd really like to make them, but I want them to fit snugly. Can you please comment on this?
ReplyDeleteHello Carol, the striped box is made with cereal box weight cardboard, so there is a little more room but still snug enough that the drawer will not slide out on its own. The one with love on the drawer is constructed with Sizzix Mat Board and the fit is quite snug. If it were any tighter, you would not be able to slide the drawer in and out.
DeleteLove these Maggi, so perfect for Valentine's treats! Hugs, Anne xx
ReplyDeleteThank you Anne!
Delete