Pages

Showing posts sorted by relevance for query garden journal. Sort by date Show all posts

Monday, July 25, 2016

Creative Embellishments Garden Journal

This is the time of year when I have steal moments here and there to be creative because I am so busy with my garden.  For several years now, I have wondered, how many jars of salsa did I make last year, how many pickles etc.  So I'm working away in the kitchen and not having a clue how much of anything I might need or how much we consume in a year's time.  I need to get organized.  

Idea!  What I need is a garden journal to keep up with what I'm doing.   Now I can I keep up with how much I plant and where each year along with the yield.  I have room to make notes about any problems encountered and also to note the type of plants I purchased and even when I planted them.

So I recycled an old 3 ring binder for my journal and covered it with Graphic 45's DIY paper which was perfect as it is large enough to cover a notebook without having to piece it.  I used some images from Graphic 45's Home Sweet Home collection to decorate the front of my journal but what I love most on my cover are the Creative Embellishments chipboard veggies that I painted.  I layered up the vegetables along with some Petaloo blooms and now I have pretty but useful journal to record all the goings on in my garden.

I just love the detail etching on the veggies;  look at that carrot, it looks so real to me.  
  I used a combination of acrylic paints and Lindy's mists to color the various vegetables.


I love the kernels that are etched on the corncob, it looks so realistic!  These pieces would be perfect for a scrapbook project about your garden or to decorate a card or tag for your gardening friends.


Inside the journal I covered the divider pages with design paper.  I kept it simple on purpose as this binder is going to get a real workout!
Supplies

Graphic 45 DIY Craft Paper-Bicycles and Polka Dots
Graphic 45 Home Sweet Home Collection
Petaloo Botanica Blooms x 4 
Petalooi Burlap Blossoms x 4 Pistachio
Petaloo Burlap Blosssoms x 10 Pistachio


Thanks for visiting today!  Be sure to stop by the Creative Embellishments blog and don't forget to enter our July challenge.  You still have today and tomorrow to enter the challenge and maybe you'll be the lucky winner of a $50 gifrt certificate to the CE store.


Saturday, November 10, 2018

Saturday Showcase: Stamperia Garden Journal at The Frilly and Funkie Blog

Spotlight on Stamperia's Garden Collection

Join me over at The Frilly and Funkie Blog for the  Saturday Spotlight!  Today the spotlight is shining on Stamperia's Garden collection, AND I've got a great tutorial for you.  These papers are colorful and filled with delightful garden images that just might entice you to do a little fussy cutting.  I've created a garden journal that is simple to make, but oh so lovely, and, since it's the time of year for gift giving, this journal is perfect for the gardener's in your life!


Inside journal page:

The Stamperia Garden Collection can be purchased at The Funkie Junkie Boutique along with many other Stamperia collections.


Sunday, August 5, 2018

A Delightful Spiral Bound Mini Album with Carta Bella Spring Market

A Garden Mini

Spiral bound handmade Spring Market mini album
Don't you love the sentiment on the cover of this mini?!  Yes, flowers are a must, they make me happy!  I made this mini, completely from scratch.  The covers are medium weight chipboard and the inner pages are a nice weight cardstock.  I used my Cinch to do the spiral binding, it's quick and easy and makes such a nice finished look.


Video Tour

Sit back and enjoy as I walk you through the many interactive pages in this journal.  There are flip pages and pocket pages, tags and hidden spots that you'll want to see!


All the Details
Spiral bound handmade Spring Market mini album
This Carta Bella collection, Spring Market, is just so pretty.  It has so many cut-aparts and great sentiments.  Let's take a look inside.

Spiral bound handmade Spring Market mini album
I started the inside cover with a simple cut-apart, a border strip and a boot sticker. Those boots are so stinkin' cute.  Truth is, that's why I bought this collection!  Wait 'til you see the boot print page. Cuteness overload!

On the right side I've created a little pocket that has a mini file folder tucked in.  I die cut that with one of my old favorite Sizzix dies. it dates back to 2006-07.  It was made to fit the original Sizzix machine so you know how old that is!
T

Spiral bound handmade Spring Market mini album
That cute little tag on the left actually flips out so you can hide some photos or journaling.  On the right side, just some pretties from the collection.  I adore the watering can!


Spiral bound handmade Spring Market mini album
The page on the right has a surprise flip, that sentiment cut-apart flips to the left to reveal a spot for photos.

Spiral bound handmade Spring Market mini album
The page on the right flips out so that there are 3 equal sized panels.  There's lots of room for your photos here!


Spiral bound handmade Spring Market mini album
Turn the page, and you'll find a delightful little pocket with an ATC tag in it.  On the right, is another flip out page where you can add photos.

Spiral bound handmade Spring Market mini album
The next set of pages has a flip out on the right .

Spiral bound handmade Spring Market mini album
On the left is a cut little mason jar belly band with  a nice sized square tag tucked in.  On the right is a pocket with two smaller tags.


Spiral bound handmade Spring Market mini album
More flip pages!  AND on the right is a pocket page with a nice sized tag tucked in the pocket.  the ribbon is the top of the tag.

Spiral bound handmade Spring Market mini album
When the left page is flipped out, a nice surface is revealed that would be great for photos.  Now look at the boot print, isn't that just adorable?

I think I want to get on the bicycle on the left page and ride through the meadow!   The right page has another pocket with a file folder tucked in.

Spiral bound handmade Spring Market mini album
The right side has a large pocket with a tag in it.  There are so many uses for large pockets, would be a great place to tuck in seed packets if you are using this mini for a gift.


Spiral bound handmade Spring Market mini album
On the left is a waterfall photo feature.  There are lots of surfaces there for photos!  The right side is really nifty, first you've got a nice pocket to tuck in photos.  Then, turn that page and you'll find another full size page that also flips, it's a 3 page flipper!  LOL!  AND it's that fabulous boot print paper!!  Win win all around!


Spiral bound handmade Spring Market mini album
Last two pages, the page on the right sports a small pocket and tag and the page itself, is also a pocket page and there's a much larger tag tucked in the pocket.


Spiral bound handmade Spring Market mini album
View of the opened mini from the back.  There are 12 pages in this mini and that's not counting the flip out pages, so that's 24++ surfaces to add photos, momentos and journaling!

Whew, this is a long post but I want to share all the pages with you so you could see how adorable this collection is!

Supplies

Carta Bella Spring Market Collection Kit
Carta Bella Spring Market Ephemera
Black Cardstock
Hug Snug Pink Salmon Seam Binding
Graphic 45 ATC, Square and Regular tags and dies
Petaloo flowers

Looking for a garden journal for the gardener?  Check this out, it's my personal gardening journal that I use to keep up with what I plant and annual yield from year to year.

Thanks for visiting and making it all the way through this long post!

Maggi

Tuesday, July 18, 2017

A Cook's Notebook

 Yep, it's another traveler's style notebook, but this one is for a cook.  It's bright and bold, and has lots of my favorite color in it, RED!  I chose red because it is a hot summer color and more on that in a minute.
 I used Sizzix's Heartfelt Journal designed by Eileen Hull to cut the cover and papers from Graphic 45's Home Sweet Home collection.  The cover is cut from chipboard and I used matte medium to adhere the papers and seal them so that the cover could be wiped clean.  I assure you that I will slop something all over any cookbook that I am using!  Layers of design paper, pretty lace adorning the spine along with knife and spoon dangles (the fork is MIA apparently!), flowers and a gingham bow all work together to make this such a pretty cover with a homespun look.

I am entering this in the Frillie  and Funkie Blog Good Old Summertime Challenge that my friend, Kathy Clement is hosting.   The challenge is to create a project that shows what you love best about summer using summer colors (remember why I chose red?)  Well I must confess, I do not like summer.  I hate hot weather and I retreat to the AC in the summer.  In fact the neighbors have inquired of my husband if I was still alive.  Ha ha, he tells them if they will look in the garden at 6 am, they will find me.  Yep, I can be found most mornings in the garden up until maybe 9 am and then I am in the house for the day, as in enjoying the air conditioning!  However, in the spirit of meeting the challenge, I will tell you that I do love my garden and that is all that I love about summer.  The reason I love my garden is because I LOVE all the fresh produce that I harvest all summer long.  Baby butter beans, southern peas, potatoes, squash, zucchini, green beans, tomatoes, blue berries, peppers, jam, pickles, relish, salsa, I freeze and/or can as much as possible all summer long.  Eating all that "good stuff" is what I love about summer!


Inside the front cover, I wish you Bon Appetit (diecut with Cheery Lynn Designs die)!  On the right you can see the cover of the first of 3 signature inserts.


Inside the back cover.

I made 3 signature inserts for my notebook. 
  One has a collection of some of my go-to recipes.  They are mostly good old fashioned southern type casseroles.
I fussy cut some things from the design paper to decorate my pages.
Back cover of the 1st insert.


 The 2nd insert has just lined pages in it so that you can record your own recipes.

Pocket on the left to hold collected recipes, maybe torn from a magazine or jotted down on scrap paper.  
Back of the insert cover.

And the 3rd insert has pockets for recipe cards and I'll add some cardstock for saving photos.

On the left I've tucked in some blank recipe cards and on the right I made some tags that can be used for recipes or notes.


These journals are so much fun to make, I am loving them!  The die for this journal is selling like hotcakes and they are hard to find.  The Funkie Junkie Boutique had them in stock at the time of writing this post, so check there if you're looking for this die.

Ok I am getting this in just under the wire as the challenge ends tonight!  Better late than never I say. The Frillie and Funkie Blog has great fun challenges, why not check it out sometime?


Tuesday, January 1, 2013

My vegetarian dog & the January Flying Unicorn KOM

I really loved working with the January Flying Unicorn KOM, it is so fun and playful, its perfect to pull you out of the winter blues!
 
 
Here we have the silly Chena picking cherry tomatos! If you look closely in the first photo you can see a tomato in her mouth.  We have to fence our garden to keep the dogs out or they would completely strip the vines!
 
Journal:
I’ve never seen a dog that loved vegetables as much as Chena!  The 1st year we had a garden, Chena learned to take her snout and root through the bean vines and pull off the mature beans. Tomatoes?  Well just like me, she only picked the ripe ones! I’m not sure which is her favorite, green beans or tomatoes.  Then there was time I planted sugar snaps on the fence.  I’d see Chena running across the yard with a long pea vine stringing out behind her; then she would stop and eat the whole thing!  We had to fence the garden to keep her out; so then, she would sit at the edge of the garden, whine and look at me with those sad puppy dog eyes!


Supplies from the kit:

Patterned paper:  BasicGrey Serenade collection:  Base-york, orange circle-Parlor, beige circle-avalon, circle under small photo-chemise, sweet robin from the BasicGrey packaging
Flowers:    BasicGrey diecut flowers, Bo Bunny Natural Earth Daisy,
 
Supplies from my stash:
Diecuts and punches: DA0395 Birdbath, DA0640 Cherry Blossoms, Martha Stewart Laurel Leaf & Deco Flower punch around the page
Flowers:   Petaloo Florettes (I think Sept kit), Prima Bel Canto (Dec KOM)
Mist: TA Glimmer Mist Bronze, Tattered Leather, Lindy’s Cattail Copper Brown
Paint: Liquid pearls bisque, white gesso
Unknown: Burlap


Monday, August 2, 2021

Cherub Garden Tag for Creative Embellishments

 I like to use large tags as my creative "playground".  It's sort of an art journal for me.  I just can't do traditional art journals, I draw a blank every time I open one.  But, give me a tag, and the mojo sometimes flows. 

This is definitely one of those pieces that didn't have a plan.  I started by adhering a piece of 49 and Market design paper to a large tag and then though hmmm, those Little Birdie succulents would look good with this paper.  Then I grabbed a harlequin stencil and stenciled on a harlequin pattern. 


Well then I remembered those harlequin chipboard pieces and thought they'd look nice too.  I heat embossed them with Stamependous Shabby Chic embossing powder.


Then I added my succulent garden.  Love these from Little Birdie Crafts.  I've had these little Prima resin cherubs forever.  Dont ask me why, it just popped in my head to add cherubs and call it a cherub garden.


So I thought, if I'm going to have cherubs, I need an angel/cherub kinda word, hence peace.  Works for me.  😄


Well. that's how one thing leads to another!  Hope you've enjoyed this little trip through my creative process!  Thanks for joining me.

Supplies from Creative Embellishments

Large Tags


HOW TO ENTER THE CHALLENGE

Be sure to check out the monthly challenge on the Creative Embellishments Blog because you could win a great gift certificate to the store! To find the monthly challenges just click on the pink search icon on the upper right side of the page and enter “challenge” in the search box and the challenges will pop up.


 Here are the rules:

  • Create a NEW project layout, mini album, tag, card, canvas, etc….as of  August 1st, 2021.
  • It is required that you mention in your blog post that you are playing along at Creative Embellishments together with a link back to our blog page. Please make sure to reference our challenge. Please, no old projects. (meaning projects from previous months that may fit the challenge) Please share only new projects.
  • Please add your entry to the inlinkz tool below to be eligible for the prize. You have until the last day of each month 11:55 pm eastern time to enter.
  • Simply add a link to your FB photo (if you do not have a blog) featuring your challenge entry. Let us know how you were inspired by the photo.
  • Combining with other challenges is permitted.
  • We would love to see you USE AT LEAST 1 OF CE products on your projects but it isn’t required to play along.
  • One lucky randomly drawn entry will get a $25 gift voucher to our store. (Shipping not included)
  • WINNERS will have 2 weeks to claim their prize. The winner will be announced on this post the day after the challenge ends. Keep an eye out to see if you are a winner.


xoxo Maggi


Saturday, March 20, 2010

More vintage scrapping

I'm on a roll!  Did these 2 pages using the fabulous Feb kit from Pages in Time


Papers used include 7 gypsies - Walk and Pandora, Graphics 45 (blue from On the Boardwalk collection), BasicGrey Lucky, Prima Firefly, Adornit tags. 

This is my mother's side of the family.  The journal is long, but here it is if you want to read it:
I have so many fond memories of times spent at my Grandparents house. We were a big family and it was so fun having so many aunts, uncles, and cousins. Aunt Elsie didn’t have any children and so she, in particular, really doted on us. Her husband, who we called either Uncle Alex or Uncle Everett, would bring us silver dollars or 2-dollar bills and of course, we loved that!
Papa Greene had a country store and in the summers, we would play kick-the-can or hide and seek down by the store with the other children who came to the store with their folks. The store was a meeting place and you’d always find someone there sitting on the bench dipping snuff and talking about their crops.
Papa Greene was such a fun grandpa, he really loved his grandchildren. When we’d leave from a visit, he’d give each of us a small brown paper sack filled with penny candies. He was never too busy for us.
Mama Greene loved us too but she was always busy. In the summers, she cooked all the time as she made dinner (which is lunch to most of us) for the tobacco hands. I remember the help coming in from the fields so well. There was a big dipper out by the well; they’d all go there and have a big drink of water. Then on the porch, she had several wash pans set out, one to wash the tobacco gum off their hands and another for rinsing. Now they were ready for dinner! Dinner was usually lots of fresh vegetables from the garden and cornbread. She always had snaps – those are green beans that she always cross cut after cooking so that they pieces were about a half inch in size. My favorite dish was Grandma’s potatoes, which were chunks of potato in a cream sauce that she made from the cooking broth and butter. They were so good and I make them now but they aren’t as good as Mama Greene’s. There might have been a little pork but usually there wasn’t much meat. Of course, no meal is complete without dessert and she always had one.
Before we ate, she always announced what was for dinner. I can still hear her in my head, “Now there’s Irish potatoes, snaps…”. For years, I thought she was saying ash potatoes! She was distinguishing between Irish potatoes and sweet potatoes.

When she wasn’t cooking, she was working in the garden or canning and freezing for the rest of the year. There was always something from the garden that needed to be shelled. Sometimes we’d sit outside under a big shade tree and shell field peas and butter beans.

Sunday, March 24, 2013

Bo Bunny Prarie Chic and ScrapFx chippies

Have you taken a good look at the ScrapFx chippies? They are seriously wonderful, very detailed and sturdy and they are just perfect for embossing with one of my favorite product, Stampendous aged embossing powders.  On these two layouts, I've combined ScrapFx chippies with Bo Bunny's great new collection, Prairie Chic.

For this first LO I used Garden as my base paper and cut it to put the two edge patterns together and made the swirly pattern on the right side of the page.  I wanted to bring out the subtle greens in the background so I stamped some flourishes with an old Heidi Swapp foam stamp near the bottom and then liberally sprayed the page on the left with Lindy's Moonshadow mist.

The photo is of me and my big brother when I was 3 1/2 years old.  Ahhh, every little girl needs a big brother!


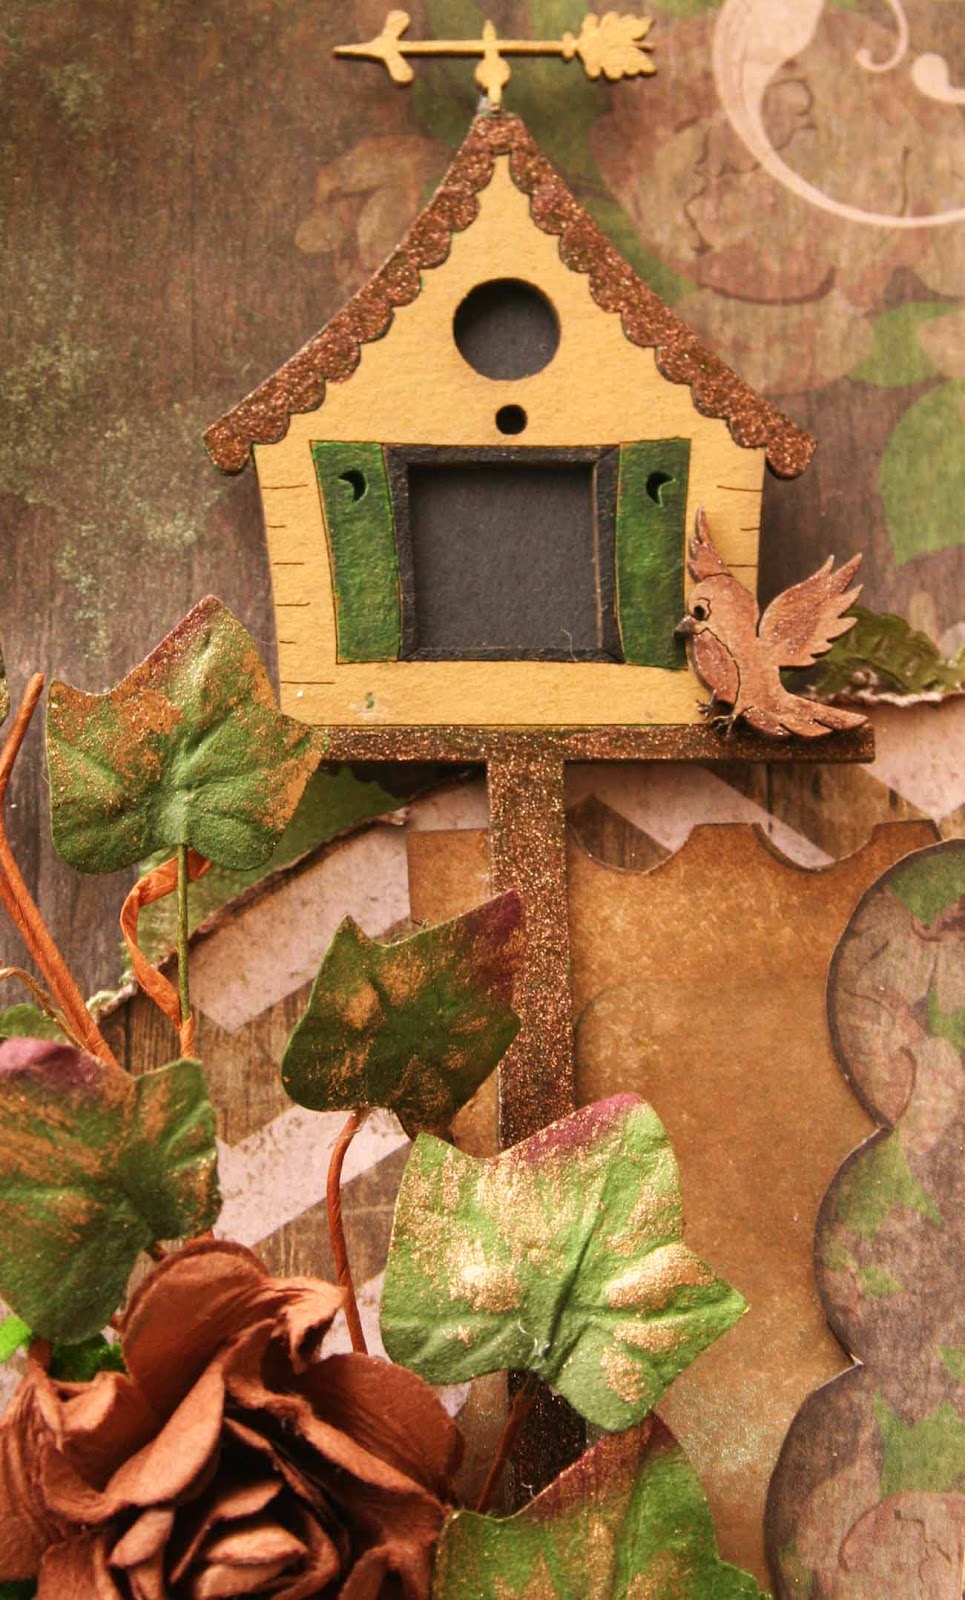
I am loving ScrapFx chippies and here I've used one of my favorite flourishes ever behind the photo. I embossed the chippy with Stampedous Aged Hunter Green Embossing Enamel. I love the this stuff! The birdhouse is painted with Viva Decor paints.


Supplies:

Patterned paper:  Bo Bunny Prairie Chic:  circle-Chevron 14101668,  base-Garden 14101673, license plates fussy cuts-Prarie Chic 14101667, photo mats-Stonewashed Denim 1410676,die cut border stickers-Combo Stickers 14103681 (Currently this is out of stock at the Flying Unicorn)
Letters:  Sizzix diecut  Tim Holtz Vintage Market 
Chipboard:  ScrapFx flourish and birdhouse - new chippies will be added to the store any day now!
Flowers:    Petaloo Cantebury Rose Brownie, FUL Victorian Garden beige; Petaloo Canterbury Ivy leaf vines with gold
Ink:  Distress walnut stain
Embossing enamel:  Stampendous Aged Hunte
Other:  7 Gypsies journal ticket
Unknown:  Burlap,straw mesh


On this layout I was trying my hand and blending the photo into the paper in the style of our guest designer this month, Solange Marques.  After cutting my photo to fit inside the ScrapFx chippy circle,   I  painted some white gesso in the upper right corner, then I glued down the photo.  I added some molding paste and used a credit card to blend the edge of the photo into the molding paste.  I used Claudia Helmuth charcoalblack and traditional tan to stipple additional leaves on the tree, thereby extending the photo into the background. I covered the photo and then misted with Lindy's Frosted Forget me nots, stamped on some script with a Kaisercraft stamp and then added the ScrapFx chippy.

On the bottom left, I used a new Prima Lattice Stencil (6 x 6) and molding paste to create the lattice pattern.  After it dried I misted it liberally with Lindy's Edelweiss Moss Green.


I cut up a Prima Bretton Alyssa vine to layer around the large Manor House bloom.


Finally I fussy cut some banners from the paper and added to my floral cluster.

Supplies:

Patterned paper:  Bo Bunny Prairie Chic:  Base-Chevron , yellow-Stonewash Denim , Stickers Chipboard:  ScrapFxchippy
Flowers:    Prima Bretton Vine Alyssa 552640, large flower Manor House
Embossing Enamel:  Stampendous Aged Ivory
Paint: white gesso;  Claudia Helmuth charcoal black, traditional tan


LinkWithin

Related Posts Plugin for WordPress, Blogger...