Pages

Wednesday, March 27, 2019

March Madness Challenge at The Frilly and Funkie Blog

Challenge Theme

Time for a new challenge at the Frilly and Funkie Blog and this one is so fun!  It's all about March Madness ans Suzz is our hostess!  She says, "Don't be afraid, the challenge isn't going to require you to use basketball inspired images. Instead I want you to be inspired by Alice in Wonderland. I started from this quote of a conversation between the Mad Hatter and Alice: The Mad Hatter asks Alice: "Have I gone Mad?" and Alice replies "I am afraid so. You're entirely bonkers. But I'll tell you a secret. All the best people are." The challenge is to take any idea or concept from this wonderful tale to inspire your project. There are so many wonderful bits or pieces to be inspired by like the Queen of Hearts, the mad hatter, the looking glass, tea party or Alice herself. The possibilities are endless. Anything can be your inspiration but make sure you reference what inspired your art from the story!"

My Take on the Challenge

My inspiration is simply the Mad Hatter, oh how I love to make hats and so I crafted this funky far-out hat for the Mad Hatter to wear.  I used Stamperia's new collection, Alice, to make this colorful hat.  Now isn't that just the perfect collection for this project!!  You can find it at The Funkie Junkie Boutique but better hurry, because, Stamperia papers sell out pretty quick.


The Flowers

I made the largest flowers on this hat using one of my favorite flower dies, Sizzix Alterations Tattered Florals.  I just love these pretty flowers!

I made two of them, and then I added some of Graphic 45's gorgeous lush Triumphant Red Roses.  They come in a  pack complete with rosebuds, leaves and spirally thingys!   (Thingys, that's a technical term, 😃)

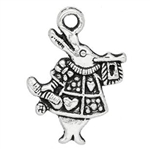
Take a look at the White Rabbit charm dangling, isn't that just the cutest!  The Funkie Junkie Boutique has them in packs of 6.  I imagined that the Mad Hatter needed some scissors so I have a pair of those dangling from this mad hat too.


Every seamstress needs buttons so there are a couple of those nestled in there too.


One more view of the White Rabbit, I think he's heralding the handmade flowers!  😉  I misted them with Lindy's to give them lots of sparkle.


How to Enter the Challenge

Create a vintage or shabby chic project  and link it up to the Frilly and Funkie Challenge, March Madness.
The Design Team will choose their top four picks, with the winner being invited to be a guest designer in one of our Frillie and Funkie challenges. The other three winners will receive Top 3 badges to display on their blogs. Everyone who enters and follows the rules will be entered into a draw to have the chance to win a $25 spending spree at The Funkie Junkie Boutique.

Thanks so much for stopping by today.  Be sure to take a look at the creations of my talented teammates, you can see their creations here, at the Frillie and Funkie Blog.

Supplies Available from The Funkie Junkie Boutique


Thanks for stopping by!

Tuesday, March 19, 2019

A Wrap Journal by Eileen Hull Designs Celebrating Spring

Hello friends!  It's nice to have semblance of normalcy in my life again!  We just moved from North Carolina to Tennessee and what a job that was.  Since mid-January, all I have done is pack and then unpack boxes.  I've moved more times in my life than I can possibly count (I am an Army brat so moving has always been part of my lifestyle) but this move was the hardest ever!  I think it has something to do with my rapidly advancing years.  😅

Finally, I found a few crafting supplies and was able to create this fun spring journal with Eileen Hull Designs Wrap Journal.  Ha ha!  Ok crafting in my new studio was a challenge.  So....here's how that goes, first I thought what I wanted to do, yes, ðŸ’¡ make a wrap journal.  So then I spent 2 hours looking for my wrap journal die!  I was about to really panic when I couldn't find any of my XL Scoreboard dies when I spotted  2 Vagabond boxes.  At that point I realized that I only have one Vagabond because the first one broke and I threw it away.  Hmmm,now wouldn't that Vagabond box be a great box for packing XL dies?  Yes, aaaahhhh, there they were, all my wonderful, much loved, Eileen dies.  Whew, crisis averted!  Well repeat this process for nearly every supply I wanted to use...you get the picture?  Creating time - 3 hours,  looking for stuff time - 6 hours.  Sigh,  I hope to get my studio organized soon!

The Journal

So how did I make this fun, colorful quirky journal?

I started out by creating the background.  That was a simple process, I just grabbed some inks and paint and began blending in patches of color.  There was no rhyme or reason to how I did this, I just made splashes of color.


Next I rummaged around and found a few stencils and I used those to create patterns on the background.  I let all that dry and then stamped the floral/mushroom image with a fun new Dylusions stamp that I just got.  I liked how that looked, so I kept right on stamping and added that heart border.


I also just got Seth Apter's new Baked Texture embossing powders and wanted to try those out so I stamped on some embossing ink and used Blizzard Baked Texture.  Oh I loved the addition of white to offset the bright colors.

And then to give it some real wow, I die cut some flowers with Eileen's Thinlit flowers die, added some doodling to the petals and popped them on the cover.  Don't they look great and they add dimension AND character!

The Closure

I'm always trying to think of ways to hold my journals closed as the wrapped bands don't always work for me because I usually have flowers and other 3D doo-dads on my covers that get in the way of a ribbon or elastic wrap.    So I thought these two buttons made a great closure.  The orange button is simply sewn on the cover with eavy duty thread.  The button on the spine is sewn on with elastic.  Now here's the trick, after having made a couple of stitches to hold the button securely I made one last stitch BUT I did not pull the thread all the way through, thus creating a loop that could be secured around the orange button.  Pretty cool, right?   And SEW  (LOL!) easy!


The Signatures

I made three signatures to go inside, using tiny composition books that fit perfectly in the Wrapped Journal.  I used scrap design papers to cover the outside of the books and then added inks and stamping in keeping with the style of the cover.


Thanks for visiting with me today, now that things have settled down just a bit, I hope I can get back to crafting on a regular basis!


Eileen Hull Designs Products Used:

Colorblends Inks:  Beach, Hydrangea, Bay, Leaf, Sunflower and Melon

Other Supplies

Stencils

Wednesday, March 13, 2019

Pass the Tissue Challenge at The Frilly and Funkie Challenge Blog

Challenge Theme


We're kicking off a new challenge at The Frilly and Funkie Challenge Blog today.  The challenge is  Pass the Tissues, Please! hosted by Sara Emily.  She describes the challenge this way, "Since we are still in 'cold season', I always make sure I'm stocked up on tissues in my home, in my purse and in the car. For this theme, I would like to see how you incorporate tissue paper into your vintage or shabby chic project. You can use regular tissues, tissue wrapping paper, sewing patterns or even collage paper or tissue wrap designed especially for crafting."

My Take on the Challenge

I made an all-purpose card combining Graphic 45's new collection, Love Notes, with Tim Holtz 's Botanical Collage Paper.  I love how it turned out, I think it has an oriental flair.


Methodology

To meet the challenge requirement of using tissue, I adhered a layer of collage paper to a piece of cream cardstock.  Then I embossed that using the 3D Kaleidoscope embossing folder.  I love the texture created when using the 3D folders.  To make the embossed details stand out, I lightly inked over the embossing with Distress Oxide Ink in Antique Linen.


Next I added red and black strip of papers from the Love Notes collection and topped that with a strip that I cut off from the embossed cardstock above and flipped it to the backside.  I made a card 4.25 x 7.5" from black cardstock and adhered the embossed panel to the front.


A Closer Look at the Card, inside and out

Time for the fun part now!  I added a small cut-apart from the Love Notes Collection and some lucious Graphic 45 roses to complete the front of my card.

Inside, I added a cream cardstock panel, embellished with a cut-apart and a paper strip, again from the Love Notes collection. 


The Flowers

Let's take a closer look at these gorgeous roses!  I die-cut some leaves to nestle underneath the roses.  Don't you love those sweet rosebuds peeking out?  


These dark red roses are a perfect match with Love Notes and add the perfect finishing touch to any project.  You know me, I am a flower child!  😄


How to Enter the Challenge

Create a vintage or shabby chic project  and link it up to the Frilly and Funkie Challenge , Pass the Tissue Please!

The Design Team will choose their top four picks, with the winner being invited to be a guest designer in one of our Frillie and Funkie challenges. The other three winners will receive Top 3 badges to display on their blogs. Everyone who enters and follows the rules will be entered into a draw to have the chance to win a $25 spending spree at The Funkie Junkie Boutique.

Thanks so much for stopping by today.  Be sure to take a look at the creations of my talented teammates, you can see their creations here, at the Frillie and Funkie Blog.

Supplies Available from The Funkie Junkie Boutique

Graphic 45 Staples - Rose Bouquet Collection - Triumphant Red
Graphic 45 - Staples - Large Tag and Flowers Dies
Tim Holtz Idea-ology Collage Paper Botanical
Mosaic Gems by Courtney Chilson - Sizzix 3-D Textured Impressions Embossing Folder (I used  the 3D Texture Fades Kaleidoscope embossing folder, this one is quite similar)

Saturday, March 2, 2019

Saturday Showcase:- A Little Mixed Media and Graphic 45's By the Sea DCE

By the Sea - The Deluxe Collector's Edition 

Hello all you frillie and funkie folks!  I am excited to share a much loved older Graphic 45 collection, By the Sea, that has just be released again as a Deluxe Collector's Edition.  I have a tutorial that you can view over at the Frillie and Funkie Challenge Blog.   The Funkie Junkie Boutique carries this collection as well as all the new Graphic 45 releases so be sure to take a look at all the new Graphic 45 collections and Staples.

Head on over for an  in depth look at this mixed media canvas.


Canvas Graphic 45 By the Sea


Wednesday, February 27, 2019

Artists Trading Coins Challenge at The Frilly and Funkie Challenge Blog

The Challenge

Time for a new challenge at the Frilly and Funkie Blog and Suzz is hosting this time around.  The challenge is to create an Artist Trading Coin.  They are a fun and new way of capturing a little bit of art to share with others. Your challenge is to create a trading coin which should be a circle shape 2 1/2 inches in diameter.

My Artist Trading Coins

Bold and Bright

This was a great challenge that I had lots of fun with.  I went in several different directions making my coins.  To make this one, I cut a 2.5" circle  from white card stock, mounted it on a lightweight piece of chipboard,  and added a piece of washi tape down the middle.  Then I stenciled on the "Travel" work and the rosettes with black texture paste.  I tape over the parts of the stencil that I didn't want to use so that I would not stencil over the washi tape or right side of the coin.  I used another piece of washi tape underneath the "Travel" word and trimmed it to fit the coin.   Easy, peasy, so fun!

Artist Trading Coins

Study in Metallic

I have a fascination with metallic finishes so this was really fun to make.  First I used a 3-D Texture Fades embossing folder to emboss my coin which I cut from light weight chipboard.  Then I misted it with black ink.   After that dried, I brushed my finger over the surface of Prima's Old Silver wax and lightly brushed my finger over the coin's surface.  I just love how the details of the embossing popped out as I rubbed on the silver wax.  Then I just added the embellishments to finish it off.

Artist Trading Coins
My First Coin

I was just warming up when I made this coin and really had no idea what I was doing or what direction I wanted to go in.   I started out with a lightweight chipboard embossed coin and misted it with Lindy's.   Then I applied Prima's was in several colors.  That still didn't produce what I wanted so I got out the embossing powders.  I used Emerald Creeks Bronze Age and Ancient Amber.  To keep from applying embossing powder all over the coin, I painted on embossing ink just where I wanted heat embossing.  Welll...that look didn't please me either so I went bold with Rocky Road embossing powder on the left gear.  Ugh, that was a disaster.  Time to get the waxes out!  I rubbed Bronze Age deep into the Rocky Road embossed area and that was an improvement!  I topped it with two silver flowers that I also heat embossed with Bronze Age.   Not my favorite, but we all have to start somewhere, right?

Artist Trading Coins


Let's Sew

These two coins are a nod to my Mom who was an excellent seamstress.  She made my wedding dress, tailored suits for me, she was amazing!  Too bad, I did not inherit the love for sewing from her, in fact I hate to sew.  Now I can sew and did a lot in my younger years when I could not afford to buy my wardrobe, plus I am tall and finding clothes that fit correctly within my budget was difficult.  I even made my own jeans with flat felled seams.  But still, sewing is a frustrating experience for me and making these coins sure reminded me of that.  You see, on the coin on the right, I was going to stitch around the coin.  Took 15 minutes to get that working, the thread was not coming off the bobbin correctly so the machine kept hanging up.  Finally I managed to stitch around the edge.  Oh my, that looked awful so I decided to cover up the stitching holes with the lace!

I gave up on using the sewing machine at that point and just added some bits and bobs to these two coins!


Artist Trading  Coins


How to enter the challenge

Create a vintage or shabby chic Artist's Trading Coin and link it to the Frilly and Funkie Challenge any time between now and 11:55 Eastern Time on Tuesday,
The Design Team will choose their top four picks, with the winner being invited to be a guest designer in one of our Frillie and Funkie challenges. The other three winners will receive Top 3 badges to display on their blogs. Everyone who enters and follows the rules will be entered into a draw to have the chance to win a $25 spending spree at The Funkie Junkie Boutique.

Thanks so much for stopping by today. Be sure to take a look at the creations of my talented teammates, you can see their creations here, at the Frillie and Funkie Blog.


Supplies from The Funkie Junkie Boutique

Bold and Bright:
Dylusions Washi Tape #1
Studio 490 Wendy Vecchi Embossing Paste - Black

Study in Metallic:
Sizzix 3-D Texture Fades Embossing Folder - Mechanics

Let's Sew
Stamperia - Precious Gift 12x12 Paper Pack
Carved Coconut Shell Buttons - 5/8"
Burlap String - 12 Colors

Monday, February 25, 2019

Graphic 45 By the Sea

I am so thrilled that By the Sea is back as as a Deluxe Collector's Edition!  I'm going on a cruise the end of March so I made this Traveler's Journal styled mini to preserve my vacation memories.  


The Collection includes a page of cut-aparts printed on both sides.  I used these to embellish the front and back covers of my journal.  Layer up the cut-aparts with other design papers for a stunning presentation  Tip:  Give your cover that "extra" look by popping up the cut-apart with dimensional foam tape.  Or, to save on supply costs, use cardboard as a backing to pop it up.

Another cut-apart tip: This collection includes design paper that is printed on both sides with the same sized cut-aparts.  Just cut the paper in half horizontally, fold accordion style and you have an instant pull out page.

This journal is wider than many at 1 1/2" wide.  I started with Eileen Hull Designs by Sizzix journal die and cut two journal covers.  Instead of assembling using just the two covers,  I made a spine by cutting a piece of chipboard 1 1/2" wide and the same length as the journal covers.  Then I glued the two journal covers to the spine side by side. (The spine should fit perfectly between the outer score lines where the covers fold.) Cut another piece of thin (like shirt packaging) cardboard and glue to the inside of the spine.  This makes the spine nice and strong. Use a Crop-a-dile to punch holes in the spine using the already die-cut holes as a guide.  At this point string the elastic as you do for an Traveler's Notebook styled journal.  Here's a link to a traditionally made Traveler's Notebook using Graphic 45's Imagination Collection.  

I've recorded a video flip through of the mini so that you can see all of the pages.


I used a simple design on the back cover, using another cut-apart, so that the journal would store easily.


 Instead of wrapping the journal with an elastic band, I used long lengths of seam binding.  You can either wrap ribbon around the journal as I have done in the above photo, or simply tie it and let the long ribbon tails dangle as in the top photos.

 This journal will hold 4 signatures but I have only included 3 so that there is lots of room inside.  The signatures are the individual books inside this journal and they are quickly bound inside with elastic thread that is secured to the book's spine.

Tip:  If you don't want the elastic to show on your outer spine, cut a piece of chipboard to fit the spine, cover with design paper and glue to fit over the spine.  Add a fun chain of charms as an embellishment.


I am so crazy about Graphic 45's new Rose Bouquet Collection!!  The ones I used here are Bon Voyage & French Blue, aren't they just fabulously gorgeous and so perfectly matched to G45's colors.  The flowers also come with the greenery you see underlying the roses. 

Graphic 45 Supplies:

Graphic 45 By the Sea Collector's Edition
Staples ATC Tags Kraft
Staples Large Tag, ATC Tag and Flower Dies
Staples Rose Bouquet Collection—Bon Voyage & French Blue
Decades Ink - Bon Voyage Blue, Triumphant Red


Other Supplies:

Eileen Hull Designs by Sizzix Journal Die
Chipboard
Snug Hug Rust Seam Binding
Metal Charms - The Funkie Junkie Boutique

Wednesday, February 13, 2019

Let Me Count the Ways Challenge at The Frilly & Funkie Blog with Graphic 45's Garden Goddess


The Challenge

Today begins a new challenge at the Frilly and Funkie Challenge Blog and the theme this time around is Let Me Count the Ways hosted by Sara Emily.  In her words, "Since it's just a day away from Valentine's Day, the opening line of Elizabeth Barrett Browning's famous love poem "Let Me Count the Ways" (Sonnet 43) comes to mind. "How do I love thee? Let me count the ways." For this theme, I would like to see your vintage or shabby chic project that includes three of something. This could be three colors, three words, 3 stamps (you get the idea); just be sure to tell us what those three elements are."


My Take on the Challenge

 Three is a magic word in my paper arts world.  Why?  Generally speaking, elements always look better when done in threes.  You can do 3 or 6 or 9.  Well you get the picture.  That's not to say, that 4 elements won't look good, but usually and odd number will look better like 3 (or groups of 3 or 5.

So I made a simple card to share with you using the gorgeous Graphic 45 Garden Goddess Collection.


On the front there are 3 rosebuds.  These are from Graphic 45's new Rose Bouquet Collection in Precious Pink.  Oh!  These roses are so GORGEOUS!

I die cut the cover on the left side using the Mixed Media Thinlit Mixed Media #5 die.  I love how that allows the paper beneath to show through the die-cut.  Then I tucked in a pretty ribbon to set off those pretty rosebuds!


Inside I used 3 words and 3 border strips.   The strip at the top is cut from the design paper and the 2 strips at the bottom are from the sticker sheet that comes with the 12 x 12 collection pack.

There's another sticker border on the front page.  Notice that the front page is not as long as the back of the card.  That allows the pretty scalloped border to show through.

Supplies from The Funkie Junkie Boutique:

Block by Tim Holtz (similar to the lettering I have used)


How to Enter the Challenge

Create a vintage or shabby chic project that includes 
 three of something and link it up to the Frilly and Funkie Challenge.
The Design Team will choose their top four picks, with the winner being invited to be a guest designer in one of our Frillie and Funkie challenges. The other three winners will receive Top 3 badges to display on their blogs. Everyone who enters and follows the rules will be entered into a draw to have the chance to win a $25 spending spree at The Funkie Junkie Boutique.

Thanks so much for stopping by today. Be sure to take a look at the creations of my talented teammates, you can see their creations here, at the Frillie and Funkie Blog.


Tuesday, February 5, 2019

The New Treasure Box Die by Eileen Hull Designs for Sizzix

The New Treasure Box Die

Hello friends, I'm back with another Valentine's box and I've used Eileen Hull's Treasure Box die to make this awesome little box that is perfectly sized for so many things.  I'm going to fill this one with chocolate and give it to my hubby  I am sure that he will love it, being as how he is a connoisseur of all things chocolate! 

I tried not to get too feminine with this but you know that is hard!

This box is just the right size to use for recipes, wouldn't a recipe box make a fun gift?  And, guess what, you know those cute little stacking drawers I showed you last week, well a stack of 3 fits perfectly inside this box!  Isn't that awesome?


Tutorial

Let's take a look at how to assemble this box.

Supplies:


12 x 12 Design paper - 2 sheets
Strong Quick Drying Adhesive
Ink

Step 1:

Cut the 12 x 12 papers in two pieces, each 6" x 12".  You will need two pieces of chipboard as you will need to cut two pieces of each pattern on the die.  Adhere the paper to the chipboard using something like Sizzix Adhesive Sheets.  Be sure to burnish the adhesive paper down well before pulling the backing off.  If you want the inside of the box covered in design paper, you will need to cover the chipboard on both sides.  Once you have adhered paper to both sides of the chip or mat board, place the paper with the box's outside design down on the die and run it through your die-cut machine.


Step 2:

You will need two pieces of each design so you should end up with the pieces shown below.  (I have shown both the inside and outside of the pieces.)  Take care when running through your die cut machine that you have the same side down on both pieces.


Step 3:

The largest piece is the body of the box.  Carefully bend at the score lines and join the two pieces together by adhering the tab on one piece to the non-tab end of the 2nd piece.  Form a box and adhere the 2nd tab.  A clothespin works great for holding it together while the glue dries.


Step 4:

Take the two smaller pieces and for the lid for the box, joining together in the same manner as the box body.


Step 5:

The two rectangle pieces are for the top of the lid and the bottom of the box.  Adhere such that the tabs are on the inside of the box lid and box bottom. You can see this in the next photo.

Step 6:

Adhere the hinge to the body of the box first.  I would suggest using something really strong for the hinges as they have a tendency to tear over time.  Tim Holtz's Substrate Sheets work really well as would fabric (felt) or any kind of leather.  When adhering the lid to the box, be sure that you have it positioned such that the lid opens fully.  If you join the box and lid too closely, the lid will not open very well.


If you don't like the look of the tabs showing inside the box and lid, you can cut a rectangle to fit inside the box and lid covering the tabs.  You could also mount the tabs on the outside of the box but I thought that would put more stress on the tabs and thought they would eventually pull away from the box.


Thanks so much for joining me today!  Keep an eye on Eileen's blog to see more great projects from the Eileen Hull Inspiration Team using the Stacking Drawers and Treasure Box dies.

LinkWithin

Related Posts Plugin for WordPress, Blogger...