
Let's make a box covered with pretty papers! Eileen Hull has a new XL die that makes into a great 4" x 4" storage or gift box.

Here's how you put it together.
TUTORIAL
Step 1: Use 2 sheets of 6 x 13" matboard and run the die through your die cut machine twice. You should have the pieces shown in the photo below. You will also need 2 additional small strips shown at the bottom of this photo. Cover the flaps with red liner adhesive tape as shown in the photo. (You can use the adhesive of your choice. I like red liner tape because it has a strong bond.)

Step 2: Take the two largest pieces and fold on the score lines. Adhere one piece to the square which is the bottom of the box. Then attach the 2nd sidewall piece along the side and to the bottom of the square forming a box. (You can attach the side walls to each other before attaching to the square lid. Either way works.)

Step 3: Now make the lid. Attach the walls together and then adhere to the 2nd square forming the lid. The flaps should be inside the lid.

Step 4: Insert the 4" x 5/8" strips inside the box top making a lip that fits down into the box bottom. Adhere the strips such that about 1/4" protrudes from the box lid. This hold the lid in place.

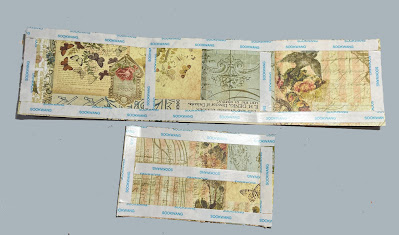
Step 5: Now let's make this box pretty! Cut paper to cover the box sides as shown in this photo.

Step 6: Apply adhesive, glue or tape.
Step 7: Adhere the smaller panel first. It wraps around two corners. Then adhere the large piece beginning at a wrapped corner. The paper then will fit nicely all around the box.

Step 8: Cut a 5" square and score at 1/2" on all 4 sides. This will be the cover for the box. Clip the corners diagonally as shown. (sorry for the blurry photo!)

Step 9: Adhere to the top of the box folding down along the sides at the score lines.

Step 10: Cut paper 5" x 1 1/4" and score both ends at 1/2". Cut another strip 12" x 1 1/4" and score at 4" and 8". Cover the sides of the lid in the same manner as the box, beginning with the 5" strip. (Sorry no photo.)
Step 11: Now your box is finished and all ready for embellishing! I glued some lace around the box top and added some fussy cut images on the sides.

Step 12: Build some height on the lid by adding flowers and ribbons.

All finished!

Thanks for joining me today. Be sure to stop by Eileen's blog and see all the beautiful works from the other designers.
xoxo Maggi

gorgeous Maggi!
ReplyDeleteHow special to make a gift box for a friend!! Yours is certainly lovely and a model to follow after!
ReplyDeleteSo pretty Maggi and great tutorial!
ReplyDelete