
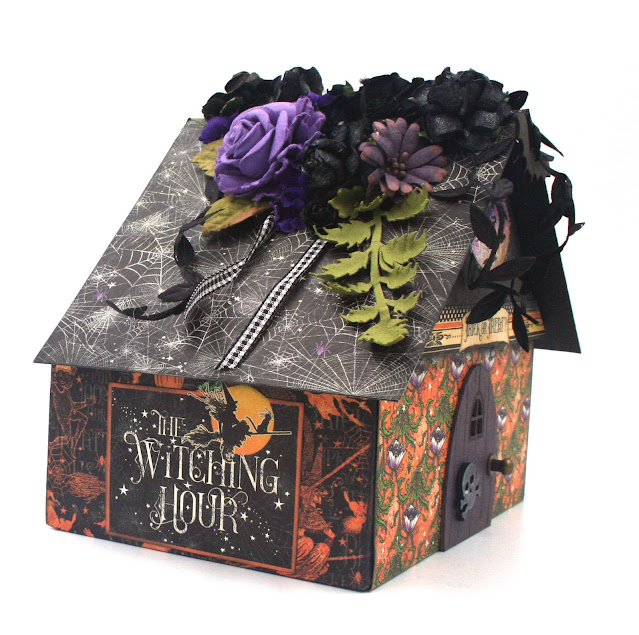
This is Eileen Hull's Slotted Treat Box cleverly transformed into a haunted house. (Well, I think it's clever 😁!) Best of all, the roof flips up so you can stash candy inside!

I used Graphic 45's Midnight Tales paper collection, black cardstock, and chipboard to put this together.

To make this I assembled the treat box without the lid. Here's what the treat box looks like in it's "normal" state:

Instead of using the lid, I built a roof using the side walls of the lid to form roof peaks.
Steps for building the house and roof:
House
- Die-cut 2 sets with the Slotted Treat Box die.
- Assemble the bottom portion of the box as usual. Cover the slot by placing the die-cut piece back in the slot and tape in place. We'll cover that with paper later.
Roof
- We'll use the 2nd set of die-cuts to build the roof.
- Fold the side wall die-cut pieces of the lid assembly in half and cut to the shorter length. Don't fold the long flaps down on the scored lines.

- Using a craft knife, score the ends of the cut edges @ 3/8", being sure both ends are exactly the same and that you don't cut all the way through the chipboard.

- This will create tabs on either end and are used to make the roof peak. Adhere the tabs underneath the roof floor, which is the die-cut piece that is normally the top and bottom of the box. It is better to adhere this with the scored flaps inward rather than outward as shown in the photo below. Its doesn't make a big difference but inward is better.

- Now its time to cover the gable ends of the roof. Now for a little geometry! 😄 Cut two pieces of paper 6 1/2" w x 4 1/2 h as shown in the photo below and score on the inner triangle lines. Adhere to the roof assembly folding the flaps and adhering over the roof assembly.

- Die-cut one more side piece for the lid and trim and discard the tab and shorter piece as shown in the photo below. Adhere the wide part of the long piece inside the box, then adhere the roof to the tab. Be sure that the scored part is facing the side wall in the the box so that the lid can be opened.

- Now cut a piece of paper for the roof 5 3/4" x 10 1/4" and score at 5 1/8" and cover the roof centering from front to back. I used black cardstock for this step and then covered with design paper just to make the roof a little more substantial although not really necessary. But, since I like to add lots of flowers etc. I thought I might need a little more heft to my roof! (You could also use a folded piece of chipboard but I didn't think it was necessary.)

Box opened. The black object holding the box open is just something I put there so I could photograph the inside.

View from the back.

The front door and skull are pieces from Creative Embellishments and the door knob is Tim Holtz.
I'll be doing a Facebook Live with Eileen October 3rd at 6 pm EDST showing you how to make this so be sure to tune in! You can catch the replay here.
Thanks for stopping by!
xoxo
Maggi
SUPPLIES
Graphic 45 Midnight Tales
Light Weight Chipboard

I love this little house, very clever. But geometry? Me? Yikes! I want to see you walk me through this on a video.
ReplyDelete