Pages

Wednesday, March 27, 2019

March Madness Challenge at The Frilly and Funkie Blog

Challenge Theme

Time for a new challenge at the Frilly and Funkie Blog and this one is so fun!  It's all about March Madness ans Suzz is our hostess!  She says, "Don't be afraid, the challenge isn't going to require you to use basketball inspired images. Instead I want you to be inspired by Alice in Wonderland. I started from this quote of a conversation between the Mad Hatter and Alice: The Mad Hatter asks Alice: "Have I gone Mad?" and Alice replies "I am afraid so. You're entirely bonkers. But I'll tell you a secret. All the best people are." The challenge is to take any idea or concept from this wonderful tale to inspire your project. There are so many wonderful bits or pieces to be inspired by like the Queen of Hearts, the mad hatter, the looking glass, tea party or Alice herself. The possibilities are endless. Anything can be your inspiration but make sure you reference what inspired your art from the story!"

My Take on the Challenge

My inspiration is simply the Mad Hatter, oh how I love to make hats and so I crafted this funky far-out hat for the Mad Hatter to wear.  I used Stamperia's new collection, Alice, to make this colorful hat.  Now isn't that just the perfect collection for this project!!  You can find it at The Funkie Junkie Boutique but better hurry, because, Stamperia papers sell out pretty quick.


The Flowers

I made the largest flowers on this hat using one of my favorite flower dies, Sizzix Alterations Tattered Florals.  I just love these pretty flowers!

I made two of them, and then I added some of Graphic 45's gorgeous lush Triumphant Red Roses.  They come in a  pack complete with rosebuds, leaves and spirally thingys!   (Thingys, that's a technical term, 😃)

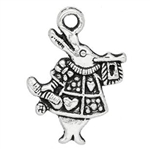
Take a look at the White Rabbit charm dangling, isn't that just the cutest!  The Funkie Junkie Boutique has them in packs of 6.  I imagined that the Mad Hatter needed some scissors so I have a pair of those dangling from this mad hat too.


Every seamstress needs buttons so there are a couple of those nestled in there too.


One more view of the White Rabbit, I think he's heralding the handmade flowers!  😉  I misted them with Lindy's to give them lots of sparkle.


How to Enter the Challenge

Create a vintage or shabby chic project  and link it up to the Frilly and Funkie Challenge, March Madness.
The Design Team will choose their top four picks, with the winner being invited to be a guest designer in one of our Frillie and Funkie challenges. The other three winners will receive Top 3 badges to display on their blogs. Everyone who enters and follows the rules will be entered into a draw to have the chance to win a $25 spending spree at The Funkie Junkie Boutique.

Thanks so much for stopping by today.  Be sure to take a look at the creations of my talented teammates, you can see their creations here, at the Frillie and Funkie Blog.

Supplies Available from The Funkie Junkie Boutique


Thanks for stopping by!

Tuesday, March 19, 2019

A Wrap Journal by Eileen Hull Designs Celebrating Spring

Hello friends!  It's nice to have semblance of normalcy in my life again!  We just moved from North Carolina to Tennessee and what a job that was.  Since mid-January, all I have done is pack and then unpack boxes.  I've moved more times in my life than I can possibly count (I am an Army brat so moving has always been part of my lifestyle) but this move was the hardest ever!  I think it has something to do with my rapidly advancing years.  😅

Finally, I found a few crafting supplies and was able to create this fun spring journal with Eileen Hull Designs Wrap Journal.  Ha ha!  Ok crafting in my new studio was a challenge.  So....here's how that goes, first I thought what I wanted to do, yes, ðŸ’¡ make a wrap journal.  So then I spent 2 hours looking for my wrap journal die!  I was about to really panic when I couldn't find any of my XL Scoreboard dies when I spotted  2 Vagabond boxes.  At that point I realized that I only have one Vagabond because the first one broke and I threw it away.  Hmmm,now wouldn't that Vagabond box be a great box for packing XL dies?  Yes, aaaahhhh, there they were, all my wonderful, much loved, Eileen dies.  Whew, crisis averted!  Well repeat this process for nearly every supply I wanted to use...you get the picture?  Creating time - 3 hours,  looking for stuff time - 6 hours.  Sigh,  I hope to get my studio organized soon!

The Journal

So how did I make this fun, colorful quirky journal?

I started out by creating the background.  That was a simple process, I just grabbed some inks and paint and began blending in patches of color.  There was no rhyme or reason to how I did this, I just made splashes of color.


Next I rummaged around and found a few stencils and I used those to create patterns on the background.  I let all that dry and then stamped the floral/mushroom image with a fun new Dylusions stamp that I just got.  I liked how that looked, so I kept right on stamping and added that heart border.


I also just got Seth Apter's new Baked Texture embossing powders and wanted to try those out so I stamped on some embossing ink and used Blizzard Baked Texture.  Oh I loved the addition of white to offset the bright colors.

And then to give it some real wow, I die cut some flowers with Eileen's Thinlit flowers die, added some doodling to the petals and popped them on the cover.  Don't they look great and they add dimension AND character!

The Closure

I'm always trying to think of ways to hold my journals closed as the wrapped bands don't always work for me because I usually have flowers and other 3D doo-dads on my covers that get in the way of a ribbon or elastic wrap.    So I thought these two buttons made a great closure.  The orange button is simply sewn on the cover with eavy duty thread.  The button on the spine is sewn on with elastic.  Now here's the trick, after having made a couple of stitches to hold the button securely I made one last stitch BUT I did not pull the thread all the way through, thus creating a loop that could be secured around the orange button.  Pretty cool, right?   And SEW  (LOL!) easy!


The Signatures

I made three signatures to go inside, using tiny composition books that fit perfectly in the Wrapped Journal.  I used scrap design papers to cover the outside of the books and then added inks and stamping in keeping with the style of the cover.


Thanks for visiting with me today, now that things have settled down just a bit, I hope I can get back to crafting on a regular basis!


Eileen Hull Designs Products Used:

Colorblends Inks:  Beach, Hydrangea, Bay, Leaf, Sunflower and Melon

Other Supplies

Stencils

Wednesday, March 13, 2019

Pass the Tissue Challenge at The Frilly and Funkie Challenge Blog

Challenge Theme


We're kicking off a new challenge at The Frilly and Funkie Challenge Blog today.  The challenge is  Pass the Tissues, Please! hosted by Sara Emily.  She describes the challenge this way, "Since we are still in 'cold season', I always make sure I'm stocked up on tissues in my home, in my purse and in the car. For this theme, I would like to see how you incorporate tissue paper into your vintage or shabby chic project. You can use regular tissues, tissue wrapping paper, sewing patterns or even collage paper or tissue wrap designed especially for crafting."

My Take on the Challenge

I made an all-purpose card combining Graphic 45's new collection, Love Notes, with Tim Holtz 's Botanical Collage Paper.  I love how it turned out, I think it has an oriental flair.


Methodology

To meet the challenge requirement of using tissue, I adhered a layer of collage paper to a piece of cream cardstock.  Then I embossed that using the 3D Kaleidoscope embossing folder.  I love the texture created when using the 3D folders.  To make the embossed details stand out, I lightly inked over the embossing with Distress Oxide Ink in Antique Linen.


Next I added red and black strip of papers from the Love Notes collection and topped that with a strip that I cut off from the embossed cardstock above and flipped it to the backside.  I made a card 4.25 x 7.5" from black cardstock and adhered the embossed panel to the front.


A Closer Look at the Card, inside and out

Time for the fun part now!  I added a small cut-apart from the Love Notes Collection and some lucious Graphic 45 roses to complete the front of my card.

Inside, I added a cream cardstock panel, embellished with a cut-apart and a paper strip, again from the Love Notes collection. 


The Flowers

Let's take a closer look at these gorgeous roses!  I die-cut some leaves to nestle underneath the roses.  Don't you love those sweet rosebuds peeking out?  


These dark red roses are a perfect match with Love Notes and add the perfect finishing touch to any project.  You know me, I am a flower child!  😄


How to Enter the Challenge

Create a vintage or shabby chic project  and link it up to the Frilly and Funkie Challenge , Pass the Tissue Please!

The Design Team will choose their top four picks, with the winner being invited to be a guest designer in one of our Frillie and Funkie challenges. The other three winners will receive Top 3 badges to display on their blogs. Everyone who enters and follows the rules will be entered into a draw to have the chance to win a $25 spending spree at The Funkie Junkie Boutique.

Thanks so much for stopping by today.  Be sure to take a look at the creations of my talented teammates, you can see their creations here, at the Frillie and Funkie Blog.

Supplies Available from The Funkie Junkie Boutique

Graphic 45 Staples - Rose Bouquet Collection - Triumphant Red
Graphic 45 - Staples - Large Tag and Flowers Dies
Tim Holtz Idea-ology Collage Paper Botanical
Mosaic Gems by Courtney Chilson - Sizzix 3-D Textured Impressions Embossing Folder (I used  the 3D Texture Fades Kaleidoscope embossing folder, this one is quite similar)

Saturday, March 2, 2019

Saturday Showcase:- A Little Mixed Media and Graphic 45's By the Sea DCE

By the Sea - The Deluxe Collector's Edition 

Hello all you frillie and funkie folks!  I am excited to share a much loved older Graphic 45 collection, By the Sea, that has just be released again as a Deluxe Collector's Edition.  I have a tutorial that you can view over at the Frillie and Funkie Challenge Blog.   The Funkie Junkie Boutique carries this collection as well as all the new Graphic 45 releases so be sure to take a look at all the new Graphic 45 collections and Staples.

Head on over for an  in depth look at this mixed media canvas.


Canvas Graphic 45 By the Sea


LinkWithin

Related Posts Plugin for WordPress, Blogger...