Pages

Showing posts with label Dogs. Show all posts

Tuesday, April 19, 2022

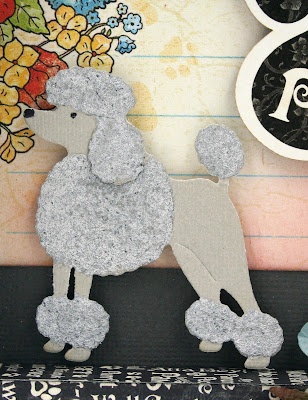
Eileen Hull Shadow Box Frame with Graphic 45's Well Groomed


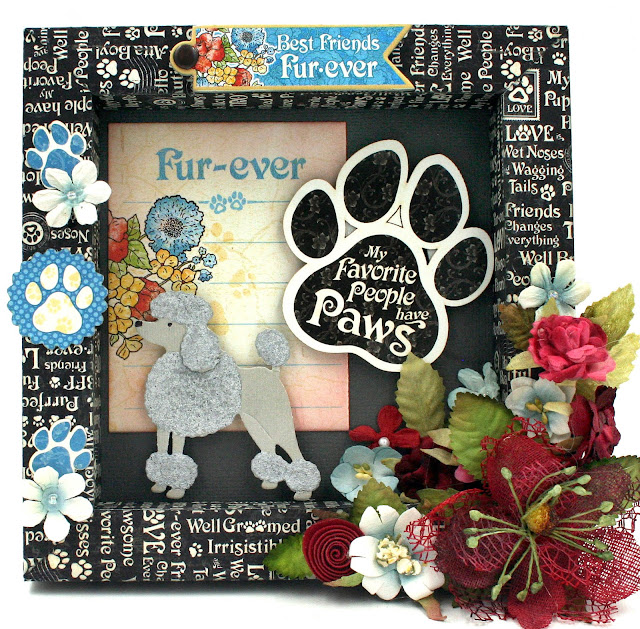
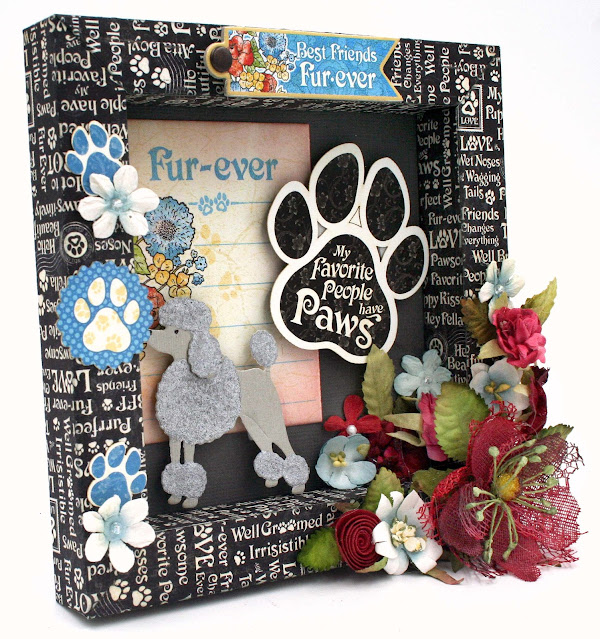
I am loving Eileen's new Shadow Box Frame. I tend to use the largest size at 6" square.  It gives me enough room to create fun little scenes like this one with the silver poodle.  I have 2 standard poodles, a silver and a blue; I am quite smitten with them!


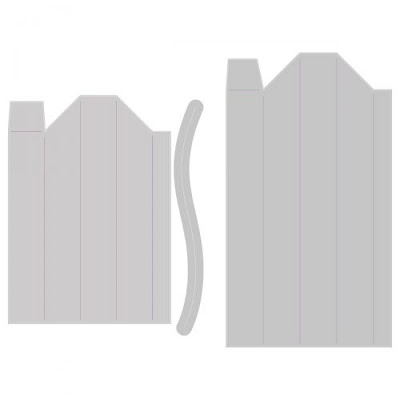
I love that this 3D frame is made from cardstock and goes together soooo easily!  This die set comes with 2 sizes so that you can make a large and a small square frame or a nice rectangular frame.  This is what the dies look like.  You just need to cut 4 pieces and assemble.
This frame is made with the larger one and measures about 6" square.  Tutorial for assembling the frame here.


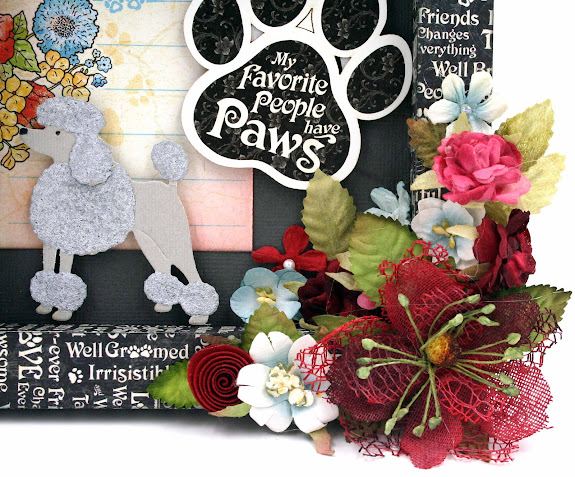
Gotta have some pretty blooms with my pretty poodle!


This cute little poodle is heat embossed with Ranger Antiquities Cement embossing powder; it sure makes great look poodle curls!


Tuesday, March 3, 2020

Creative Embellishments - Cards for Dog Lovers!

Hello friends, Maggi here with two entirely different cards, it's my split personality showing through!!  😁


Collaboration with Rinea

This month CE's designers are joining forces with Rinea Spark Your Creativity and creating with Rinea foils and CE's wonderful embellishments.  I used a gold 4" x 6" sheet of gold foil and embossed it with Tim Holtz's 3-D Texture Fades - Gears Embossing Folder.  Then I dampened a paper towel with Alcohol Blending Solution and wiped it over the embossed surface removing much of the gold color revealing the silver tones.  To grunge it up a bit, I misted with black mist and heat dried.

The embossed foil begged for a frame and Creative Embellishments Steampunk Frame was perfect.  I heat embossed the frame with Lindy's Midnight Gold embossing powder.  I topped the frame with a couple gears heat embossed with gold embossing powder.


My favorite part of this card has to be the sentiment (from Tim Holtz Big Talk - Snarky) which I can so relate to!!!  I popped it up with foam tape and mounted on a piece of embossed silver Rinea foil.  I wanted a really grumpy face for the  card and this dog was all I could find.  It's a stamped image (Tim's Crazy Dogs), inked, fussy cut and popped up with foam.


My Poodle Side

You probably know that I have two standard poodles who rule my home and life.  Here they are "fighting" over who gets to sit in the chair.  Tisha, the one in the front, always wins because she gets in the chair and sits on Nika, who then moves.  They are such a comical pair!


Back to card making!  I used the larger of the frames in the Fancy Oval Frame Set and heat embossed it with Eileen Hull Designs Molten Dimensions White Wonder embossing powder.  It is a super chunky powder that retains it's chunkiness when heated.

The poodle die-cut and the stamped sentiment are a set from Tonic Studios.  Many thanks to my dear friend, Billie, who gifted the set to me.  The papers I used are Simple Stories from an old (2017?) Valentine's paper pack.


Supplies from the Creative Embellishments Shop

Steampunk Frame
Mini Gears 3/4" (set of 12)
Fancy Oval Frame Set
Rinea

Metallics Foiled Paper Variety Pack

Thanks so much for stopping by today!  Be sure to join in the monthly challenges because, you could win a $50 gift certificate to the Creative Embellishments store, now that is sweet!! The challenge is usually the first post on our blog.


Tuesday, February 25, 2020

Creative Embellishments Chipboard for Dog Lovers!

There's nothing I love better than scrapping my sweet poodles!  Aren't they just adorable, curled up together in front of the fire?

Sometimes it's just nice to make a clean and simple layout and this one fits that bill.  Just a few paper layers and some fabulous Creative Embellishments chipboard is all you need.


I used an older Authentique collection, Companions, to make this.  First I stenciled on some paw prints with the Muddy Paws stencil.  Then I used a few chipboard pawprints scattered randomly on the layout.  I used a paint pen to color the hearts inside the pawprints.


I love this frame and it sure was perfect for the picture of the poodles snoozing in front of the fireplace.


Then I heat embossed the hearts that come with the Paw Prints set and the frame with Ranger Antiquities Chinese Red embossing powder.   Layer up the papers, add the pretty chippies and you’re done!

Supplies
From the Creative Embellishments shop:
Muddy Paws Stencil
A Dog's Life Frame Set
Paw Prints

Other:
Authentique Companions Collection
Ranger Antiquities Chinese Red Embossing Powder

Thanks for stopping by today!


Friday, August 5, 2011

Another Chena and Escape Kitty escapade! Sketch from Sketches: Creatively Yours

Wow, its been a long time since I posted.  Right after I got back from CHA, I came down with a nasty case of bronchitis that totally took the wind out of my sail and I'm just back on my feet!  I spent the better part of the last two weeks sleeping and reading.  I haven't counted, but I bet I read somewhere between 8 - 10 books.  It's just so easy to order another book on my Nook, yikes my credit card is yelling at me!

So here we go again....That dog and That cat are out traipsing the world again and now they're in Morocco!!!  And how did they get there you ask, obviously they didn't drive the motorhome!!   Well if you can believe it, they found a Magic Carpet and off they flew.  Yeah, right you say, well we have pictures and you can see them here, in jrabs gallery.  Jennifer (jrabs) is Kitty's Mom.  Take a trip through her gallery and you'll find out all about Kitty and Chena.  In a nutshell, poor Kitty has to stay indoors because a coyote has moved into her neighborhood and Jennifer fears for dear Kitty's life.  Now Kitty is not too happy about this so she has been trying to escape ever since.  Now Chena, being a particularly resourceful and smart dog, learned of Kitty's plight (pet ESP I guess) and took our motorhome to New York, rescued Kitty, and the two of them headed for a grand vacation in Alaska.  After a couple of months of frolicing there, Chena finally brought the RV home and took off again for Niagara Falls where she and Kitty took a barrel over the falls!!  That little adventure got them arrested but oh don't you know, they were resting on a little carpet in their jail cell that turned out to be magical and now they are in Morocco riding camels and who knows what else!!  And I might add that Chena still has my credit card!!!!!  Ha-ha, I am going to cancel that sucker and hopefully that will force Chena and EK to hop that magic carpet and come home!!

So Chena, being the loving dog that she is and not wanting her dear parents to worry, pee-mails home frequently and sent us this photo.  Can you believe it?  Yeah, EK's up there on the camel with her, she is sitting right behind Chena.

I used this week's great sketch drawn by Ali at Sketches: Creatively Yours to create this layout.  Please check out the other layouts from the rest of the design team, they are great!!  And if you decide to try the sketch, be sure to link it so we can all see and admire your work!


Thanks to Jennifer for allowing me to play along with the Escape Kitty adventures! 

Monday, July 11, 2011

The continuing sage of Chena and Escape Kitty


So when I last heard from Chena she had lost Escape Kitty when she stopped at Uncle Willie's.  Poor Chena she watned EK to meet her dear sweet favorite person (besides me of course) and EK jumped out  of the motorhome and ran away.  Well now, finally that dog is  home and it certainly is time.  As I suspected, she had been swilling champagne with her Uncle Willie as you can see in this picture.   I sent her an email and told her that EK was home with jrabs and everything was A_OK so she finally decided to bring the rolling doghouse home!!  She was quite elated to hear that EK was home as she really was worried about her dear kitty friend.  They are indeed the odd couple but I think they had a grand old time in Alaska!  But OMG, that motorhome sure does smell.  What's up with that cat that she can't clean out her littler box?  Me thinks that Miss Kitty just might be spoiled.  I believe she might be a little princess!!  I just have a feeling those two ar eup to something.  Chena is sneaking around, using my computer when I'm not watching,   I don't know what the heck she's searhcing for but I keep seeing addresses to far away places.  And then the other night, she was watching I Dream of Jeannie online.  What's up with that?  You know, why can't she lay around and chew on a bone like a normal dog??

I did this layout for a challenge at Flying Unicorn to use punched or cut paper.  See the challenge here.  I used 3 different items that I cut on my Vagabond, the Umbrella Man, gear, and the rosettes.  I also cut the trim using a Martha Stewart deep edge punch - scrolled hearts.  The papers I used are Webster's Ladies and Gents and I won this pack of papers from Flying Unicorn.  Sweet!!

I love layers and layers and I love patterned paper.  You don't usually see much cardstock on my layouts other than buried deep in the background or maybe used to make flowers.  Some of my scrappy friends tell me that they have trouble with layers so I thought I'd tell you how I approach layers.  First of all, as you begin to use layers, it is easier to work with a collection of papers because then all you don't have to worry about your colors coordinationg.  When selecting your layers you want to pick things that work together.  Generally a large print and a small print will work better together than two large or two small prints.  A stripe is always a nice mix into your collection of patterns.  Look for contrast in the colors you select too.  That helps each paper stand apart for the others.  Contrasting patterns look good together, i.e. a stripe, a check, circles, large print, small print.

Here's my selection of papers and in the order that they will be layered.  I chose the light green paper to cut a circle from.  This is where I will place my photo.  Although this paper has a pattern it is a "quiet" pattern and won't distract from my photo.  If you are layering your photo onto busy paper, it is a good idea to mat your photo with a solid color.  I chose that very lively striped paper to go behind the circle, after that the Webster's diecut that has some will reside mostly in the background and finally the blue as a bottom frame.  Notice I have cut the center out of the blue paper.  It wouldn't show so why waste that paper?  I used in on another LO.  The brown and white stripe I cut using Martha Stewart scrolled hearts border punch.  In the next frame you will notice that the blue is different and that's because I fliiped it over.  I liked the green colors in it and it sort of pulled all the colors together.


Next I put all the pieces togehter to see if it pleased me.  I decided I liked the arangement so next I thought about embellishments that might work.  I like this trim with  fuzzy balls on it, I think it works well on a guy layout.  But when I put the trim on the border cut, the border cut got lost on the layout. 


I thought maybe a piece of solid cardstock under the border cut would bring it out so I chose a green piece of cardstock the color of the leaves on the Websters die cut.


Yes, I think that helps alot!   I love paper rosettes, they work well on guy layouts, so I used my Alterations paper rosette die to cut these two rosettes.  I always ink the edges of those too.  Ink adds dimension, I use it on everything.  And one of my favorite things is the Umbrella Man so if I can work him into a layout, even better!!  I cut  this one using Timmy's glassine paper.  Then I brushed on some cappucino Perfect Pearls and set that with my heat gun to give the Umbrella Man a little shimmer.


At this point I am happy with my over design so I start putting my layout together.  BUT, before I adhere anything, I have to distress and ink all the edges.  I used a little water on the circle and striped paper edges so that I could curl the paper a little to give my layout some added dimension. 

You can see that after I got my papers adhered I added some extra embellishments and a title.  I outlined the letters with a brown pen after I put them down.  They needed a little extra emphasis as they were getting lost on that busy striped paper.  I added buttons to the rosettes to liven them up a bit, some journaling and the large gear which has been coated with bronze Perfect Pearls.  Willie is a car guy so I added the Tattered Angel car Glimmer chip.  Added the burlap and brown lace as those are always on the EK and Chena LOs.

I hope this gives you some ideas on layering and helps you get started using layers on your layouts!  Thanks for visiting, I really appreciate it!!


Tuesday, May 24, 2011

Artic Ocean - Chena and Escape Kitty

When we last saw Escape Kitty and Chena they were romping it up with their bear friends and look at them now! Chena!! What are you doing all the way up there in Tuktoyaktuk??? Please tell me you didn't charter a flight using my credit card!!! You can't drive there and I know you don't have wings...yet. You need to get your little poodle butt in that Rolling Doghouse and get yourself and Miss Kitty home!! Kitty doesn't like water, Jennifer will never forgive you if Kitty runs off.
Who is that weird looking lady standing beside you? I see you are carrying your tennis ball, are you playing fetch in the Arctic Ocean with her? Geez, Chena the water is about 40º, you're going to freeze to death!!
A note of historical significance - Tuktoyaktuk aka Tuk is in Canada's Northwest Territories on the Arctic Ocean. You can drive as far as Inuvik (scene of some Ice Road Truckers episodes several years ago) on a dirt/gravel highway that is oh, 400 miles or so, I can't remember. From Inuvik you take a 20 minute flight in a 4-6 passenger airplane to Tuk.
Back in the 90's Molsen Beer was running a Beach Party promotion and one of the beach parties was held in Tuk and Metallica played at the party. Now imagine a Native American village and Metallica. Doesn't quite compute does it?? LOL, well the village elders came out for the concert and apparently evryone enjoyed themselves! It was alcohol free as Tuk is dry as are many native villages. Our guide in Tuk told us all about it!

The crazy lady in the photo is me, note how bundled up I look. It ws the end of June, the water was really cold as and the air wasn't much warmer! This photo is from our 1999 vacation when we lived in Alaska and drove up the Dempster Highway.  Chena and Kitty have been photoshoped into the picture of course!

Burlap for Escape Kitty and a touch of lace for Chena. Thanks to Jennifer, Jrabs, for inviting me to share in Escape Kitty's escapades. Be sure to visit Jrabs gallery at SB.com to get the "rest of the story" and see Jen's awesome fantastic creations!


Thanks for visiting and be sure to check out my giveaway at the top of my sidebar if you haven't already!

Thursday, April 7, 2011

Rainbow

I hope you will check out this blog, Just Perspective, where my layout, Rainbow, is being featured today.  Throughout April, Sue is featuring layouts hoping to  "inspire visitors through a journey of scrapbooking art, words and perspectives. It brings together the voices of scrapbookers from all walks of life, and from all over the world."

There's a lot of symbolism in this LO, the gates are painted with Perfect Pearls and that angel I've had forever, it came from my good friend Pam and was just perfect for this LO.  The journal says: 

"Sometimes when I look at a rainbow, I dwell on one very important facet of my life and that is my love of animals and the dogs that have given me their unconditional love. I think of the Rainbow Bridge and believe with all my heart that it must exist. For, what is a rainbow, but a symbol of hopes and dreams living in your heart?
How could there be a heaven without animals? I can only imagine what a joyous occasion it will be when my fur-friends and I are reunited. I can see my sweet Chili, healed from the autoimmune diseases that took her from me much too early in her life. I can feel Brandy’s soft fur and I know she will very gently hold my hand in her mouth, because that’s what Labs do. Tiffany, my Yorkie, will be spinning in frantic, but happy, circles as she did so many times when she was excited. Jezebel, my Rhodesian Ridgeback, will lie down beside me and allow me to use her hip as a pillow for my head.
Rainbows make me smile, for they remind me of the many fur-friends that have enriched my life. Each was a beloved member of my family and each will always owns a special place in my heart."

I know that all of you with fur-friends can relate to this LO.  You know, it's not my favorite LO, but it is one that is filled with love.  Chili has been on my mind alot lately as next week will be the first anniversary of her death.  I do miss her, but it was her time, I could not keep her anymore as she was too sick so I did what I had to do.  Tough, but it is the last gift we give our fur friends.


Sunday, April 3, 2011

The Saga Continues! Chena and Escape Kitty

My good friend Jennifer, (Jrabs), has a beautiful cat, Escape Kitty, who was longing to escape the confines of her home!  Well she and Chena cooked up this scheme to steal the motorhome and make their way to Alaska and those two rogues are now on the road!!  They are BFF's now but Jennifer says Chena will get tired of Kitty's complaining about the snow and cold 'cause Kitty doesn't like to have cold feets!!  Well so far no problems.  Chena pee-mailed this photo to me, aren't they sweet snuggled up together?

Check out the (mis)adventures of Chena and Escape Kitty here at Jennifer's gallery.  Jen has done a series of LOs on Kitty's adventures and you can find out why Kitty wanted to escape in the first place!

This month Escape Kitty is hosting a challenge at Scrapbook.com to scrap your friends and family.  Come join in the fun, here at Scrapbook.com.  This is my entry, Chena and her new BFF, Escape Kitty.

I did this LO using the gorgeous April kit from Swirlydoos that features Bo Bunny's Gabrielle collection.  It is really pretty!   The burlap, lace, mosaic tiles, letters and "Together..." tag are from my stash, the rest is from the kit.  I made the flowers with cardstock that was in the kit (sprayed with glimmer mist from my stash) and the leaves are some that LisaG has posted for us to use at SD's,  thanks Lisa!


Supplies:
Cardstock: Bazzill white for flowers

Patterned paper: back piece Gabrielle dot; circle & fussy cut piece Unwritten
Letter stickers: Sticko Nostalgiques
Stickers: Karen Foster Adventure Awaits “Together is the…”
Flowers: Handmade using Alterations Tattered florals die, white CS sprayed withCreme de Rouge Glimmer Mist; Vines from Swirlydoos
Ink: Distress Victorian Velvet, Faded Jeans, Tumbled Glass, Pumice Stone, Cats Eye Chestnut Roan
Other: Liquid Pearls Bisque; Lace Heaven brown lace; Gabrielle metal butterfly trinkets;
Unknown: Mosaic tiles from Michaels, rhinestones; burlap


Sunday, March 27, 2011

Nika and her "grandpa" Swirlydoos Cabaret kit - March

I just adore this photo of my Dad and Nika. She loves standing on her back legs and does it all the time. She and Dad were "dancing" and I quick grabbed the camera and got this shot. Papers are from the March 2011 gorgeous Cabaret Swirlydoos kit featuring Prima Moulin Rouge. Everything else is from Swirlydoos at one time or another. I will post supplies later.


Sunday, February 27, 2011

Chena and Escape Kitty

Have you been following the adventures of Escape Kitty (EK) on Scrapbook.com?  My good friend, Jennifer (jrabs) has a cat that is trying desperately to escape the confines of her house.  Poor sweet EK longs to be outdoors but alas, Wiley Coyote, has been spotted so EK is destined to be an indoor kitty.  Jennifer posted a challenge to do an Escape LO of whatever is your escape and I thought it would be fun to do a LO of Chena and EK.  EK has her bags packed and is waiting patiently by the door for Chena to pick her up in her mobile doghouse and they are off to Alaska.  HA-ha, they don't know that it is still really cold in Alaska and the ground is covered with snow.  They are in for a BIG suprise.  And geez, Chena has never driven in the snow before.  I sure hope they make the jouney safely.  I told Chena to be sure not to let EK eat any birds but I think the birds will be safe as there are only 6 species that spend the winter in Alaska so the hunting will be sparse for EK!  LOL, Chena put lots of cat food in the doghouse for EK!


Journal says:  EK, come travel with me in my mobile doghouse.   I've been from coast to coast, Florida to Nova Scotia, and all the way to Alaska.

Supplies
Base paper – MME Lost & Found Union Square Perfect Damask Print

Other papers – 6x6 BAsicGrey pad, Capella
Bingo Boards and Calling Cards – Tattered Angels
Vine – Reflections
Flowers – Prima & handmade
Escape letters – BasicGrey Max & Wiskers
Fence – layered Sizzix diecut painted with white crackle paint and Crackle Accents, inked with Antique linen distress paint
Suitcase pile – Tattered Angels glimmer chips
Burlap fabric
Key & Bookplate - MM Vintage Findings
Prima flower ribbon


Sunday, February 13, 2011

Fly

Several years ago I attended the wedding of my poodle's breeder's daughter.  The theme of the wedding was medieval and everything was beautiful.  It was extra special to me because you all know how much I love dogs and Saber and Fifi, brother and sister standard poodles, were the ring bearer and the flower girl.  Now, as a child, I had this fairytale dream in my head of getting married and having a long flowing train that my dogs would  carry down the aisle for me.  I think that idea must have come from seeing Lady and the Tramp!  Anyway,  they were both perfect little attendants and sat very quietly and still throughout the entire ceremony which was about 45 minutes long.  About 20 minutes into the ceremony, Fifi sat her little flower basket down in front of her.  She was so pretty and I just love this photo of her.  But I thought it would be fun to add to the fantasy and give her some fairy wings.  I have written a tutorial with a link to fairy wings and pointers on how to add them.  Be sure to check it out if you want to try it!

Used the November Swirlydoos kit for most of this, featuring House of Three Parisian Anthology.  Also used lots of Peacock Chalkboard Glimmer Mist and Distress Victorian Rose ink, Kaisercraft pearls and bling, Prima flowers, Dusty Attic chippy painted with Tattered Angels Tinsel Town Glimmer Glam.  Those are K & Co butterflies. 

The journal verse:
 Faeries, come take me out of this dull world,
For I would ride with you upon the wind,
Run on the top of the dishevelled tide,
And dance upon the mountains like a flame.
~William Butler Yeats, "The Land of Heart's Desire," 1894

PSE Tutorial – Adding wings & clouds

This is my sweet poodle, Chili, she went over the bridge last April, 2010. She was only 7 and was suffering from severe autoimmune diseases. As all pet lovers know, it is really hard to lose a beloved pet, and doubly so when it is before their natural time to go. She was such a pretty girl and I often think of her at the Rainbow Bridge as an angel so I think it’s only fitting to give her some pretty wings!


You will need to acquire wing brushes. I think there are a lot out there. I downloaded mine from Obsidian Dawn.  There are instructions there for downloading the brushes, unzipping the file and installing the brushes as well as a “Random Brushes Tip” that tells you how to add the wing brush to your image. The instructions are easy to follow so I’m not going to repeat them. Instead I’m going to add in some other information that I hope will help you achieve the look you want.

I didn’t like the background in my picture so I decided to replace it with clouds.


Clouds - Steps for this:

1. Create a background copy and make sure that you have this layer selected in the layers box.  Do this by selection Layer, Dupicate Layer in the menu at the top.


2. I don’t want the clouds to cover the dog so I am going to use the Quick Selection tool to select all parts of the image except for the dog. See my tutorial on the Quick Selection Tool if you don’t know how to do this. I actually selected the dog and then I went to Select, Inverse. That has the effect of inverting my selection so now everything but the dog is selected.

3. Select colors in the foreground and background colors that will look like clouds. I used a white foreground and light blue background. To change the color just click on the foreground and background color boxes and select your color.


4. After picking your cloud colors, go to Filter, Render, Clouds. This should give you clouds over the entire part of the photo that you selected.

5. I wanted to reveal some grass so I used the eraser tool to erase part of the clouds from the bottom part of the image.

Wing Color
You can make the wings any color you want and before you apply the wing brush to your photo, you need to select your wing color. Use the Foreground Color box to select wing color. I chose white for mine. The Foreground and Background color boxes are the bottom tool in the picture below. Click on the foreground colorbox and click inside the color box to pick your color.

Brushes Tools
In the brushes tool bar is an Opacity setting. Manipulate this until your wings look natural. Then go to Image, Transform, Free transform to manipulate the placement of the wing to a natural appearance.   I think of wings as being somewhat transparent so you should be able to see somewhat through them. 

Next I used the eraser tool to erase the portion of the wing that was in front of her face. After selecting the eraser tool, you will need to set the brush back to default otherwise your eraser “head” will be wing shaped.

I then added a 2nd layer to place my 2nd wing and repeated the above steps.


And here is my completed project - already for scrapping now!  She is pretty angel!  One thing I learned while doing this project, you should save your projects as PSD files so that you can go back and edit your layers at a later date if you want to.  I always save my images as jpg's and now I know why I should not!!  I am going to add a rainbow to this photo but I really need to have the layers separated to do so.  Soooo, I have to do this whole thing over again in order to get the rainbow in and make it look right....sigh....we live and we learn.....


This is Fifi and she was the flower girl in a wedding.  Isn't she beautiful?!!  I thought she, too, needed fairy wings.  The little fairy at the top is an image I pasted onto this picture.  The colors of the background, pink and blue, I achieved by using the selection tool to select the background and then  manipulate the background colors hue and saturation.  This was a little trickier when I was erasing the wings because the wings had to show somewhat through the tulle netting on her hat.  I set the opacity of the eraser tool at about 50% so that the wings would show through.

I hope this tutorial helps you on your way to your own wings!   I am still learning, it does not happen overnight.  I have spent the entire day today writing this.  But, I have learned alot and that is my objective.  If you have any questions, please post them here and I will try to help you.


Sunday, January 16, 2011

Snow Dance

I just love the pictures I got of Chena and Nika playing in the snow and can't stop scrpping them!  I have one more, think I'll save it for a really hot day this summer!


  I used a real mix of pps here, black, white and gumbo Bazzill cardstock and the diecut is Webster's Pages Your Life with the center cut out.  The black and white piece is GCD Cosette collection and the swiss dot is Heidi Grace Floral with Definitions -  I cut the snowflakes with a MS punch.  Just about everything is sprayed with TA graphite glimmer mist.  The lace is Recollections.   Those great sparkly letters are from Creative Imaginations and the flowers are layered Petaloo Color Me Crzay with a punched snowflake center and rhinestone.  Also rimmed the flower with some puffy paint.

Monday, January 3, 2011

Happy New Year! Snowing & GO

Wow, 2011.....that last decade sure flew by.  Seems just the other day it was January 1, 2000 and I was wondering how I would refer to the new century, you know two thousand sounded so odd!

I am done with Christmas - took the decorations down yesterday and scrapped my last Christmas layout, at least for a while.  I am over red and green!  LOL, love this layout of Nika in the snow though.  The papers are from the Swirlydoos December kit and are Bo Bunny and IOD.  What a gorgeous kit!!  I added the platinum Prima flower and colored the center rhinestone red to match.  The snowflakes are from my stash and they are brads covered with icicle stickles.

Bo Bunny - Noel Joy and Noel Rejoice
IOD - Holly Stripes
Bazzill cardstock
Prima flower, Rossetti Roses Lula
IOD tags


I've really been itching to dig into the Swirlydoos January kit, it is soooo colorful.  Well I took alot of photos on Nika in the Christmas foot of snow that we had.  I could have titled this one Dashing Through the Snow but decided on "Go" as the journal tag has a quote from Confucious.  It says "Where ever you go, go with all your heart." 

Swirlydoos has an action photo challenge going on, so this picture was perfect for it!


Bazzill dotted swiss cardstock
GCD Artsy Urban blue floraland Postcard One
BasicGrey yellow lace
Petaloo Magnolia blossoms
GCD Artsy Urban border strip and blue transparency flourishes
Dusty Attic chipboard vines painted white with touches of pale yellow.


Sunday, December 26, 2010

It's snowing!!

Hard to believe we have nearly a foot of snow on the ground here in eastern NC.  That's really unusual! 

Christmas has come and gone again for another year.  I love Christmas but must confess it was nice to have lots of quiet time today with absolutely nothing to do!!  So I scrapped this photo me my mother and me which I think is a great picture of the two of us!

I used the beautiful Swirlydoos Dec kit for this LO.  The dark green pp is Bo Bunny NOel Stripe and the floral is IOD Night Divine collection from Creative Imaginations as are the two tags.  The cardstock is Bazzill.

I used fired brick distress ink to ink the edges of the circle cut which I made using a Martha Stewart corner punch.  Got this tech. from Lisa at Swirlydoos, TY Lisa!  The 4 red flowers are small roses with layered with 2 hydrangea flowers sprayed with red shimmerz. The red flower with the white stamen is a Petaloo, Magnolia and berries pick.  The holly leaves are sizzix cuts inked with olive and green Cat's Eye pigment ink and Forest Moss distress ink.  The butterflies are some I scanned from the IOD design and painted with Diamond Glaze to give them a little shine.  I distressed the edges first with my Distrezz it all and then dampened the edges with water and bent and shaped.  This was a great way to spend my day!!

Meanwhile the spoos were outside having a ball in the snow.  This was Nika's first snow and she was a little overwhelmed at first but she soon was right in the middle of it playing with Chena.


Thursday, December 16, 2010

White Christmas

It is snowing outside here in NC and that is kind of unusual!  Just a dusting, but still it was fun to watch it coming down.

Here's another LO of the dogs, Chena and Chili, from when we lived in Denver.  We had one heck of a blizzard starting on Dec 20th and it was just a real mess.  The dogs loved the snow though so thought it would be fun to do a Christmas snowy page.  I used the Dec Swirlydoos kit for this and these papers are IOD.  I just tore the trees from some Bazzill cardstock.  The flowers are layered Primas.

Wednesday, December 1, 2010

Angels at Play

Lisanova at Swirlydoos posted a great challenge, do a winter themed LO using a summer or spring photo!  I ran across this photo of Chili and Chena playing and thought it would be perfect.  Its such a great picture of Chili.  After Chili was gone, Chena was in a funk, I know she was missing her sister.  It took several months for her to be herself again and now that we have Nika, Chena is overjoyed.  They adore each other!


For this layout I used 3 layers of white paper plus the silver die cut.  I glued a large Tim Holtz fragment over the photo and then misted part of the fragment and the photo moreso over Chili, the white poodle, than over Chena b/c I was trying to evoke the feel of the heavens.  I also misted the top two layers of paper.  Here's a closeup of the photo:

The corner pieces are from Pink Paislee and are really fun as you can color them with inks or paints.  I used Glimmer Glam to add a silver shimmer to them.

I love randomness and so I added the tulle and the silver beads and let it play randomly over the page.  I like how it subdues the title which I printed on cardstock and traced over it with a gray Glaze pen.


Supplies list:

Paper - Bazzill dotted swiss
  Pink Paislee House of 3 Darling Doilies
  Not sure about the 3rd piece, its a scrap that was laying around.
  Silver diecut - Anna Griffin
Prima roses
Petaloo layered flowers
Memory Makers silver and pearl brads
Photo corners - Pink Paislee Artisan Elements
Tim Holtz fragment
Collage Trims -both fibers
Glimmer mist - Marshmellow and Silver Bells,
Glimmer Glam - Tinsel Town
I glued silver foil paper to TH's grunge paper and then used an old Sizzix die to cut the leaves from that.
Snowflakes cut with an older Sizzlets die from foil paper.

The jounaling is printed in gray onto vellum paper and adhered to soem of the Pink Paislee paper.

The journal reads:

The ivory angel waits patiently at the Rainbow Bridge for her ebony angel sister to join her, knowing that someday they will reunite.  I can picture their happy tails wagging and the fur flying as they romp through the meadows waiting for their humans.

Thanks for visiting!!

Monday, November 15, 2010

Swirlydoos kit - La Chienne

Here's a LO I did using the November kit from Swirlydoos.  It is a really awesome kit featuring Pink Paislee's House of Three Parisian Anthology resist paper.  This paper is just awesome as it is white with lots of resist designs on it.   So you get out your inks and mists and make the paper whatever color you want.  This is Nika, our 7 month old standard poodle.  She is such a love!  She and Chena adore each other and are constantly either playing, eating, or sleeping together.


Monday, September 6, 2010

Finally back home

We spent a wonderful summer in Alaska.  See our travel blog if you want to know more about that.  Road trip - Alaska Bound.

Now that we are home, we have adopted a poodle puppy.  She is delightful and so, so pretty!!

Thursday, April 15, 2010

God has Another Angel

Thank you my dear friends that have sent us messages about our sweet Chili.  You'' never know how much we appreciate your caring words.

LinkWithin

Related Posts Plugin for WordPress, Blogger...