Pages

Showing posts with label Stamperia. Show all posts

Tuesday, March 7, 2023

"Music Sings" Tag for Eileen Hull Designs by Sizzix

 For me, tags are just so fun!  They're big enough to have enough space to play on, yet small enough that they're not overwhelming.  So many people ask, what do you do with them?  Well I attach them to cards and you have instant slim line card.  Sometimes I put them on layouts and most often, I just hang them around my studio because they inspire me and make me happy.  

Sometimes I use them to try out new techniques, they are like art journals to me.  I just never could embrace art journaling because paper inside a book just doesn't work for me.  Maybe its because I'm left handed and have fought with that wire binding being in my way my whole life!! πŸ˜†

Well then, on to business!  This month's theme for the Eileen Hull Design Team is Wordsoup, Tags & Pockets. It's always up to each team member to interpret the theme however they want. So I just went with, make a tag with words on it.


To get started, I chose a Graphic 45 large tag and covered it with design paper and added some beads at the bottom and bling along the side.


Next I cut layers with the Mandala die and  journal cards die.


Now for some assembly, first layer is popped up with foam tape and then the mandala is glued to that.


It's time to prep the center panel with the sentiment. Music Sings was cut with Eileen's new Alphanumeric Die. This is such a great die, the letters are just the right size to use for titles and they are so easy to read!

I always locate and glue the middle letter first and then add the rest of the letters.  That way I know my placement is centered.  (But be aware that in words like music with a skinny "I" in it, the center is thrown off.  I had to reposition the S so that it was slightly off center.)


I find it easier to cut a thin strip of paper and adhere my small letters to it and then cut the words apart.  Its a lot easier to get the letters lined up this way.


Ok, here's the center panel already to place on the tag. Oh wait, it needs one more thing.  I glued cardboard to the back to pop it up.  I like lots of dimension in my tags!


Just about finished, it needs a few flowers and a bow! 


You can better see the dimension in this photo.

All finished, it's just a fun tag that makes me happy.  I really love music and it does sing to my soul!


Supplies


Stamperia's Maxi Background Desire Collection


Thanks for visiting, be sure to stop by next week as I have a fun collection of ATC's to share.  AND don't forget to visit Eileen's blog for lots of inspiration from the other DT members.


Friday, April 15, 2022

New Spellbinders Color Block Mini Shapes

Spellbinders has a new collection, Color Block Mini Shapes, that I think are great for making paper embellishments.


This is the Color Block Mini Inverted Squares die set, it's acutally just 2 dies that cut the graduated set.  Cut several from different colors and then mix and match the squares.


Look how cool these Inverted Squares look on this card. I cut two sets of squares and then mixed them together.  They just add another layer of wow-ness to the card.


I also used a Spellbinders die to cut the "Get Well" sentiment above the inverted squares embellies.


Supplies


Stamperia Oriental Garden Collection


You can find all the Color Block Mini Shapes here at Spellbinders.

xoxo Maggi


Tuesday, March 8, 2022

Mixed Media Journal with Fabrics and Laces for Eileen Hull Designs

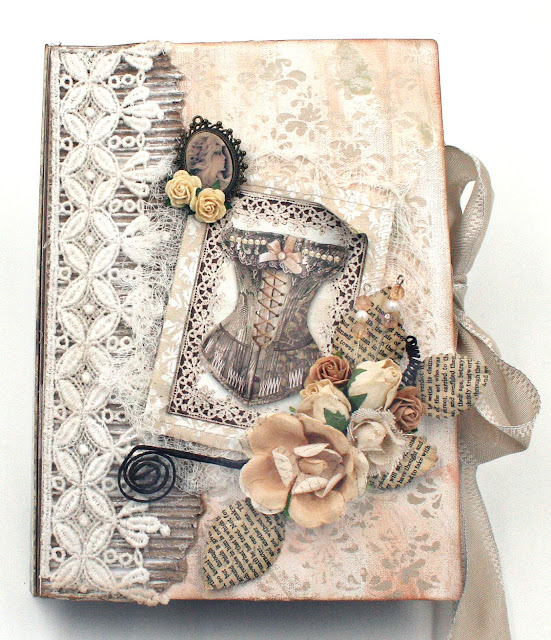
 The theme for Eileen's  March creations is fibers, fabrics and felt.  It's been a while since I created a shabby chic journal so I just dove right in to this project using fabrics and laces and lots of fun mixed media techniques!


I have lots of photos and a tutorial for the cover to share with you so get comfy and let's go!

Tutorial

This journal is a great size at 6.25" x 8.75"; plenty of room for notes and lots of photos.  I used Eileen Hull by Sizzix Full Size Journal to cut the cover.  You do need a BIG machine to cut the cover and I just got Sizzix's new Switch Machine.  Woo-hoo!!  I confess, I made this particular journal because I wanted to see how my Switch worked.

Okay, okay, πŸ˜„πŸ˜„let's get to the tutorial part!  

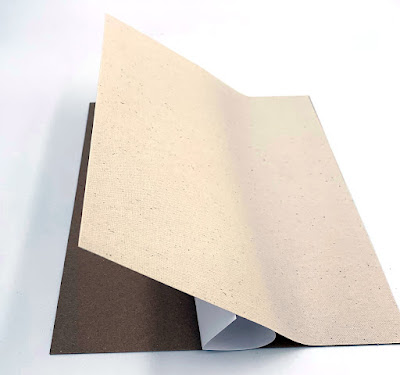
Step 1:  First thing I did was adhere sticky back canvas to 2 pieces of chipboard and diecut the two covers. 


Step 2:  I used thin chip board for the covers and the score lines were about to come apart so I reinforced the area where the scorelines are with fabric washi tape to keep the chipboard from separating at the scorelines. 


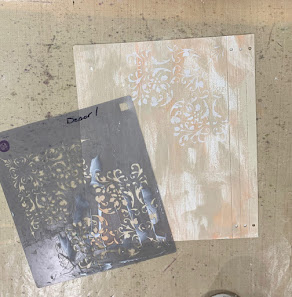
Step 3:  Now we get to the fun part!  I prepared a Gel-Press plate with white, beige and peach acrylic paints and the outsides of the front and back covers.  Sorry, I didn't photo this process but you can learn more about Gel-Press in this blog post.

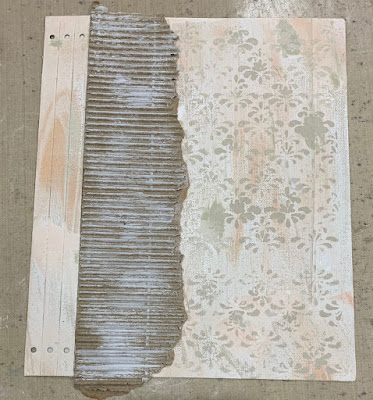
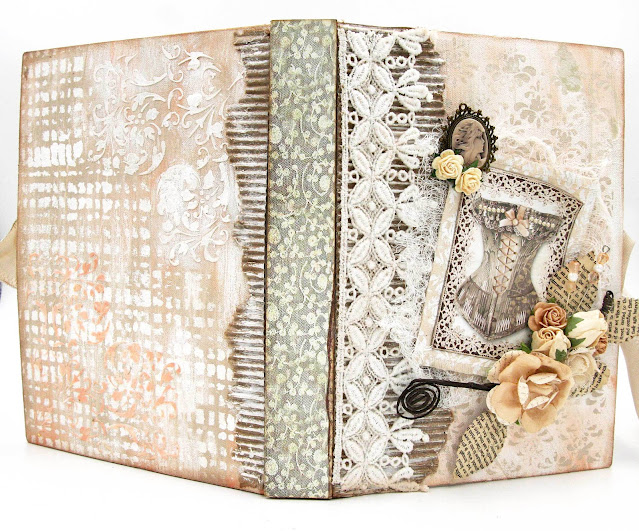
Step 4:  After allowing the paint to dry, it's time to do some stenciling.  On the front cover I used a stenciling brush to dab paint instead of using molding paste.


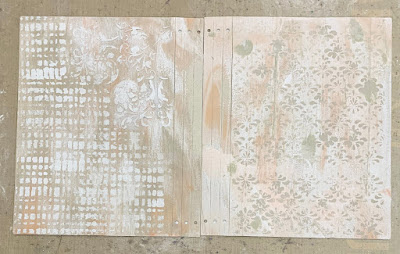
Step 5:  On the back cover, I used white molding paste and after stenciling on the pattern, I went over it with white paint (before removing the stencil) so that the stenciled image would be bright white.  


Step 6:  Here are the two covers together.  You can see that I did some additional stenciling on the back cover with a different stencil.


Step 7:  Add some corrugated cardboard near the edge and dry brush with white paint to add to the shabby chic look.


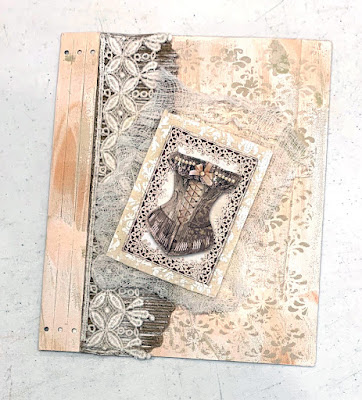
Step 8:  Add a strip of lace over the cardboard using mat medium to adhere it.


Step 9:  Then I layered the vintage corset image over a scrap of fabric and and some distressed cheesecloth.


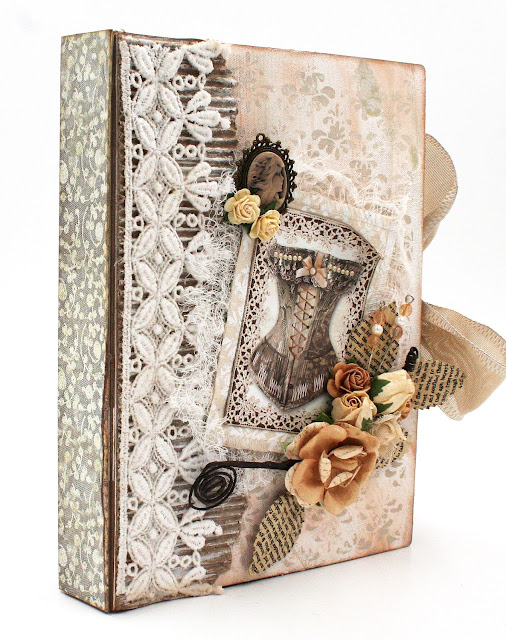
Step 10:  Of course the final step is to add flowers and leaves, along with a vintage cameo and a couple of stick pins.

I added a ribbon closure by gluing ribbon on the inside of the covers.  I used design paper overtop the ribbons as you can see in this photo.  The chipboard sentiment on the right is heat embossed with Aged Ivory embossing enamel.  


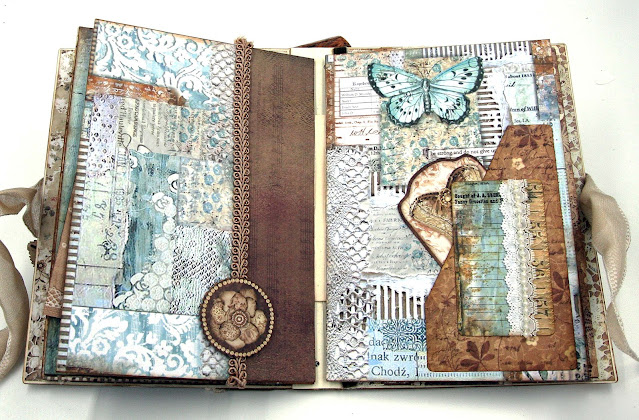
I embossed a piece of black cardstock with Eileen's Vintage Buttons folder and then went over the embossed images with Sizzix wax in rose gold.  I love the effect of the wax on black cardstock.  I added fussy cuts from the paper collections and bits and pieces of lace and trim from my stash.


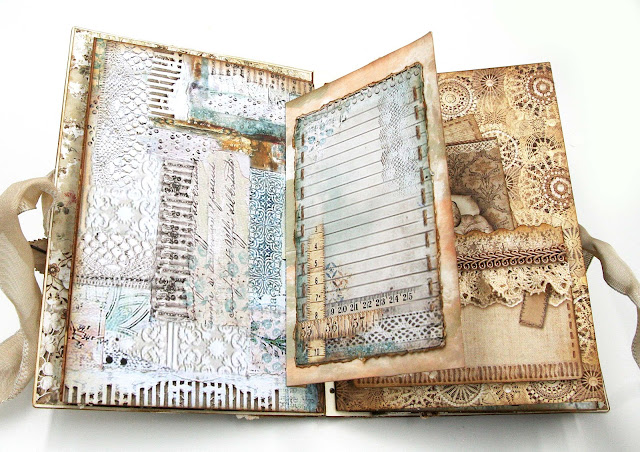
The page on the left has a little page that opens up to reveal a journaling spot and another place for photos.


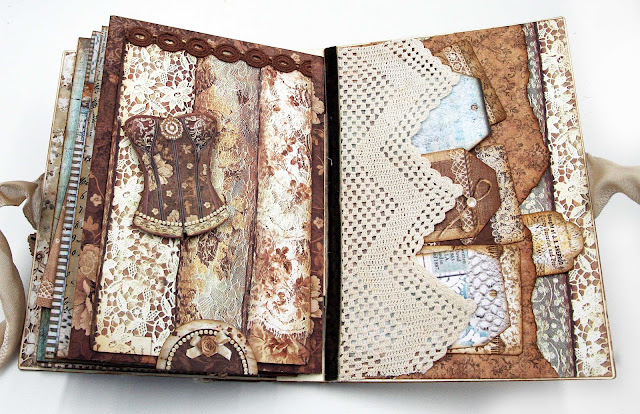
I made a pocket on the left by covering a piece of cardstock with lace.  On the right is a tuck spot and more of the Vintage Buttons embossed cardstock.


On the right is a pocket for tags, notes, etc.


On the right is an envelope that is one of the images in the design papers. I just cut it out and folded it into an envelope. Its a perfect spot for notes and photos!


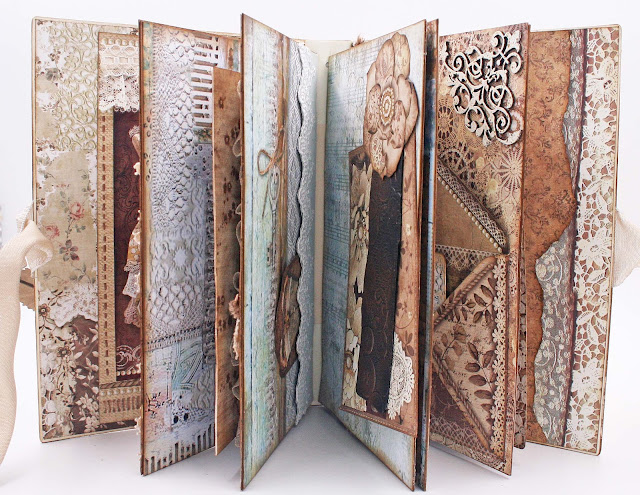
The left side has a page that lifts up and the right side has two pockets.  Making the lace pocket was fun.  I adhered the lace onto a piece of vellum and then glued it onto the brown paper which is also a pocket.  Iliked the torn edge on the brown scrap and decided to just leave it au naturel!


All of the pages in this book are made from covered thin chipboard, so I guess it's technically a "board" book right?


To make the spine stronger, I covered a piece of chipboard with design paper and glued it to the spine.


If you've managed to stay with me through this entire post, thank you!!  It's a long one.  This was a really fun journal to make, I enjoyed working with vintage images and laces!  Thanks for stopping by.

Maggi xoxo

Supplies


Stamperia Atelier Paper Collection
Stamperia Old Lace Paper Collection
Creative Embellishments Chipboard Quotes
Stampendous Aged Ivory
Ranger Sticky Back Canvas
Assorted Flowers, Laces, Fabric from my stash


Tuesday, December 7, 2021

Art Journal using Eileen Hull's Full Size Journal

 This was a really fun project to do and different from my usual style.  I used mixed medias to create the cover and a little paper from Stamperia's Cosmos Collection.


Here's a video that I did with Eileen Hull showing you how I made the cover.  (Instructions begin at 4:33 in the video.)


The covers are done with mists, Luster Wax amd paper and finished off with Glitter Dust.


I used stencils and Luster Wax to create stars and rays.


I started with a black chipboard cover and used just 3 colors of mist the create the night sky.


I heat set gold embossing powder on the floral element in the center to give it more shine.  


Products Used to Create this Cover

Sizzix ScoreBoards Plus Die - Full Size Journal

Skip to the beginning of the images gallery Sizzix Effectz - Luster Wax, Gold

Stampers Anonymous - Tim Holtz - Christmas - Layering Stencil - Burst

The Crafter's Workshop - Stencil - Random Stars

Ranger Ink - Inkssentials - Dylusions Ink Spray - Black Marble

Ranger Ink - Tim Holtz - Distress Oxides Spray - Wilted Violet

Prima Mist - Empress Gold

Stamperia Cosmos Paper Collection 

Glitter Dust Thermoweb Ultra Fine Glitter Spray, Gold

Eileen Hull Red Liner Tape, 1/4", Clear

Eileen Hull Golden Rod Embossing Powder


Wednesday, December 1, 2021

Final Creative Challenge of 2021!

This is a special card that I made for the wonderful gal that grooms my poodles.  They love her so much and delight in going in to have their "hair done"!  She is crazy about my girls and always makes them so pretty! 

This is the inspiration photo for the December Creative Embellishments challenge.  I was immediately inspired and headed straight for a Stamperia paper collection called "Pink Christmas".  It is a perfect match with this photo!  The twist is to use bling and I used a glittery embossing powder for the twist.


This is an easel card and I've used Merry Christmas words from Creative Embellishments to hold the easel in place.  My poodles are silver just like the one on the card (Cottage Cuts die I believe) so this came together in the most perfect way!


The Merry Christmas Titles set is great as it includes 5 title sets each in a different font that are perfectly sized for card making.  I heat embossed these with Stampendous Shabby Pink Embossing Enamel which has glitter in it.  Too bad you can't really see how sparkly it is in this photo.


Here you can see the mechanism that makes the easel.  These are simple cards to make.  Here's a link to a blog post that includes a video tutorial on making an easel card.


I heat embossed the fuzzy part of my poodle with Ranger Antiquities Cement embossing powder.  It makes the greatest "poodle hair"!


From Creative Embellishments 

Merry Christmas Titles


Be sure to join in our final 2021 challenge!  

Monday, June 21, 2021

Becca Feeken Beautiful Sentiment Vignettes from Spellbinders

I have two new beautiful die sets, Beautiful Sentiments Vignettes, from Becca Feeken to share with you today.


First I went the traditional route and made a card with this beautiful set.  It's so elegant!  This is a simple card, I just mounted the die cuts on white card and mounted on a patterned card base. 


To embellish, I added a simple fussy-cut hat on the left with 3 small flowers.


I used Stamperia's Grand Hotel paper collection for the card base and fussy cut hat.  The right card side is  1.25" wider than the left side to add some extra color to the front when it is folded flat.


For a different spin on these beautiful dies, I made a layout using the Heartfelt Thanks Vignette dies as a frame to hold 2 photos on an 8 x 8 layout.  The paper is Graphic 45's Dreamland.


In this photo, you can really see the detailin the die-cuts. Instead of using the frame in the vertical position, I used it horizontally.


There are so many pretty vignettes in this collection.  You can see them here.

Thank you for stopping by today!

Maggi xoxo

LinkWithin

Related Posts Plugin for WordPress, Blogger...