Pages

Showing posts with label ATC's. Show all posts

Tuesday, March 14, 2023

Using Eileen Hull's New Library Pocket to Make ATC's

I had a blast making these ATC's!  They are fun and quick and a great way to use scraps and leftover bits and bobs!  Thanks to teammate  Susie Bentz for the inspiration that got me going on these.

ATC's are sometimes created as set and so this is my alphabet set.  When it's finished there will be 26 ATC's in the set.
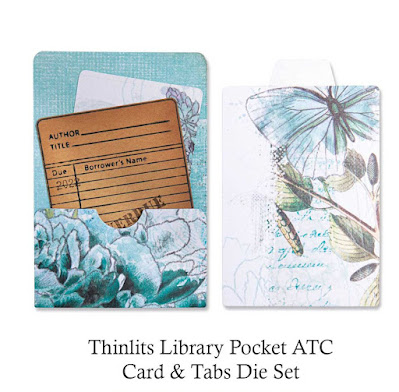

Each of these ATC's has it's own pocket which I also had to embellish!  All the pockets and ATCs are die-cut with Eileen's Library Pocket ATC Card and Tabs Die Set (below).  I love not having to cut my ATC's because they are never "perfect".


My ATC's 

Q is for Question

I made this set with leftovers!  It's black cardstock embossed with Vintage Buttons.  I rubbed luster wax over the raised image to bring out the details in the embossing.


Instead of misting with water when I embossed the pocket paper, I misted with Lindy's Starburst Mist.  The letters I am using for my Alpha set are die-cut with Eileen's Alphanumeric die.  Sometimes I used the cut out letter and sometimes I used the negative letter as I did on this one.

The stamp on the ATC is from Graphic 45's Typography Collection.  I used silver StazOn ink and doodled the edges with Uniball pens.


Sizzix 3-D Textured Impressions Embossing Folder - Vintage Buttons


S is for Seek

More leftovers, I found the wizard and stamped image in a pile of leftovers!


To make this one, I first stenciled a background on the ATC and then added the wizard image.  The pocket is embellished with a die-cut and stamped stamp.


I is for Inspire

This one is cut from a scrap of a Gel Press Print that I made.  It's stamped with a Graphic 45 Inspire stamp from the Typography collection.  I added a piece of torn paper, some washi tape and bling.  That's it.


D is for Dog (of course!)

 I used some Authentique paper scraps that are 2 - 3 years old and stenciled a paw print on the pocket.


On the lower right corner of the ATC is a brad that's from 2005 probably and the dog stickers from at least 15 years ago!! I love shopping in my stash!


B is for Believe


This one is made with Graphic 45 Imagine papers.


I just fussy cut a few things and fit them all together.


The hardest part of making ATC's is dialing my brain back and forcing it to think small.  But I find that the more I make them, the more imaginative I get.  I hope you'll get inspired and make some too!


Here's some more inspiration for you, from long ago, 2010!


Wednesday, March 18, 2020

Small Things challenge at The Funkie Junkie Boutique Blog


The Challenge

Jenny is hosting out challenge this time around and she calls it Little Things.  She describes her challenge, "Sometimes it can be the littlest of things that can mean the most. For this challenge create a small vintage or shabby chic project (or if you're feeling adventurous even a set!) It could be an Artist Trading Card/Coin, a tag or a little card for example, or you may have something else in mind - we can't wait to see them."


My Take on the Challenge

I decided to make artist trading cards (ATC) and a coin.  They are fun little projects to make and a great way to use up odd bits of paper.


This first ATC is a play with mixed media.  I used a spatula to apply modeling paste to the ATC and then pressed a bit of cotton trim into the paste.  After that dried I painted it with green Dylusions paint and let that dry before stenciling on a pattern with a Dylusions stencil.  Then I added a scrap from the Ciao Bella Seventies paper collection, added a ribbon, flower and metal key.


Stamperia Glamour Gel - Gold Dew


For this ATC, I started with a black corrugated ATC card and first inked it with oxide ink in iced spruce and misted it lightly to muddle the color.  Then I heat embossed all around the edges with gold embossing powder.

The sun face and the blue scrap are from Stamperia's Alchemy paper collection.  I cut out the sun face and backed it with a die-cut 3-D Impresslits medallion.  I heat embossed a circle frame with chunky rust and gold embossing powders and glued that over the sun face.  Then I filled in the frame area with glossy accents.  After that dried I glued it to the ATC over top the sun face.  I added a Little Birdie flower and a metal leaf charm that I accented with Metallique gold wax.


Sizzix 3-D Impresslits Embossing Folder - Burst (I used Medallion, but this one is very similar)


This last one is slightly larger than a regulation Artist Trading Coin.  I used Stamperia Roses and Lace paper collection.   I fussy cut a clock face from the collection and covered it with Crackle Accents and allowed to air dry.  The frame is a Creative Embellishments Frame heat embossed with silver powder.  Then the paper underneath the frame is edged with silver Metallique wax.  I just glued the pieces together and that's all there is to it!


Prima Art Alchemy by Finnabair - Metallique Wax - Antique Silver


How to Enter the Challenge

Create a vintage or shabby chic project and link it up to The Funkie Junkie Challenge Blog Challenge, Little Things. The Design Team will choose their top four picks, with the winner being invited to be a guest designer in one of our Funkie Junkie Challenges. The other three winners will receive Top 3 badges to display on their blogs. Everyone who enters and follows the rules will be entered into a draw to have the chance to win a $25 spending spree at The Funkie Junkie Boutique.

Challenge Guidelines

The guidelines for entering are simple; create a new vintage or shabby chic project following the challenge theme, link to your post (not just your blog) and also include a link back to this challenge in your post. You can combine our challenge with up to 10 challenges (including this one) to be in with a chance of winning. If you are entering through a public forum (such as Instagram) you'll need to include the words 'Funkie Junkie Boutique Challenge'. Also, please be sure to turn off your Word Verification so our Design Team can leave comments on your blogs. Make sure you follow these rules as unfortunately, we have had to eliminate entrants from the prize draws in the past.

Thanks so much for stopping by today. Be sure to take a look at the creations of my talented teammates, you can see their creations here, at The Funkie Junkie Blog.

Monday, June 13, 2011

Artist Trading Card (ATC) - The Flower 1/1

I made this ATC fir a challenge at Swirlydoos.  I often use ATC's as "practice" for a new technique.  On this ATC, I covered the background with molding paste and then stamped it with a brick stamp.  I used my heat gun to dry the molding paste, and then I sprayed liberally with Moonshadow mist Bucket o'blood red.  The large flower I cut using my Alterations Tattered Flower die, used the two small flowers.  I rad the flowers through using an embossing folder to give them a bit of texture.  They are sprayed with Moonshadow mist and then touched with silver ink although that isn't showing much in the photo.  I used a silver gel pin to add silver highlites to the leafy vine and the largeer Tattered Angels glimmer glass leaves. I drew the vine and leaves near the bottom using a glue pen and then sprinkled with glitter.  This was my first use of molding paste, I like the end result!


Thursday, March 11, 2010

ATCs - Artists Trading Cards

These are so fun to make and I 've done a couple  vintage ones.

This first one is using Graphics 45 Romantique papers, I just laove the old fashioned ladies.  I just layered several pieces that I cut out.  Then I added some Frosted Lace Stickles to the bodices and gold Stickles to the butterfly, the button is Dress it Up.  And of course, lots of inking.  Hmm, just looking at it, I might add some crackle finish to the rose picture in the background, what do you think?

The Ladies


This one was for a challenge at SOS to do a spring ATC.  Its been so cold and rainy around here I just felt dark and vintagy!  LOL, is that a word?  Anyway here is:

Vintage Spring


This is real simple, the bird is a stamped image that I covered with a Tim Holtz fragment, embossed the scallop which is a Martha Stewart punch, added the Prima flower, K & Co paper image and MM flet rick rack.

Thanks for visiting my blog!!  Appreciate it!

Now I must go do something creative, like dye my hair, LOL!!

Wednesday, February 3, 2010

Artists Trading Cards - ATCs

I love making these!!  I am having a challenge at Pages in Time to create ATCs.  I have decided to use ATCs as a way to try out new things.  Its a bit easier to tackle on a little 2.5 x 3.5 card.  If you mess it up, no big deal.  I really hate it when I mess something up on a 12x12 LO so I find ATCs perfect. 

At the Pages in Time Fashionista Group we all decided that we loved this image of the lady dressed in black and so some of us are going to do ATCs of her.  These are the ATC's that I did.

This first one is my favorite.  It is the Black Widow.  It is a hybrid in that I created the image of the lady by digitally superimposing a spider and a web over the picture and then printed it out. 
Steps:  cover ATC with pp- I used two but you can hardly see one of them.  Then I added some black lace that already had rhinestones attached to it.  Then I added my photo.
I used my Cricut to cut out the chandelier using heavy black CS.  I used silver pigment ink to stipple over the chandelier to give it a metallic look.  Then I used some silver stickles to highlight parts to imitate crystals. 
I highlighted part of the spider web by applying black stickles and I used a very tiny dot of red stickles on the spiders body.  I adherred the chandelier last over the image.  I think the ladies eyes are very haunting so I was careful when adding the web to the photo and when adding the chandelier not to cover her eyes. I inked the title tag and around the entire ATC with black and silver inks. 

I painted the photo and hearts with Range Crackle accents.  I love this effect!  I was afraid that the ink in the photo would run when I applied the Crackle medium but it didn't.  The title is embossed.


I used Perfect Pearls on this one to do the title.  First time for that,  I love the effect but it sure is messy, especially when you open the Perfect Pearls upside down!!  LOL, won't do that again!

This was my first attempt with the Perfect Pearls and it didn't turn out so well.  It is hard to read the title.  I guess it just adds to the mystic of the woman!

Making ATC's is really fun.  Come join me at Pages in Time!

Saturday, January 30, 2010

Artist's trading cards - Challenge too.

Have you ever made Artist's Trading Cards (ATCs)?  This is my first and it was so fun!  I was skeptical about making it at first 'cause I thought I'd rather be doing a LO but I really loved this.  I think its a great medium for trying new techniques.  You can focus a single technique on this small little project.  If you don't like what you did, throw it away as you don't have that much time invested, hopefully!  I just got this great stamp set from Back Porch Memories and an idea popped into my head for my first ATC.

I painted the background with T Holtz brushed pewter crackle paint, then rubbed several colors of alcohol ink into the cracks to give an etheral appearance.  Then I used one of my new BackPorchMemories stamps to stamp the words using archival ink.  Then I adherred the fairy, placed a BG rubon on the left, added stickles to the fairy's wings and bodice, and sprayed all over lightly with marshmellow glimmer mist. I rather like it and think I will do more! 

I am hosting an ATC challenge at Pages in Time and I will randomly select a winner for a RAK.  Do come join my challenge, and check out the other challenges too.  We've got some great challenges going on!  There are challenges for shabby chic, flowers and bling, an exploding box, scraplift!  Come join us!!

LinkWithin

Related Posts Plugin for WordPress, Blogger...