Pages

Showing posts with label Frilly and Funkie. Show all posts

Wednesday, November 6, 2019

Fabulous Fall Challenge at The Funkie Junkie Blog.


The Challenge - Fabulous Fall!

Ginny is hosting our latest challenge and it's a colorful fall challenge.  She says fall is a "wonderful season where the leaves are changing and the air is crisp and our thoughts turn to pumpkin spice everything. For this challenge create a Fall inspired" vintage or shabby chic project.

My Project

As you probably know, I love dimension and bulk and most of my cards don't fit in conventional envelopes.  I just can't seem to stop piling on the layers and flowers!  This card is no exception, it's slider card mounted on a patchwork of beautiful fall colors.  It's lovely as a card or even a piece of fall decor.


The Method

What you're looking at above is a 4.25" x 5.5" slider card that I made with the Spellbinder's die pictured below.  (Sorry the card is upside down)  After assembling the card, I mounted it onto another layer of design paper to give it a frame.


The Frame

Stamperia's Patchwork Collection has so many pretty papers that work with all the seasons.  I selected this patchwork paper for it's fall colors.  The paper is 12 x 12 and has a border all the way around it.  Well I wanted that border all around so I cut a large piece 6" x 7.5".  Then I cut the border off the other corner and glued it in place to create a nice frame.  The size of the frame was determined by measuring carefully so that a 1/8" border of the green would peek out around the card.

By the way, did you know that The Funkie Junkie Boutique carries a great selection of Stamperia products at great prices, do check it out!


After assembling the frame I adhered the slider card to the frame, centering.  Then I adhered a smaller die-cut frame to the card being careful to ONLY glue to the bottom half of the pop up mechanism.  You can see the slider and pop up mechanism in the 2nd photo below.


I glued a die-cut medallion made with gold kraft paper and the Impresslits embossing folder.  It's a lot easier to grasp the pull on the slider with the medallion on it.

View from the back.


To finish the card, just add embellishments of your choice being careful not to adhere anything to the slider itself, thereby preventing it from sliding!

Be sure to join me on November 30th for the Saturday Showcase on The Funkie Junkie Boutique Blog as I will show you how to make  Christmas slider cards of different sizes.  Here's a sneaky peek!


How to Enter the Challenge

Create a vintage or shabby chic project and link it up to The Funkie Junkie Blog Challenge, Fabulous Fall.  The Design Team will choose their top four picks, with the winner being invited to be a guest designer in one of our Funkie Junkie Challenges. The other three winners will receive Top 3 badges to display on their blogs. Everyone who enters and follows the rules will be entered into a draw to have the chance to win a $25 spending spree at The Funkie Junkie Boutique.

Thanks so much for stopping by today. Be sure to take a look at the creations of my talented teammates, you can see their creations here, at The Funkie Junkie Blog.


Supplies from The Funkie Junkie Boutique

Stamperia Patchwork Paper Collection
Distress Oxide Ink - Vintage Photo, Wild Honey, Antique Linen
Bronze Pumpkin Charm
Tim Holtz Idea-ology Metallic Kraft Stock 8 x 8 Pad
Sizzix 3-D Impresslits Embossing Folder - Medallion


Other Supplies
Spellbinders Festive Wreaths Slider Card die set
Spellbinders Netabilities Iron Romance Etched Dies
Bakers Twine

Wednesday, June 19, 2019

Home Sweet Home Frilly and Funkie Challenge

The Challenge

Our new challenge at the Frilly and Funkie Blog is up and Sara Emily is hosting our "Home, Sweet Home" challenge. Sara Emily describes her challenge, "Whether your house is grand or modest, neat or messy, there's no place like home. Houses get bought and sold, but home stays with you forever. For this challenge, I would like to see how you interpret what home means to you on your vintage or shabby chic project."

My Inspiration

I chose to do a layout featuring a photo of my family to represent my home. My Dad was in the Army, so we lived all over the world rarely staying in one place longer than 2 1/2 years. Consequently, for me, a home is not a house, it is my family.  Wherever my family is, that is where I find my home.  


The Details

I used layers of Stamperia's Old Lace paper collection and gold kraft paper to scrap my photo.  The Funkie Junkie Boutique has a great selection of Stamperia.  A tip for tearing paper:  Paint a thin water line on the paper where you want your tear, then just tear it.  You'll find this to be so easy and your paper tears where you want it to tear.


The Funkie Junkie Boutique carries Eileen Hull Designs new Molten Dimensions Embossing Powders.  The title I used is chipboard heat embossed with Golden Rod Molten Dimensions Embossing Powder.  This powder is really thick and chunky.  I got complete coverage with just one coat though it usually takes 2 coats on chipboard with other powders.


The Flowers

These gorgeous burlap flowers are Little Birdie Crafts and they are spectacular to me!  I used just part of one package on this layout.  I love that there are buds as well as flowers all in one pack!


Supplies from The Funkie Junkie Boutique

Venise Lace Trim - 2 inches

How to Enter the Challenge


Create a vintage or shabby chic project  and link it up to the Frilly and Funkie Challenge, Home, Sweet Home.  The Design Team will choose their top four picks, with the winner being invited to be a guest designer in one of our Frillie and Funkie challenges. The other three winners will receive Top 3 badges to display on their blogs. Everyone who enters and follows the rules will be entered into a draw to have the chance to win a $25 spending spree at The Funkie Junkie Boutique.


Thanks so much for stopping by today.  Be sure to take a look at the creations of my talented teammates, you can see their creations here, at the Frillie and Funkie Blog.

Wednesday, June 5, 2019

Embellishments, Trinkets and Trims Frilly and Funkie Challenge

Time for another challenge over at The Frilly and Funkie Blog and this time hosted by Jenny.  Her challenge is Embellishments, Trinkets and Trims and she says "Linda sells a huge array of beautiful embellishments, trinkets and trims in her store (The Funkie Junkie Boutique), from metal filigree pieces and charms to buttons, laces and ribbons. They can be the important focal point on a project or the final finishing touches that complete it. However you wish to use them lets see those embellishments, trinkets and trims in action on your vintage or shabby chic entries."

My Take on the Challenge
I totally love Stamperia papers and The Funkie Junkie Boutique carries many of their collections.  One of my favorites is Alice, what a wonderful fun collection.  I also happened upon Tim Holtz's Big Talk Snarky quote collection.  Oh there are some great quotes in there, many of which I've said in my head, but fortunately not aloud!  Anyway, I thought this quote worked with the Alice papers.

As usual I've used a Graphic 45 large tag in kraft.  Then I layered up some of the design papers.  Alice is fussy cut and popped up over a cut-apart card that is also popped up with cardboard.  (I use cardboard when I am popping up larger pieces as it provides a sturdy base without have to use so much foam tape.  It gets expensive ya know?)

I used charms, a button and ribbons to embellish my tag.   The two teacups are fussy cut from the design paper and popped up with foam dots.


I stenciled on the word Adventure before adding Alice to the tag. The Big Talk Snarky quote is printed on bright white paper which just doesn't work.  A quick inking with Distress Antique Linen fixed that right up.


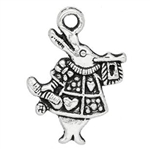
Take a look at that ever so cool white rabbit charm down in the lower corner.  Isn't that just the coolest charm? (click on the photo for a better look.)  I used a silver filigree metal piece and heat embossed it with Ancient Amber embossing powder.  I layered on a flower and topped it with this cool rabbit charm from the store.  


The metal teacup and teapot charms are from my stash and I've no idea where they came from or how long I've had them.  They work nicely with this tag though!

 I wanted a gold button over my gingham ribbon but didn't have one so I used Eileen Hull's thick embossing powder to make my own.  I just dabbed on some embossing ink, sprinkled on the powder and heated.  I think it turned out great!  


How to Enter the Challenge

Create a vintage or shabby chic project  and link it up to the Frilly and Funkie Challenge Embellishments, Trinkets and Trims. The Design Team will choose their top four picks, with the winner being invited to be a guest designer in one of our Frillie and Funkie challenges. The other three winners will receive Top 3 badges to display on their blogs. Everyone who enters and follows the rules will be entered into a draw to have the chance to win a $25 spending spree at The Funkie Junkie Boutique.

Thanks so much for stopping by today.  Be sure to take a look at the creations of my talented teammates, you can see their creations here, at the Frilly and Funkie Blog.

Supplies from The Funkie Junkie Boutique

Round Silver Tone Filigree Embellishments - Set of 4 (similar to the filigree flower I used)
Graphic 45 Large Tag (this one is ivory, I used kraft)

Saturday, May 25, 2019

Saturday Showcase - Graphic 45's Bloom Collection

Happy Saturday and welcome to The Frilly and Funkie Saturday Showcase!  Today I'm sharing a tutorial, as well as some of my favorite products available at The Funkie Junkie Boutique, on The Frilly and Funkie Blog.   I want to show you Graphic 45's recently released Bloom collection and how to make a really pretty tag that is also a card using different products, layers, shapes, and flowers, of course!  Hope on over to the Frilly and Funkie Blog for a step by step tutorial to make this tag.


Thanks so much for spending part of your day with me.  Give yourself a break and take some time to craft!

xxo  Maggi


Wednesday, May 22, 2019

Stamperia Roses & Laces for The Frilly and Funkie Blog Challenge

Mother May I Challenge
Our new challenge at the Frilly and Funkie Blog is up and Suzz is hosting.  May in the U.S. is when we celebrate Mother's Day and honor our mothers. Suzz is challenging you to create something that is vintage or shabby chic which is inspired by your Mother or any mother figure in your life. It can be a favorite memory, something based on her style, something she said/says to you, or anything that reminds you of your mother figure. Make sure to share with us how your mother inspired your art!


My Take on the Challenge

My Mother is my inspiration for so many things, most importantly, how to live a good life.  She passed away September 21, 2018 at the age of 96 1/2.  This will be my first Mother's Day without her and I know it will be hard.  For the last 10 years I have hosted a big family meal with a menu of Mom's choosing.  I thank my Mother for so many things but most importantly for teaching me to be strong, independent, and honest.  And I really can't thank my Mom without also thanking my Dad as he was her partner for life (72 years!) and together they taught us how to live the good life, but always having compassion for fellow man.

I used Stamperia's Roses and Laces papers for my layout.  Have you taken a look at Stamperia papers?  They are stunning and different from so much that is on the market.  Really rich vintage colors and images. The Funkie Junkie Boutique carries an extensive line of Stamperia, be sure to stop by and take a look.


Eileen  Hull's new Molten Dimension Embossing Powders by Emerald Creek

Ya'll I love embossing powder and I have like a gazillion of them!  Eileen's are really special because they are so thick and dimensional.  AND they layer nicely too!

Take a look at the leafy vine.  First I dabbed embossing ink on the chipboard.  If it's a large piece like this one, I do half at a time as the embossing ink tends to soak into the chipboard if you don't first paint it...and I usually don't. Too lazy 😅!    

First coat of powder was Aqua Splash.  After that cooled, I dabbed a bit more embossing ink on, just in random spots, and then added a bit of White Wonder embossing powder.  I heat embossed that and while the melted powder was still hot I sprinkled on tiny bits of Golden Rod and Polished Silver.  I love the multi-color effect!


 The filigree piece beneath the flower and clock was a silver metal piece that I heat embossed the same way as the chipboard.  Doesn't it look so pretty?  A WORD OF CAUTION:  If you heat emboss metal, DO NOT touch for several minutes, the metal gets really really HOT!!

Just above the filigree piece I made a pocket to tuck tags into.  This is a really fun way to do some hidden journaling.


Embellishments:

On either side of the photo I used a die-cut made from silver foil paper and the Provincial Impresslits die.  The I lightly applied a little bit of embossing ink with a paint brush and sprinkled with Baked Velvet Aegean Sea.  I love how it fills in the impressions with color.

The flowers I used are Little Birdie Crafts.  You can't see it so much in the photo but these are really sparkly, sooooo pretty! 

I stenciled a bit on the background using a rosette stencil.  You can see it on the right corner above  and on the right corner below, under the flowers.  I rubbed Distress Oxide Iced Spruce over some of the stenciling to make it stand out.


How to Enter the Challenge

Create a vintage or shabby chic project  and link it up to the Frilly and Funkie Challenge, Mother May I.  The Design Team will choose their top four picks, with the winner being invited to be a guest designer in one of our Frillie and Funkie challenges. The other three winners will receive Top 3 badges to display on their blogs. Everyone who enters and follows the rules will be entered into a draw to have the chance to win a $25 spending spree at The Funkie Junkie Boutique.

Thanks so much for stopping by today.  Be sure to take a look at the creations of my talented teammates, you can see their creations here, at the Frillie and Funkie Blog.


Emerald Creek Eileen Hull Molten Dimension Embossing Powder - White Wonder
Emerald Creek Eileen Hull Molten Dimension Embossing Powder - Golden Rod

Thanks so much for visiting today!

Wednesday, May 8, 2019

Graphic 45 Love Notes Easel Card for Frilly and Funkie Challenge Blog

I Love It Because...Challenge at The Frilly and Funkie Blog

This is a great challenge because you only have to do something that you love to do.  How easy is that?  Jenny Marples is our hostess this time and this is her description of the challenge: "How often do you create something just for you that makes your heart sing? Doesn't it feel great when you do! My challenge to you is to make a vintage or shabby chic piece of art, be it a journal page, a tag, a card, a home decor project etc, that fills you with happiness and makes you smile - don't forget to tell us why you love it so much."

My Take on the Challenge

My approach to this challenge was really quite simple, I just chose all the things I love and it became this gorgeous easel card.  First of all I was making this card for a special friend, that alone gave me impetus to create something special.  Then I chose all my favorite things: red, black and ivory Graphic 45 papers, beautiful Little Birdie blooms, chipboard, embossing powders and some pretty trim.  Of course this card is something I love!

I chose Graphic 45's Love Notes collection that was released in January to make this easel card. I love the drama of these colors and I think the woman silhouette really sets this card off quite nicely!

I think easel cards are especially nice because they display so prettily standing up as they do. 

The Chipboard

All the chipboard except the silhouette is from Creative Embellishments. I heat embossed the frame with Seth Apter's by Emerald Creek Baked Texture - Dirty Sand embossing powder. I love the multicolored look and textured feel of it. The words and silhouette were heat embossed with Seth Apter's by Emerald Creek Baked Velvet - Eclipse. The chipboard piece beneath the thank you words was inked with Distress Oxide Antique Linen Ink.


The Flowers

I used a mix of flowers from Little Birdie Crafts and Graphic 45.  The largest red rose and the buds are Graphic 45 and part of their Staples line.  I'm so happy to see G45 carrying coordinating flowers for their paper lines!  The rest of the flowers are Little Birdie Crafts and they are sooooo gorgeous.  The white ones are sparkly though that doesn't show to well in the photo.  


The Easel Mechanism

Easel cards are really easy to make,  Here's a link to a tutorial for an easel card.   They can be any size, this one is 7" x 6 1/4".  I used a simple strip that is popped up with foam tape to serve as a stop to hold the easel upright. That leaves plenty of room inside to write a personal message but still looks really pretty with the front of the card.  Take a second look at the first photo and you can see how it holds the easel in place.


How to Enter the Challenge


Create a vintage or shabby chic project  and link it up to the Frilly and Funkie Challenge, I Love it Because. The Design Team will choose their top four picks, with the winner being invited to be a guest designer in one of our Frillie and Funkie challenges. The other three winners will receive Top 3 badges to display on their blogs. Everyone who enters and follows the rules will be entered into a draw to have the chance to win a $25 spending spree at The Funkie Junkie Boutique.

Thanks so much for stopping by today.  Be sure to take a look at the creations of my talented teammates, you can see their creations here, at the Frillie and Funkie Blog.

Thanks for stopping by today!

Supplies from The Funkie Junkie Boutique

Graphic 45 - Love Notes Collection 12x12" Collection Pack 

Wednesday, April 24, 2019

Spring is in Full Bloom at The Frilly and Funkie Challenge Blog.

I'm hosting the new challenge at the Frilly and Funkie Challenge Blog this time around. And guess what?  Yep, It's time to kick Old Man Winter out and extend a warn welcome to my favorite time of the year, Spring! Here in the south the trees and shrubs are all blooming and showing their splendor. Many are busy planting their vegetable gardens. The migrating birds have returned to build nests and raise a new family. Your challenge is to create a vintage or shabby chic project that illustrates the magic of spring in bloom!

My Take on the Challenge

I'm back to my layout roots.  If you follow my blog, you know that I like to get funkie with bright colors sometimes and I like to dabble in mixed media.  But really, what I love most of all is making a pretty layout with lots of flowers and a great photo and that's exactly what I've done to illustrate today's challenge.  The photo was taken out in the Caribbean somewhere while on a cruise with my best scrappy pals.


I've embossed my title word and the flourishes under the flowers with Seth Apter's Blizzard Baked Texture Embossing Powder.  I love the textured and multicolor look of Seth's Baked Textures!  The Funkie Junkie Boutique has a great selection of Seth's embossing powders too.


The word and flourishes are Creative Embellishments chipboard; they look so pretty peeking out from underneath my spring flowers.


These gorgeous blooms are from Little Birdie, and they are so exquisite, especially combined with Graphic 45's new release Bloom.  Bloom papers, Little Birdie flowers, what else would you need to make a delightful blooming spring layout?!


 YOu can find Little Birdie flowers at AC Moore Arts and Crafts!


How to Enter the Challenge

Create a vintage or shabby chic project  and link it up to the Frilly and Funkie Challenge, Spring is in Full Bloom. The Design Team will choose their top four picks, with the winner being invited to be a guest designer in one of our Frillie and Funkie challenges. The other three winners will receive Top 3 badges to display on their blogs. Everyone who enters and follows the rules will be entered into a draw to have the chance to win a $25 spending spree at The Funkie Junkie Boutique.

Thanks so much for stopping by today.  Be sure to take a look at the creations of my talented teammates, you can see their creations here, at the Frillie and Funkie Blog.

Supplies from The Funkie Junkie Boutique


Wednesday, March 27, 2019

March Madness Challenge at The Frilly and Funkie Blog

Challenge Theme

Time for a new challenge at the Frilly and Funkie Blog and this one is so fun!  It's all about March Madness ans Suzz is our hostess!  She says, "Don't be afraid, the challenge isn't going to require you to use basketball inspired images. Instead I want you to be inspired by Alice in Wonderland. I started from this quote of a conversation between the Mad Hatter and Alice: The Mad Hatter asks Alice: "Have I gone Mad?" and Alice replies "I am afraid so. You're entirely bonkers. But I'll tell you a secret. All the best people are." The challenge is to take any idea or concept from this wonderful tale to inspire your project. There are so many wonderful bits or pieces to be inspired by like the Queen of Hearts, the mad hatter, the looking glass, tea party or Alice herself. The possibilities are endless. Anything can be your inspiration but make sure you reference what inspired your art from the story!"

My Take on the Challenge

My inspiration is simply the Mad Hatter, oh how I love to make hats and so I crafted this funky far-out hat for the Mad Hatter to wear.  I used Stamperia's new collection, Alice, to make this colorful hat.  Now isn't that just the perfect collection for this project!!  You can find it at The Funkie Junkie Boutique but better hurry, because, Stamperia papers sell out pretty quick.


The Flowers

I made the largest flowers on this hat using one of my favorite flower dies, Sizzix Alterations Tattered Florals.  I just love these pretty flowers!

I made two of them, and then I added some of Graphic 45's gorgeous lush Triumphant Red Roses.  They come in a  pack complete with rosebuds, leaves and spirally thingys!   (Thingys, that's a technical term, 😃)

Take a look at the White Rabbit charm dangling, isn't that just the cutest!  The Funkie Junkie Boutique has them in packs of 6.  I imagined that the Mad Hatter needed some scissors so I have a pair of those dangling from this mad hat too.


Every seamstress needs buttons so there are a couple of those nestled in there too.


One more view of the White Rabbit, I think he's heralding the handmade flowers!  😉  I misted them with Lindy's to give them lots of sparkle.


How to Enter the Challenge

Create a vintage or shabby chic project  and link it up to the Frilly and Funkie Challenge, March Madness.
The Design Team will choose their top four picks, with the winner being invited to be a guest designer in one of our Frillie and Funkie challenges. The other three winners will receive Top 3 badges to display on their blogs. Everyone who enters and follows the rules will be entered into a draw to have the chance to win a $25 spending spree at The Funkie Junkie Boutique.

Thanks so much for stopping by today.  Be sure to take a look at the creations of my talented teammates, you can see their creations here, at the Frillie and Funkie Blog.

Supplies Available from The Funkie Junkie Boutique


Thanks for stopping by!

LinkWithin

Related Posts Plugin for WordPress, Blogger...