Pages

Showing posts with label cards. Show all posts

Tuesday, January 13, 2026

Creating Cards for Eileen Hull Designs

Eileen’s creative team is in full card-making mode this month! We’re creating a card bonanza of designs you can use all throughout 2026. Be sure to visit Eileen’s blog all month long to see the team’s projects, packed with inspiration and creative ways to use Eileen’s dies. You’re sure to find plenty of ideas to spark your card making for 2026!


Travel card

We travel a lot, often with an RV tour group. Each tour usually includes about 50 people, plus the tour leaders. It’s great fun because we travel in our own RVs but camp and explore together. Some of our tours last more than two months, and we truly enjoy seeing the countryside while traveling with like-minded friends.

I made this card as a thank-you for our tour guides. It’s a little hard to see in the photo, but the black cardstock was embossed with Lacey Leaves, which adds beautiful texture. I used the Tunnel Arches die set to create the layered design on the front of the card.


 I used the Bookmarks die set to create a pocket where I inserted a tag.  I attached two Tim Holtz Thought Tokens to the front of the pocket along with a Graphic 45 washi tape stripe.


At the end of each tour, we like to thank our tour leaders with a tip for taking such wonderful care of us. I used the Bookmark, Pockets set to create a pocket on the left side of the card, perfect for tucking in a cash gift. On the right, there’s a panel that leaves plenty of space for a personal note.


Birthday Card

Everyone needs a birthday card now and then! This one was fun to make using two sizes from the Tunnel Arches set to create a tri-fold design. 


Inside, I used the Windowsill Flowers set so it looks like you’re gazing out a window at a warm, inviting summer scene. I scored the two smaller arches at ¼" and adhered them to the sides of the large arch.  If you look closely, you can see wherethe center arch overlaps the smaller arches in the photo below.


View from the back.  The green design paper covers the overlap of the small arches to the large arch makingfor a smart seamless design.


All Purpose Card

This versatile card works for almost any occasion. I used diecuts from the Field Notes and Specimens die to create the layered front. First, I cut a layer from black cardstock, followed by a patterned paper layer.  I offset the centerfold of each layer so that a 1/4" border would show at the scalloped and bottom edges. I then added another patterned paper layer on top, trimmed ¼" shorter so the black scalloped edge peeks out.


Inside, there’s a pretty vase of flowers cut with the Windowsill die set, along with a coordinating sentiment from the patterned papers. It’s a beautiful way to let someone know you care.


Close up view.


Supplies by Eileen Hull Designs for Sizzix


666767 Sizzix Thinlits Die Set 17PK - Bookmark, Pockets and Toppers


Other Supplies

Graphic 45 Cityscapes


Thanks for joining me today.  I hope you are inspired to make some great and meaningful cards!

xoxo
Maggi

Tuesday, September 9, 2025

Making Cards with Eileen Hull's new Tunnel Arches

Today I'm making cards with the newly released Eileen Hull Sizzix Framelits Set.  Both of these cards were easy and quick!


I love easel cards because they display so nicely as they stand on their own.  I made this one using the 2 larger arches from the Tunnel Arch set and Eileen's new 3D embossing folder, Lacy Leaves.


Here's a quick video showing how its done.


Here's a view from the side, illustrating how it stands on its own.


I used the Tunnel Arches and Windowsill Flowers & Vase Thinlits set to make this card along with the Lacy Leaves embossing folder.  To frame the adorable flowers and vase I heat embossed a chipboard frame.  Under the vase is an embossed arch (same process as the easel card), then a larger cardstock arch, over a layer of design paper.  (Graphic 45 Let it Bee.)  You can add a sentiment either on the front or inside.  I left it blank for now so I can use it as an all occasion card.


Eileen Hull Designs Products Used

666977 Sizzix Textured Impressions A5 3-D Embossing Folder Lacy Leaves
666979 Sizzix Thinlits, 13 pcs,  Windowsill, Flowers & Vase
666980 Sizzix Framelits, 7 pcs, Tunnel Arches

Tuesday, June 10, 2025

10 minute Mixed Media Card with Eileen Hull Designs Rainbow Wheels and Plate and Pattern Stencil

I had a fun play with Eileen Hull Designs new stencils!  I used her newest release, Color Wheel, as well as Plate and Pattern that was with her previous release.  I stenciled with markers and molding paste. While that was drying,  I stamped a sentiment on a die cut from the new Journal Hardware Scoreboard die to go on the front. Have a look at my video to see how.


Here's another card I did using the same techniques.  I used a stencil that was just laying around my studio for the background and then the Color Wheel stencil over top that.


Tuesday, July 30, 2024

A Step Card Featuring Eileen Hull's Watercolor Flowers & Lattice Layered Stencils

 Here's a cheerful step card made with the Watercolor Flowers and Lattice Layered Stencils.  I love the pretty design made by using the layered stencils.

I first stenciled the lattice background with yellow ink.  I chose a light color because I wanted the stenciled floral images to cover over the lattice stenciling.  There are two floral stencils which gives the multicolor look to the flowers.  The larger petals are lightly stenciled with Distress Oxide ink (Victorian Velvet).  Then using the small petal stencil, I applied the same color of ink but used a heavier hand.  

I thought my card was sort of dull so I added the two lacy doilies die-cut with Eileen's Mandala die behind the center card and I think it was just what the card needed. The small bow finishes it off nicely!


This is a step card, which is one of my favorites. It stands up by itself and looks pretty wherever it stands!    Here's a link for a template to make this card.


Be sure to stop by Eileen's blog for more great ideas from all of the designers.


Friday, September 22, 2023

Gnomes for the Seasons with Spellbinders Gnome Hugs Die Set

I had a blast creating with the Gnome Hugs Die Set; gnomes are so cute!  The die set is really for Christmas gnomes but I decided to use the die set to creat gnomes for all seasons.   Here are 4 seasonal cards created with the same die set, Gnome Hugs from Spellbinders. (S6-213)


Since this is a Christmas die set, let's start with the Christmas Card.  I used Stamperia Christmas paper scraps and a journaling card to create this card.  


The sentiment is printed on a transparency and glued to a small tag.  


Halloween is coming soon so I thought some "spooky gnomes" were in order.  I don't think gnomes are very spooky, they're too cute to be scary!  This card is made with left over bits of Haloween paper.  In addition to using the Gnome Hugs die set, I used Autumn Wonder for the pumpkins, and Notched Corner Frames for the inner black print layer.


The gnome on the left is wearing a witch's hat that I fussy cut instead of the die-cut hat.  The two larger pumpkins are cut with Autumn Wonder and the smaller is from an older 2018 die set, the pickup truck bed.


Of course, I needed a beach gnome for the summer!  I used Graphic 45's Sun Kissed collection for this card.  Our gnome is playing in the sand with a fussy cut shovel and bucket.


I rounded off the hat die cut from the Gnome Hugs set to make what I hope resembles a swim cap.  And his feet, well they're  supposed to be swim flippers that I just cut freehand.  Ha!  Whatever... they look a bit like feet or flippers. 😄


And finally, the spring gnomes in their garden of flowers, die cut using the Envelope of Wonder flower dies and papers from Graphic 45's Once UPon a Springtime collection. 


...And that's a wrap for Gnomes for the Seasons!  Thanks for joining me and my gnomes today!

xoxo Maggi


Supplies


ENVELOPE OF WONDER ETCHED

Tuesday, May 9, 2023

Using Dies in a "Different" Way

It's Die Cut Mania this month for Eileen Hull's design team.  We're going to show you different ways to use your dies and give you tips and tricks.


Making Edgy Die Cuts


I love to give my cards a fun edge like on this easel card.


I used 49 and Market's beautiful Art Options Rouge collection to make this card.  You know red is my favorite color so this collection has my name all over it!


Here's a view from the side where you can see the easel mechanism.


Here's the card laying flat.  There's plenty of room to write a nice message inside.


Join me Tuesday, May 9 on Facebook Live with Eileen Hull and I'll show you how to cut this fun edge.  If you can't make the live, be sure to catch the replay!  You can see the Live on the Eileen Hull Designs Facebook page.


Supplies

Tuesday, April 25, 2023

Slimline Cards with the New Mini Slimline Tickets Thinlits Set from Eileen Hull Designs by Sizzix

I'm sharing some pretty cards today that I made using Eileen Hull's new Slimline Tickets Thinlits set. 


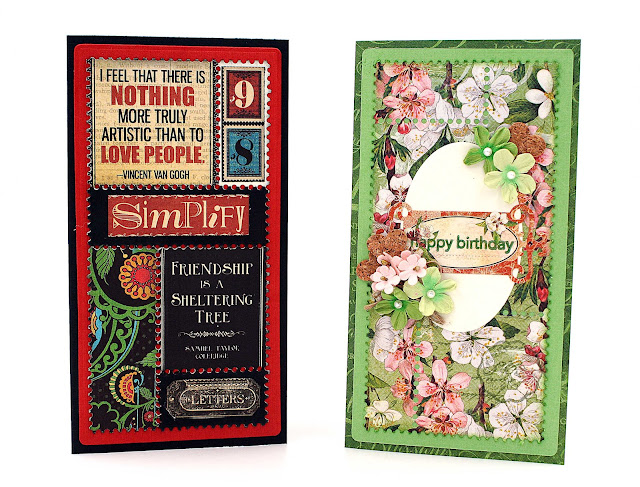
These are simple and to make.  Simple does not mean boring.  These cards are jazzed up with a cool background layer that is a tear apart tickets that I just didn't tear them apart.

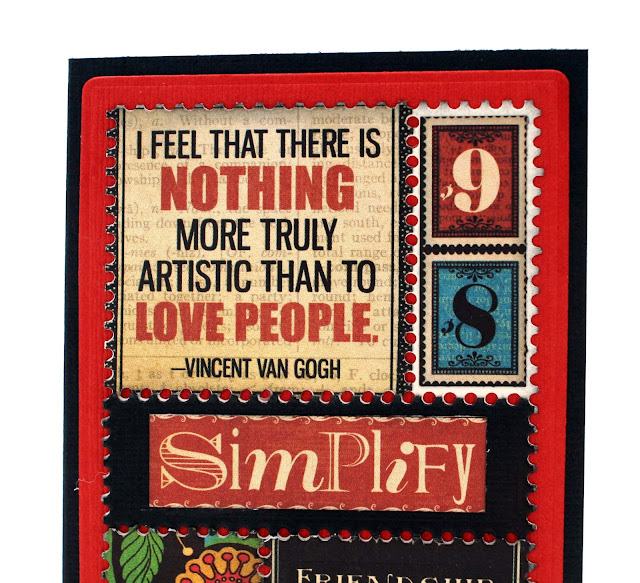
I started with a black card base topped with a red layer.  Then I die-cut tear apart tickets from cream cardstock.  Then I die-cut tickets from Graphic 45's Typography collection.  (A very old collection, but my most favorite G45 collection ever!)  I layered the diecut tickets on top of the cream cardstock, covering it for the most part.  But, I needed that layer as a template for all my torn apart tickets.  I think it makes a colorful and effective fun card for a friend.
You can see the cool effect of the tear apart tickets in this photo.


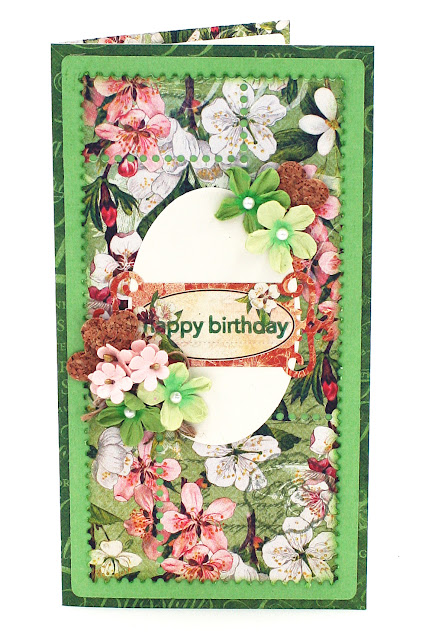
Here's another card again consisting of a dark green card base, green cardstock layer and topped with a panel of die-cut tickets from Graphic 45's Fruit & Flora collection. 


Then I added an oval die-cut with the oval die from the Journaling Card, Envelope & Window Thinlits Set. I topped the oval with a tag from the G45 collection stamped with Eileen's Happy Birthday stamp.


Supplies - Eileen Hull 

666277 Sizzix Thinlits Die Set 4 PK - Mini Slimline Tickets
666276 Sizzix Thinlits Die Set 6 PK - Journaling Card, Envelope & Window 


Thanks for visiting!
xoxo Maggi


Tuesday, April 18, 2023

Simple Cards and Envelopes with Eileen Hull's New Journaling Card, Envelope & Window Thinlits Set

 The Journaling Card, Envelope & Window Thinlits Set is so fun and makes the cutest envelopes and journaling cards.  Oh but wait!!!  You can turn that journaling card into a card and that's what I've done!

Here are the 3 cards, but, let's take a closer look.


First, here's how you how to turn the journaling card die into a card die.  Fold a piece of paper large enough for the die to cover and place the die such that the left edge is not on the paper and as such, will not cut into the paper. I always tape it down so that it doesn't move when I run it through my machine. Presto, you now have a card that opens and closes!


To make this card and envelope I first die-cut a cream envelope and decorated it with design paper and two small rectangle tags die-cut with a die from this set and topped with black rhinestones. I used my very favorite Graphic 45 collection, Typography.  Every year I suggest that this be brought back as a Collector's Edition but it hasn't happened yet.  🙁

To make the card I used black cardstock topped with a panel die-cut with Eileen's Mini Slimline Tickets.  By tearing off the two tickets at the bottom, I had a piece that perfectly fits on the card without any trimming.  I love that! I layered a design tag over that, and then topped it all with the fussy cut lady. 


Here's a simple card that I made using Graphic 45's Ephemera Queen collection.  I die-cut the envelope from cream cardstock and then added colorful design paper to make it pretty! (See this post to learn how to die-cut pieces to perfectly fit the envelope).


I adhered a G45 journaling card to my die-cut card.  Then I used one of the small rectangular dies in the set to die-cut a tag and stamped it with one of Eileen's Happy Birthday sentiment stamps and adhered near the bottom. You can't see it so much in the photo but I fussy cut the two birds and popped them up to add some dimension to the card.

Now let's get fancy and make an easel card!  


First, let's take a look at the envelope.  I die-cut the envelope from design paper and then added a couple of layers on top. I know, I'm excessive that way!  I used the Journaling Card die to cut the top piece and then I cut a window in it with one of the small rectangle tag dies.  I placed the "believe" word underneath to show through the window.  I love fancy envelopes.
Now for the card:  Cut a card in the same manner shown above.  Fold the top piece in half as shown below.


Then use the same die to cut a journaling card.  Adhere the top of the journaling card to the flap created by the fold.  Be careful to only glue it to the top half of the fold. It should look like this after gluing the two pieces together.


Now embellish the card.  I used Graphic 45's Imagine collection for this card.  This view shows the card flat.

Inside the card I created a "stop" so the easel would stand up.  I die-cut a long ticket with the Mini Slimline Tickets die and topped that with a piece of chipboard.


Here's a view showing the easel mechanism.


I think these cards are so cute at 3" x 4". Perfect size to tuck in with a gift!

Thanks for stopping by today.  Next week I'll be showing mini slimline cards, I hope you can join me.


Supplies - Eileen Hull

666276 Sizzix Thinlits Die Set 6 PK - Journaling Card, Envelope & Window 
666277 Sizzix Thinlits Die Set 4 PK - Mini Slimline Tickets

LinkWithin

Related Posts Plugin for WordPress, Blogger...