Pages

Showing posts with label Ciao Bella. Show all posts

Tuesday, March 21, 2023

Extra Large Spring Tag for Eileen Hull Designs by Sizzix


Hurray, it's spring and it's my favorite season!  I decided to make a giant tag, it's 6.5" x 12" and I think I'll put it in my sun room that I am redoing in blues and yellows.  This paper totally inspired me to redo my sun room.  I'm thinking I might make a tag for each season!  

The background of this tag begins with a layer of design paper.  Then I tore a strip of white corrugated paper and place lace along the torn edge and glued it to the side of the tag.  Then there's a strip of blue patterned paper over the yellow background paper.


The rest of the tag is just layers grouped together underneath the fussy cut rabbit.  Behind the cacti is a Tablecloth embossed panel. The next layer is on the right and is design paper with flowers on it.


Behind the rabbit is a blue layer cut with the Heart Mandala. I added flowers and tucked cacti around the tag as that gives the appearance of dimension to the printed images. 


For the title, I used Eileen's Alphanumeric die to cut the letters and then placed them on a strip of paper popped up with foam tape.


Here you can see the dimension added with the popped up layers and flowers.


Thanks for visiting, I hope you are enjoying some nice spring weather!

xoxo Maggi


Supplies


Cia Bella Sicilia Paper Collection

Little Birdie Flowers

Thanks for stopping by!
xoxo Maggi


Tuesday, April 26, 2022

New Stamp Set from Eileen Hull by Maker Forte!


Eileen Hull's new stamp release is great.  You'll love using it with your planners, cards and layouts!  It has so many uses.  I made two cards to share with you today just to give you a quick flavor of this fun new set.

Here's what the set looks like.


My Cards


First up a birthday card with a sentiment, dream a little, from the new Making Plans stamp set.  I also used a Happy Birthday stamp from a previously released set, Snail Mail Postage.  I framed the sentiment using one of the blank label stamps also included in Making Plans.
The beautiful embossed panel is Eileen's newest 3D embossing folder, Crochet Mandala and those adorable little flowers are diecuts from a recently released Sizzix Thinlits Shadow Box Frame #1.


I used an older die from Eileen's Bookplate, Hinges & Label Thinlit set to diecut the stamped Happy Birthday sentiment.  Unfortunately,  Sizzix has discontinued this set but maybe you could find it elsewhere.


Supplies Used to Make this Card

Sizzix Framelits Die Set 8PK - Bookplate, Hinges & Label by Eileen Hull
Carta Bella - Farmhouse Market Paper Collection

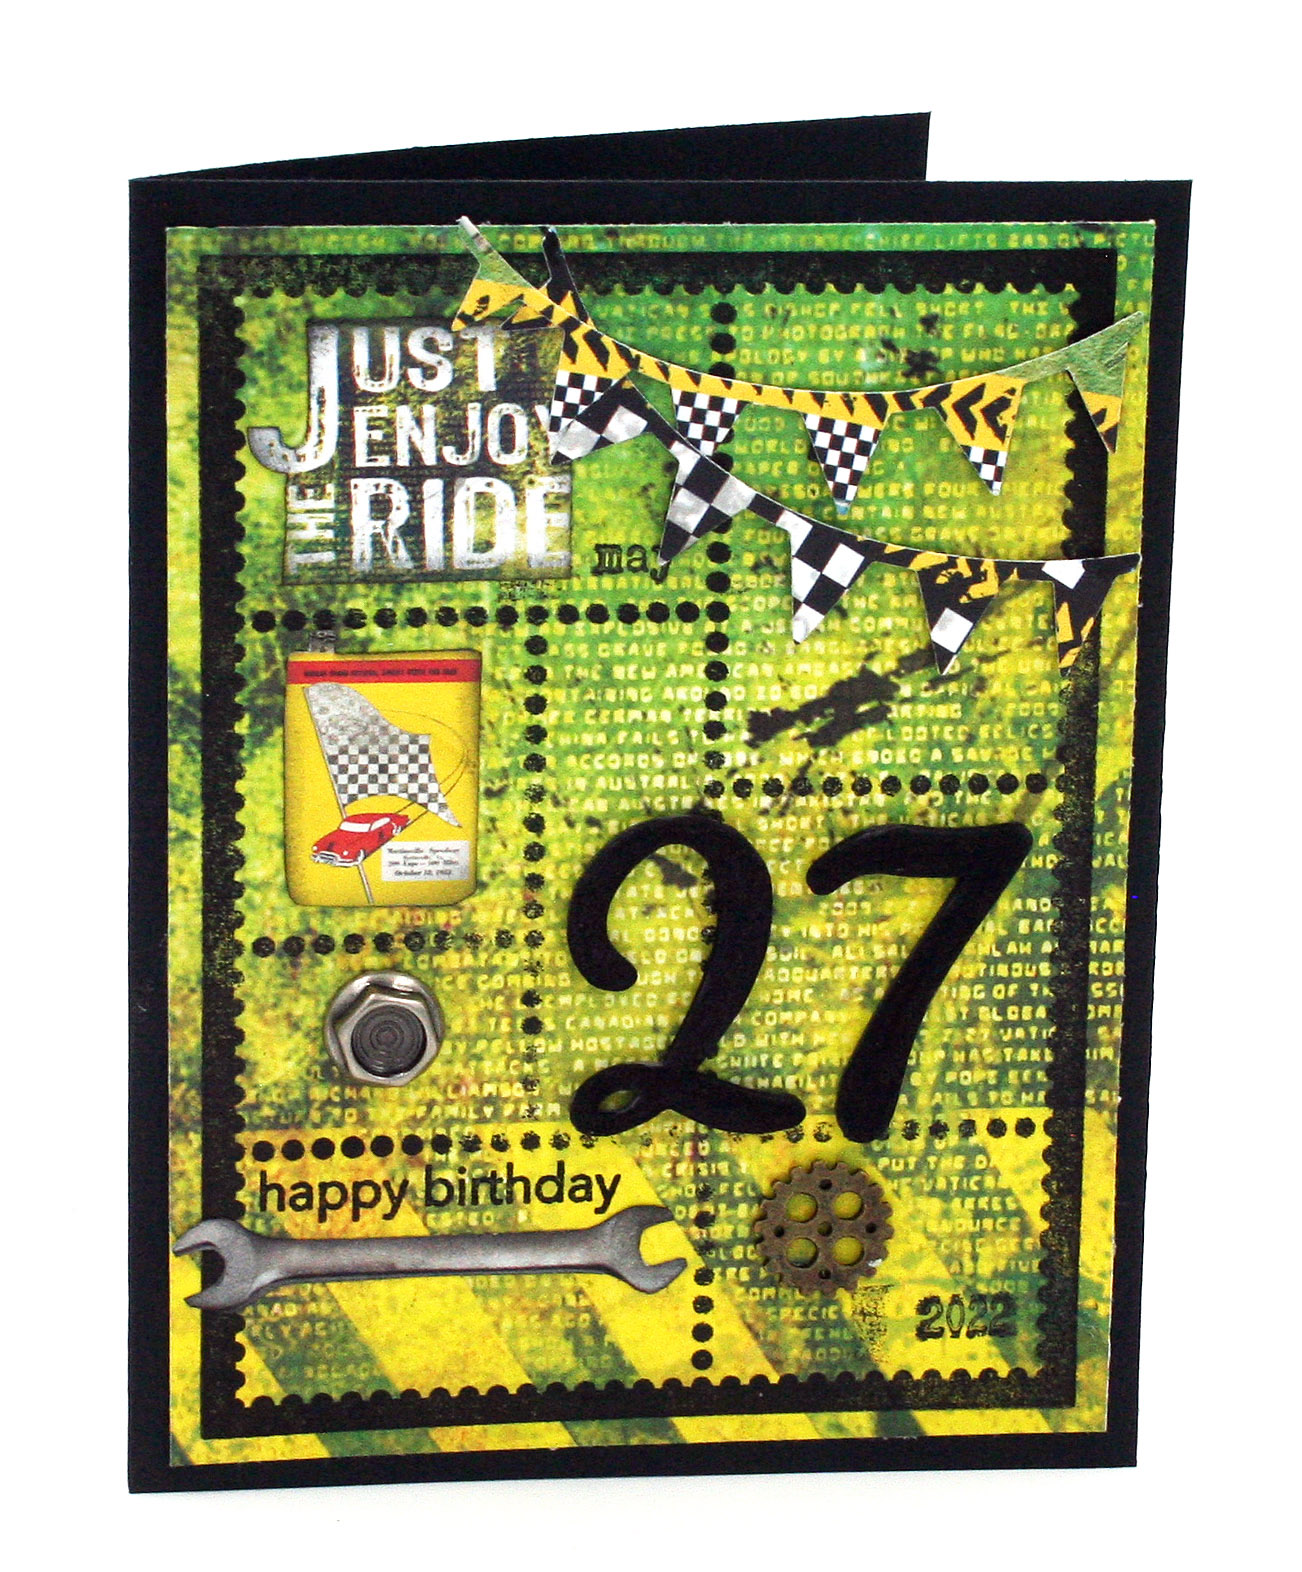
A Masculine Card


This is a fun card I made for my favorite car guy!  I used Making Plans stamps to stamp the month and year and added large foam Thickers to mark the day.


Eileen's Snail Mail Everyday Sentiments had a great stamp that I used to make frames for the elements that I fussy cut from the design paper.  (Eileen's Snail Mail by Sizzix Thinlits set works with this stamp as it diecuts the stamped image in to little stamps, I love that set!)


The Happy Birthday sentiment is from the Snail Mail Everyday Sentiments stamp set.


I thought the banners added the perfect festive touch to my card.  They were diecut with an olde Eileen Thinlit set, Banners and Pennants.

Supplies Used to Make this Card

Sizzix Thinlits Die Set 8PK - Banners & Pennants by Eileen Hull
Ciao Bella - Start Your Engines Paper Collection


Another way to use the new Making Plans stamps is on your layouts.  With these stamps you can easily add a reference date so that years from now, you'll know when your layout photos were taken.  The blan labels are so versatile and will work with many of your stamps.  

What I love most about this stamps set and all of Eileen's prducts is that they work so well together. When I'm designing for Eileen, I get out all my Eileen "stuff" and create.  I seldome need to use any other products!

Thanks for joining me today!
Maggi  xoxo


Wednesday, June 24, 2020

Cattywampus Challenge at The Funkie Junkie Boutique Blog

The Challenge
Sara Emily is hosting this fun challenge called Cattywampus.  As a fellow southerner I know all about cattywampus.  In case you don't know what cattywampus means Sara Emily tells you all about it in desribing her challenge. "Cattywampus is a funny sounding southern slag term I hear a lot around the house. According to the On Line Slang Dictionary it has several meanings including "appearing off center, diagonal from, crooked or not level, appearing askew, tilted or lopsided". Taking inspiration from any one of these definitions, include something cattywampus in your vintage or shabby chic project. Be sure to tell us what that cattywampus thing is; we might miss it!'"

My Take on the Challenge

I think I am a bit cattywampus myself, 😅!  If I don't use a ruler most things I do are apt to be just a wee bit cattywampus so I love to make things that are purposely tilted, or cattywampus! 

This card has two cattywampus layers, and don't they look just so pretty?


I used the beautiful Ciao Bella Sicilia Collection to make this card.  I love the yellows and blues.  I die-cut a blue payer to put under the top layer and focal point.  When I select my layers, I like to used contrasting colors so that each layer stands out on its own.


I used a "Thanks" stamp from the new Graphic 45 Sentiment Stamps collection along with a new Graphic 45 die.  Here I've nestled 3-D flowers in with the flowers printed on the papers to create a colorful garden.


Of course, no project is complete for me until I've added lots of pretty blooms!


Supplies from The Funkie Junkie Boutique


Ranger Texture Paste Opaque Matte

How to Enter The Funkie Junkie Blog Challenge

Create a vintage or shabby chic project and link it up to The Funkie Junkie Challenge Blog Challenge, Cattywampus, by 11:55 PM EDST June  9th.  The Design Team will choose their top four picks, with the winner being invited to be a guest designer in one of our Funkie Junkie Challenges. The other three winners will receive Top 3 badges to display on their blogs. Everyone who enters and follows the rules will be entered into a draw to have the chance to win a $25 spending spree at The Funkie Junkie Boutique.

The guidelines for entering are simple; create a new vintage or shabby chic project following the challenge theme, link to your post (not just your blog) and also include a link back to this challenge in your post. You can combine our challenge with up to 10 challenges (including this one) to be in with a chance of winning. If you are entering through a public forum (such as Instagram) you'll need to include the words 'Funkie Junkie Boutique Challenge'. Also, please be sure to turn off your Word Verification so our Design Team can leave comments on your blogs. Make sure you follow these rules as unfortunately, we have had to eliminate entrants from the prize draws in the past.


Thanks so much for stopping by today!

Tag for the Guys for Creative Embellishments

I made this fun tag for my husband using a large tag from Creative Embellishments. At 5 1/2" x 10", they are the perfect size for most any project. He's a real grease monkey and loves nothing better than to play with old broken down cars and trucks. He really is quite talented as he is able to take a pile of "junk" and turn it into a street legal, street rod.

Ciao Bella's Start Your Engines paper collection is so perfect for doing projects for my hubby!  The background of the tag is a paper that looks like metal plating.  Then I added some black stenciling using CE's metal plate stencil.


I used two distressed checker pieces to go along with the racetrack checkered flags.  How did I get them so nicely black and white?  Easy, just paint the checker pieces with white paint and then glue to black paper.  Then trim off the excess black paper and you've got a black and white checkered piece.


Of course I had to include some rusty gears.  I used rust colored embossing powders to get the effect.


Had to add the old jalopy of course!  I used some gray and brown ink to dull the "black" of the paper.  After all, it's an old jalopy and the paint has long since faded!


You know I put flowers on everything so I added this rosette, I figured the hubby would not "see" it as a flower.


Other Products

Ciao Bella Start Your Engine paper collection
Mix'd Media Truffle Embossing Powder
Emeral Creek Baked Texture Chunky Rust
Tim Holtz Rosette Die
Tim Holtz Old Jalopy Die
Wendy Vecchi Studio 490 Black Embossing Paste

Creative Embellishments Challenge

I hope you'll enter our monthly challenge; it's always the first post on the Creative Embellishments Blog.  You could win a great gift certificate to the store!  Here are the rules:
  • Create a NEW project layout, mini album, tag, card, canvas, etc. of  the 1st of each month, 2020.
  • It is required that you mention in your blog post that you are playing along at Creative Embellishments together with a link back to our blog page. Please make sure to reference our challenge. Please, no old projects. (meaning projects from previous months that may fit the challenge) Please share only new projects.
  • Please add your entry to the inlinkz tool below to be eligible for the prize. You have until the last day of each month 11:55 pm eastern time to enter.
  • Simply add a link to your FB photo (if you do not have a blog) featuring your challenge entry. Let us know how you were inspired by the photo.
  • Combining with other challenges is permitted.
  • We would love to see you USE AT LEAST 1 OF CE products on your projects but it isn’t required to play along.
  • WINNERS will have 2 weeks to claim their prize. The winner will be announced on this post the day after the challenge ends. Keep an eye out to see if you are a winner.


Friday, June 19, 2020

Layout for Creative Embellishments

The summer flowers in Alaska are amazing!  All that sunlight makes the flowers grow to super sizes.  I took these photos at the Visitor's Center in Anchorage.  The Visitor's Center is the prettiest little log cabin in the middle of downtown, amongst all the tall buildings. The cabin has a sod roof and is surrounded by cascades of hanging baskets lush flower beds. 


 I used Wisteria chippies to mimic the hanging baskets.  They are painted and then I dabbed on a bit of Lindy's mist for that something extra.  Then I topped the chippies with Little Birdie flowers.


I love word chippies and Creative Embellishments has a huge selection.  I heat embossed the words with Emerald Creek's Taos Sunset Baked Textureembossing powder.


One the left side I layered burlap and two chippies.  The lace chipboard is heat embossed with Dirty Sand and the cross stitch piece is heat embossed with Taos Sunset.


Products from Creative Embellishments Store


Other Products

Emerald Creek Embossing Powders
Emerald Creek Embossing Powders: Dirty Sand, Taos Sunset
Mix'd Media Embossing Powder - Truffle
Little Birdie Flowers Marika Boho Vibes 2pc
Little Birdie Flowers Eva Boho Vibes 3pc
Little Birdie Flowers Kimberley Boho Vibes 14pc


Creative Embellishments Challenge

I hope you'll enter our monthly challenge; it's always the first post on the Creative Embellishments Blog.  You could win a great gift certificate to the store!  Here are the rules:
  • Create a NEW project layout, mini album, tag, card, canvas, etc. of  the 1st of each month, 2020.
  • It is required that you mention in your blog post that you are playing along at Creative Embellishments together with a link back to our blog page. Please make sure to reference our challenge. Please, no old projects. (meaning projects from previous months that may fit the challenge) Please share only new projects.
  • Please add your entry to the inlinkz tool below to be eligible for the prize. You have until the last day of each month 11:55 pm eastern time to enter.
  • Simply add a link to your FB photo (if you do not have a blog) featuring your challenge entry. Let us know how you were inspired by the photo.
  • Combining with other challenges is permitted.
  • We would love to see you USE AT LEAST 1 OF CE products on your projects but it isn’t required to play along.
  • WINNERS will have 2 weeks to claim their prize. The winner will be announced on this post the day after the challenge ends. Keep an eye out to see if you are a winner.


Thanks for joining me today!


LinkWithin

Related Posts Plugin for WordPress, Blogger...