Pages

Showing posts with label Leaky Shed. Show all posts

Wednesday, April 23, 2014

More creations with the Swirlydoos April KOM!

  I am so excited to share with you some of my creations with my first kit as a designer for Swirlydoos!

First up is a very special layout for me because it is a photo of me with my beautiful Chena who I miss so much.  Chena crossed over the bridge Sept 5, 2013 and there is not a day that goes by that I don't miss her and think about her sweet soul.  Ah, but such is the nature of pet ownership, their time on our earth is much too short.  I have to thank my dear friend, Jen aka jrabs, for taking this beautiful photo of me and Chena conversing in our own special way.  AND I must note that my hair is not red, its just the beautiful late afternoon soon making it look that way.

Ok so let me tell you a little about this layout.  The base paper was a beautiful black/white sheet but I thought it would be fun to color it so I used Silks paint from my stash to paint the flowers and leaves.  Then I sprayed on a little of the Luminarte Radiant Rain Bashful Blue included in the mediums add-on kit. I also popped up the layers to give my layout more dimension.  All the flowers are from the kit and add-ons except for the silver flower and the tiny black and silver rolled roses which are handmade.

Oooh I really love the mediums add-on, that gorgeous turquoise embossing powder that I used on my chippies is Ranger Antiquities turquoise embossing powder.  LOVE this stuff!!!  And the silver paint on the chippy?  Yep, that's from the mediums add-on too!  The chippies are from my stash but all the other embellies are from the kit and add-ons or are handmade.  


I first painted this swirled chippy with Viva Precious Metal Color - silver (in the mediums add-on) and then painted on a little embossing ink, sprinkled with embossing powder and this is the effect.  I love this two toned effect!


Supplies - from the April kit and addons:
Cardstock: Core'dinations Bluebell
Patterned paper: Authentique Classique - Elegant collection: black dotted - Twelve, white floral print - Six, fussy cut header - Two
Embossing powder: Ranger Antiquities Turquoise
Flowers: Prima Vermont leaves black 553623, Prima Audrey Rose blue ice 546700, Prima Plume black 575526
Mist:  Luminarte Radiant Rain Bashful Blue
Ink: Prima turquoise stone
Paint: Viva Precious Metal silver
Other: Prima SIIC 573218

Other Supplies from my stash:
Chipboard: Leaky Shed Chipboard Live Love and Laugh 8072, Leaky Shed flourish
Diecuts and punches: Martha Stewart Swirling Lace, WRNK Lucky 8 Frilly Lace, McGill Floriano
Paint:  Silks african jade


I love love love the frame that came in the main kit this month!!  WOW, I just love the piece I made with this.  I decided to frame our wedding picture.  OMG that picture is nearly 22 years old.  It's hard to believe that it's been that long!

I pulled out one of my favorite products to do the frame, Stampendous Aged Ivory Embossing Enamel to coat the wooden frame.   Then I thought that the only thing this needed was a simple floral cluster so I made the flowers using Authentique papers from the kit.  I diecut some vines using Memory Box's Caserta Bloom die and added a few pine sprigs (cut with a McGill's punch)  to my cluster.   I finished it off  with a couple crystals from the embellishment add-on.


Ok, this is the year of the card for me!  Card making has never been my "thing" but I decided that this is the year that Maggi masters card making!  So here is my effort.  I've used papers from the kit with the addition of a piece of Core'dinations cardstock.  I used a Spellbinders die to die cut the white frame.  That awesome resin telephone is included in the embellishment add-on.  The flowers are bits and pieces from my stash left over from assorted manufacturer's packages.


 Thanks so much for stopping by our blog today!!  Be sure and check out our kit subscriptions and available kits!


Tuesday, March 4, 2014

Graphic 45 Mother Goose, meet my grandson!

Here's a fun layout of my sweet grandson.  He started walking at 8 mos and let me tell you at 1 year old he could really move.  It was a full time job just keeping my eyes on him to keep him out of trouble, LOL!

Flourishes are so pretty to add to your clusters, they can be romantic, shabby chic or whatever you wish.  I've made our Flourish #2 playful by nestling the Mother Goose images in the curves of the flourish.  I heat embossed the flourish with Stampendous aged bronze embossing enamel.

I fussy cut lots of images from the Mother Goose papers, I love that about G45, there's always so many great images that can be fussy cut.


Here you can see how all the pieces are popped up to give a 3D appearance.


Supplies:
Patterned paper:  G45 Mother Goose collection:  black base - Checkers 4500744, red border frame - Spot On 4500746, green - Storytime 4500747, Humpty Dumpty pp - Humpty Dumpty 4500748, yellow strip - A Pocketfull of Posies - 4500749, Mary had a little lamb border - Playful Postage 4500750, frssy cut images - Nursery Rhymnes 4500745, circles - Banners 4500757
Chipboard:  Leaky Shed Flourish #2
Embossing powder:  Stampendous aged bronze
Flowers:   Spare Parts
Ink:  Distress black soot

Thanks for stopping by!!

Saturday, February 8, 2014

Graphic 45 French Country banner and letters tute!

This was a really fun banner to make and it's the first one I've done.  I'm going to hang it in my studio!  I used Graphic 45 papers to make my banner and a number of Leaky Shed chippies.  Below I have shared the process for preparing the letters.
  Here's the whole banner.

The banners are Leaky Shed chipboard pieces that I've covered with French Country papers  and are nicely sized at 6.4" x 8" as are the letters which are 4" tall.


Letters Tutorial
I love altering my letters and this is one of my favorite methods for giving them a vintage and worn appearance.  The steps for making the letters are as follows:
1.  Paint the letters with acrylic paint in vintage white and allow to dry.
2.  Ink around the edges of the letters with Frayed Burlap Distress ink.
3.  Stamp the letters with a patterned or script stamp using Archival ink in coffee.      Be sure to use Archival ink so that it doesn't smear in the next step.
4.  Apply a thick coat of Ranger Crackle Accents and allow to dry naturally, i.e. do not use a heat gun to speed the process.
5.  Rub Frayed Burlap Distress ink into the cracks.
6. Take a lightly moistened paper towel and lightly wipe the ink off the letters leaving ink in the cracks but not on the surface of the letter.

The word inspire is a Leaky Shed chippy that I've covered with Stampendous Aged Embossing Enamel in aged spice.

Up in the corner is a Leaky Shed butterfly that I've simply painted with Splash of Color Silks in Emperor's Gold.

The sunflower is handmade using a Spellbinders die and Heartfelt Creations stamp.

This sunflower is also handmade but using Spellbinders Sunflower Set 2.


I added a Julie Nuttig doll to this banner.  I painted her body with iridescent water colors and cut her dress from a French Country paper scrap.  I really love these chipboard dolls, they are so fun and work with so many different projects:  cards, tags, layouts and even banners!


On this banner I've used a Leaky Shed oval frames behind the letter T.  The frame has been heat embossed, again with  Stampendous Aged Embossing Enamel in aged spice.


Leaky Shed Studios chipboard pieces used:


Other Supplies:
Graphic 45 French Country Collection
Prima Mountain Lily Sunflower
Spellbinders sunflower set 2 die
Spellbinders blossom 2 die
Heartfelt Creations Aztec Gold Sunflowers stamp

Many Graphic 45 and Leaky Shed products are available at the Flying Unicorn store.  

Thank you for the comments you leave, I really appreciate it and love hearing from you!


Saturday, February 1, 2014

Leaky Shed and Authentique pair up for delightful Valentines creations!

I'm here today to share some Authentique love with you!   Smitten is such a perfect sweetheart collection to pair with our Leaky Shed hearts and cupids.

I decided to do a layout of my parents on the occasion of their 70th wedding anniversary.  Just think how many Valentine's they've shared!  I masked my base paper using a grunge heart mask.  I layered several different papers from the Smitten collection and used cardboard between the layers to give my layout dimension.  Over my photo I've placed our Leaky Shed Cherub's Heart and on the side is our Cupid firing his heart arrow.  I've painted them both with Viva 3D stamp paint.

The Smitten collection includes lots of great quotes and I chose one to go underneath my photo.  I love that Authentique's Smitten includes so many little cards with quotes on them.  It makes it so easy to make a card or tag, or add a quote, as I did, to your layout.


Leaky Shed Cherub's Heart
Leaky Shed Cherub

Supplies:

Leaky Shed Cherub Heart
Leaky Shed Cupid

 Authentique Smitten collection

 La La Land Rolled Rose die
Dienamites Spring Branch
 Marianee Designs ivy die Petaloo Wild Blossoms pink
 TCW 416s mini grunge hearts mask
Liquidtex Modeling paste
Viva 3D stamp paint - white and carmine red

Next up I have this fun tag that I'm going to give my husband, sshh, don't tell him!  My tags are usually irregularly shaped with things hanging off them and I like to layer up my tags.   On this one, I layered our Double Hearts over our French Oval Frame.  then I layered all that over a Spellbinders diecut oval frame. I treated both pieces of chipboard with Stampendous Embossing Enamels, Chunky White and Shabby Pink.  I love how embossing enamels give such a finished look to chipboard.


Supplies:
Leaky Shed Studios French Oval Frame
Leaky Shed Studios Double Heart

Authentique Smitten collection

Stampendous Shabby Pink embossing enamel
 Stampendous Chunky White embossing powder
Flower-handmade with  McGill Floriano &  Retro flower punches
Fiber & ribbon from Hobby Lobby


Wednesday, January 29, 2014

Leaky Shed Studios and Authentique are teaming up!

Leaky Shed Studio has teamed up with Authentique for a blog hop sure to inspire you to make some great  Valentine's projects using Leaky Shed's Valentine themed chippies and Authentique's fabulous Smitten collection!  
Be sure to stop by both blogs today through Friday to see the design team's inspirational projects.  There are cards, tags, minis, layouts, all kinds of fun projects that are sure to get your imagination whirling!  And there's an awesome giveaway for some lucky winner! 

Here are a couple of sneak peeks of my projects that are on the Leaky Shed blog today!


And now for the giveaway!
What a great package of stunning chipboard!  There's a mini  and lots of other fun pieces including that adorable Cupid piece I've used in my sneak above and those double hearts.  Check Leaky Shed's blog for details on how to enter the giveaway.


Saturday, January 25, 2014

Let's make a layered mixed media tag - tutorial

We're having an online crop at the Flying Unicorn this weekend!  Come join in the fun and enter my challenge to make a tag, you could win a $20 gift certificate for the Flying Unicorn store!

My challenge is to make a tag, not any old tag, but a Valentine non-traditional layered tag with mixed media.  Whew, that was a mouthful!!

Here are the steps to my tag.  Feel free to scraplift this exactly or modify however you wish!

1.  Start by cutting your base tag.  I like long tags so mine is 8 1/2" long x 3 1/2".  I used Prima Jodie Lee Art Journal paper from the January Flying Unicorn kit for my base.

2.  Now let's do some masking.  I've use a TCW tattered hearts mask and 13 Arts Ayeeda Gesso from the January.  Quickly was your mask off while the gesso is drying.  After the gesso is dry, place the mask back over the hearts and dab on some paints.  I used 13 Arts Matte Lemon and Matte Pink paints from the Flying Unicorn Mixed Arts kit.


3.  Now let's make some of our layers  that we're going to use on the tag.  Cut a frame of some sort that works with whatever image you chose for your tag.  I cut a Spellbinders square frame to go under my image (you can see my image in step 8)   Instead of cutting a frame you can just make a paper layer.

Then tear a paper a little larger that the frame or layer you just made.

Now let's have some fun with embossing powder.  Dabble a little embossing ink here and there on your base tag and around the edges of your frame.  Sprinkle with embossing powder of your choice (I used Stampendous aged gold and silver.)

I love this Leaky Shed cupid chipboard piece and decided to dress it up with Stampendous Shabby White Embossing Enamel.


4.  Ooops!  I left this circle out.  Cut a 2 1/2" circle and add some embossing powder around the edges and heat emboss.  Add a word to the circle if you like.

5.  Let's begin our assembly.  Cut a piece of cardboard to fit underneath the paper layer.  I glued it to the tag so as to be sure the cardboard does not show from the backside of the tag.


6.  Adhere the torn paper to the cardboard hanging it off the side.

Cut a piece of cardboard to fit under the frame or paper layer that you made in step 3.


 7.  Layer the frame over the torn paper.


8.  Layer an image within the frame.  Glue some lace to the bottom of the tag and then add some flowers.  Glue cupid to the flowers.


9.  At this point I thought the tag looked a little too heavy on the left side so I added the circle and the rectangular scrap to the right side.  The rectangle is layered under the base tag and the circle is layered over the base tag.
OK so I have to tell the truth and tell you that I got some ink on my lace by mistake but hey, that's no problem.  Just dab some more ink on the lace and it will look like ot was planned that way!
Add some ribbons at the top and that's it!


 Leaky Shed cupid chipboard


Lots of other challenges going on too as well as games and door prizes, come join us!


Sunday, January 19, 2014

Flying Unicorn Chipboard Challenge

Tammy is hosting a chippy challenge at the Flying Unicorn this month and  I did this layout for inspiration. The papers I used are from the January KOM, just love them!  They are Prima Jodie Lee Art Journal papers.

For this challenge you had to use 3 different sized chippies and they had to be treated in some fashion.  I used 6 chippies, just because I'm excessive, :-)!  I used Leaky Shed Studios chippies.  The large round chippie and the floral corner chippier were painted gold.  The gears were heat embossed with Stampendous bronze aged embossing enamel.  The butterfly is sprayed with Dylusions white linen mist.  Notice that the butterfly wings are kind of curly.  This is a fun thing to do, soak your chippie in water just long enough that you can separate the chipboard into layers.  Then let the layers dry and mist, paint, etc.  Its really a cool technique to use on chipboard is really is great with wings.

I did some masking with Timmy's Rays mask and TCW's mini paint lids.  I used Stamper's Anonymous grunge stamps to stamp the two different black patterns you see.  Then to finish it all I dabble teal and white paint here and there with a sea sponge.


 Here you can see the layers I created by separating the chipboard.


Supplies:
paper: Prima Jodie Lee Art Journal, black cardstock
Letters: Doodlebug Design-Just My Type Alphas;
Chipboard: Leaky Shed Studio Ring Frame Large, Flower Corner Small, Spring Butterfly small, Watch Parts
Embossing powder: Stampendous aged bronze embossing enamel
Diecuts and punches: Lucky 8 Lace Kerchief
Flowers: Manor House, Petaloo,
Ink: Ranger Black Archival
Mist: Lindy's Maidenhair Fern, Grab a Guy Gold, Wild Honeysuckle Coral
Masks: Tim Holtz Rays, TCW Paint Lids
Masking paste: 13 Arts Ayeeda Gesso
Paint: Splash of Color Emperor Gold, Claudine Hellmuth Classic Teal & Blank Canvas; 13 Arts Matte Coral
Other: Stamper's Anonymous Ultimate Grunge stamp; Kaisercraft Journal clear stamp

Tuesday, December 31, 2013

Marion Smith Designs and Leaky Shed Studios

I'm hosting a fun challenge at the Flying Unicorn this month, all you have to do is a layout, card, or tag and use pop dots, cardboard, foam, etc to pop up at least 3 different things including one layer!  Easy peasy, and loads of fun.  You could win a fabulous RAK too.  Our challenge winners are chosen by random selection so everyone has an equal chance!

I've used Marion Smith Designs new Garment District papers for this layout and a bit of Mad Tea Party too.  I am so excited to see Marion designing on her own and I have loved every single sheet in the 3 collections she has released.

The beautiful birdcage is a Leaky Shed Designs that I've covered with Stampendous aged ivory embossing powder.  I love the look these powders give to chipboard!


In the next two photos you can see how I've popped up the layers.  I used a thick cardboard box on the first layer and much thinner cardboard on the next layers.  Cardboard is great for popping up your layers as you don't have to worry about sag or using so much foam tape.


Supplies:
Cardstock: Core'dinations
Patterned paper: Marion Smith Designs Garment District collection: base - Manhatten, pink floral - Blush, gray - French Line, Mad Tea Party Collection: green floral - Spot of Tea,
Chipboard: Leaky Shed Studios Birdcage
Embossing powder: Stampendous aged Ivory
Diecuts and punches: Martha Stewart punch around the page Flourish Lace, Scallop 3 Dot; Spellbinders for Heartfelt Creations Bella Rose
Flowers: Prima Le Mia 571498 white
Ink: Mixd Media Inx vintage, Distress walnut stain
Mist: Lindy's Wild Honeysuckle Coral, Apline Ice Rose
Other: Flying Unicorn lace, Prima resin bird

Saturday, December 28, 2013

Graphic 45 Couture

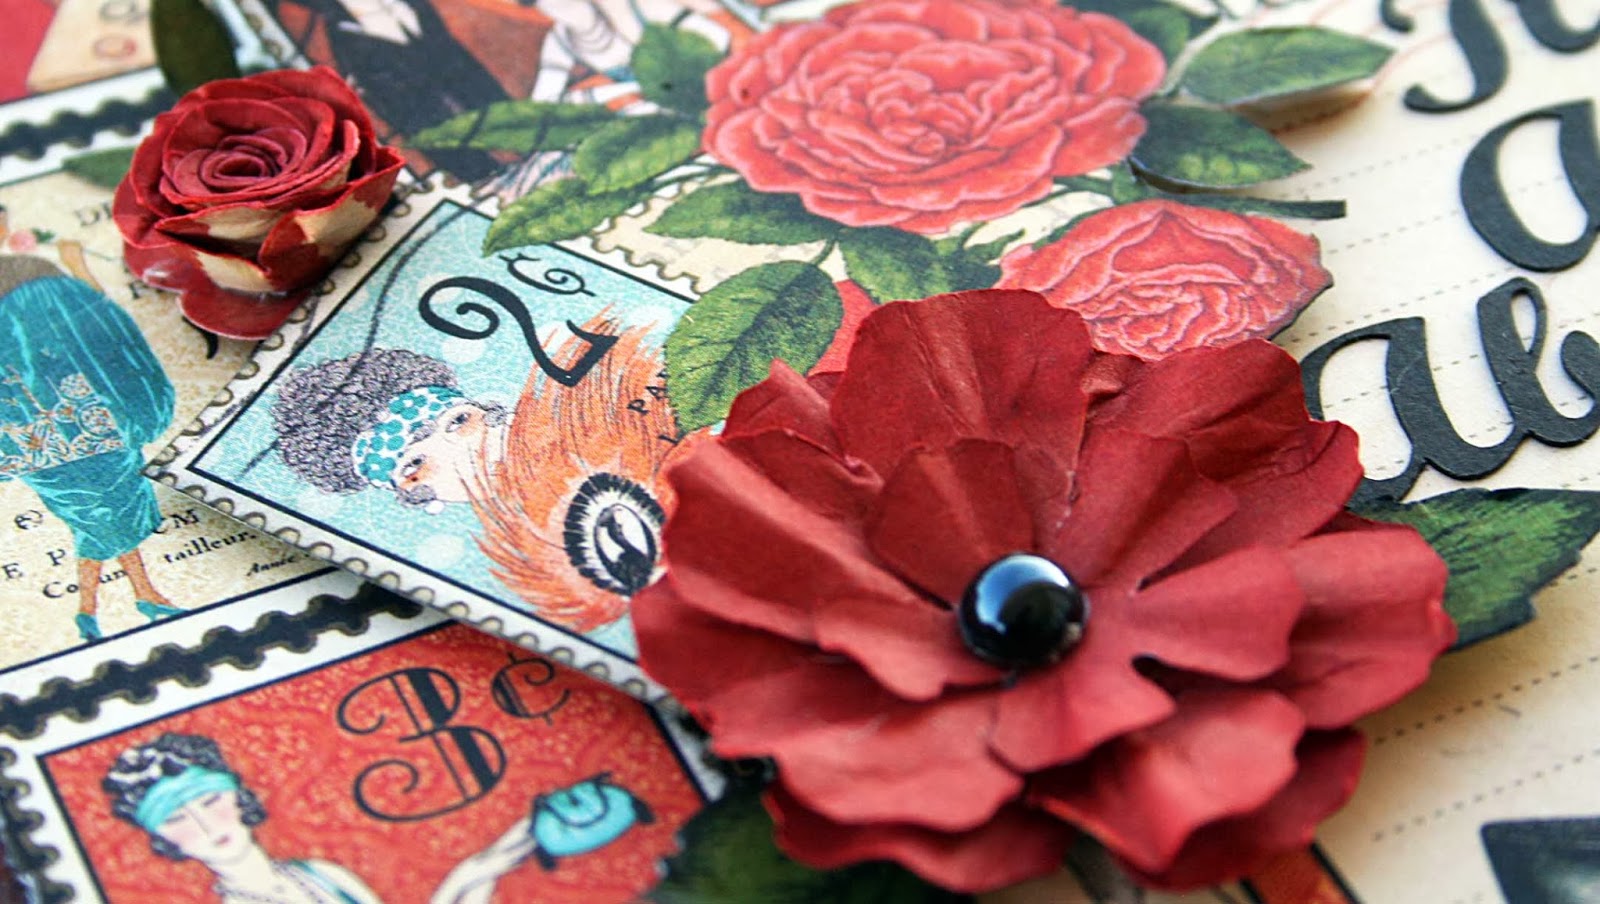
I seriously love this Graphic 45 collection!!  I love the reds and black in the collection and the images are just so fun!!  I have to thank one of our members, Marcia,  at the Flying Unicorn for supplying me with this great vintage photo of the ladies showing off their shoes.  It is such a perfect photo for these papers!

Recently I got a Silhouette Cameo and wow, am I impressed!  I cut the title "It's all about the shoes" on my Cameo.  The letters came out perfect!!  I am loving it!!


 I've used a Leaky Shed Studio  Iron Leaf Corner #543 in the upper right corner that I misted with Lindy's Golden Lump O' Coal.

 I made the flowers using Sizzix's Tattered Floral die and I  rolled the small roses that I diecut with a La La Land die. 


I fussy cut some roses and leaves from the Couture collection and then I used Heartfelt Creations Bella Rose stamp to make more leaves that would look like the collection leaves.

On the right you can see a couple of the Bella Rose stamped leaves, they do look alot like the ones I fussy cut in the photo above don't they?

Supplies - you can get most of these things at the Flying Unicorn store:

Patterned paper:  Graphic45 Couture: red base-Fabulous 4500821, black patterened - 6 x6 paper pad, Cut apart - Elegant, stamps strip - Classy 4500820, Couture stickers and chipboard
Chipboard:  Leaky ShedStudio  Iron Leaf Corner 543.
Diecuts and punches: Alterations Tattered Floral, La la Land rolled roses,
Ink:  Distress Fired Brick, Black Soot
 Mist:  Lindy's Creme Brulee Cream,  Golden Lump O' Coal
Other:  Prima SIIS flower centers


LinkWithin

Related Posts Plugin for WordPress, Blogger...