Pages

Showing posts with label Dusty Attic. Show all posts

Wednesday, April 4, 2012

More from the April Flying Unicorn KOM

Wow, with the paper addon to the April kit you can make so many LOs, cards, etc. whatever your please is.  I think I have made 8 layouts so far  and I can still get at least a couple more out of the kit!

ON this first LO I used a Prima mask and molding paste on the right side to add some interest and texture to the cardstock.  I used a sheet of Arbor Ruby Rock-It from he August Moon collection and a strip sheet from Meg's Garden on this layout.  Lots of border punching too, all with martha Stewart punches.  Everything on this page except the letters and leaves came in the April kit.  It really is an awesome kit - so many great things you can do with it.  Those gorgeous blooms are Manor House, aren't they just lucious?  Oh yes, the little girl is me with my baby brother, photo from 1957.  Hmmm I need to add that little detail to my layout!


My bff's and I decided to celebrate our 40th year by taking a trip to the wine country of California.  We spent a week there sampling the wine and just having fun!!  Again I used Ruby Rock-It August Moon papers on this combined with a sheet from the Fabscraps Organic collection.  I particularly love that Dusty Attic piece (from my stash), it was so perfect for this LO.  I painted it with acrylic paints, smooch paint on the grapes which I then stickled.


One of the things I really love about this kit is the diversity of the papers included.  The Glitz French Kiss and Pretty in Pink papers really worked well together.   This is a photo of my Mom's sister, Elsie.  I made the peach flowers from Core'dinations cardstock (included in the kit) using a McGill Floriano punch.  I especially love the lace that came in the kit, its sooooo feminine.


This layout is also done with a combination of the August Moon and Organic collections.  They work sooooo well together!  I added the Dusty Attic piece and Family embellie from my stash. The journal reads:
Mom and her brother, Alex.  I often called Uncle Alex my Uncle Daddy because in many ways, he was a father to us when my Dad had to be overseas without us.  Dad did two one-year assignments in Vietnam and a year in Korea, and six month in Nepal.  During these times we always returned to NC so that we would be among our families.  Uncle Alex always helped Mom find a place to live and he was always there with a strong shoulder for Mom to lean on.  One house that we lived in was so close to his office that he stopped in nearly everyday for coffee and just to check on us. 


This layout is a companion page to Tobacco Road that I revealed yesterday.  I wanted to tell the story of raising tobacco here in NC as it is was such an important part of the economy here.  My greandparents on both sides were tobacco farmers.  I am from a rural area of NC and farming is what everyone did back in the day.  Here's the journal if you'd like to know a little something about "barning tobacco" as we call it.

“Barning tobacco” was hard dirty work.  Tobacco ripens from the bottom of the stem up and the first pickings of the season are the toughest.  The field hands spent their days stooped over, picking the bottom leaves from the stems and placing them in a wooden cart that was hauled up and down the rows by a mule or horse.  As the season wore on, the work got a little better in that picking the leaves further up the stem didn’t require so much stooping.

When the cart is filled it is taken to the tobacco barn to be strung on poles for later placement inside the barn.  The barn usually had a shed off the side where the “stringers” and “handers” did their work.  The handers gathered 3 or 4 leaves of tobacco together and handed them off to the stringer who then looped the tobacco with string onto a pole.  When the pole was full it was hung there in the shed until the end of the day. 
Green tobacco is really sticky and leaves a gummy substance on your hands.  We had to use Lava soap, which is harsh and gritty, to get our hands clean.  Imagine how much dirt and sand is stuck to those first leaves coming off the bottom of the stalks.  Don’t forget that here in the hot southern summer, it is humid and often 95ยบ or higher.  I’d call this a true recipe for misery!
At the end of the day, the field hands passed the poles of strung tobacco into the barn where it was hung to dry and cure.  The barns had furnaces, often oil fired, to speed the curing process.
When I was growing up in the sixties, the field hands were paid 75¢ an hour and the handers and stringers were paid 50¢ an hour.  The handers and stringers were female and the field hands were male.   These were the summer jobs available for kids in those days, I guess you could call it character building!  Today, barning tobacco is a whole different process and now most of the laborers are migrant farm workers.  I think it would do our youth a lot of good to put down their assorted electronic devices and engage in some manual labor, perhaps building some good character like that of our mothers and fathers, many of whom  grew up where manual labor was just part of the daily routine.

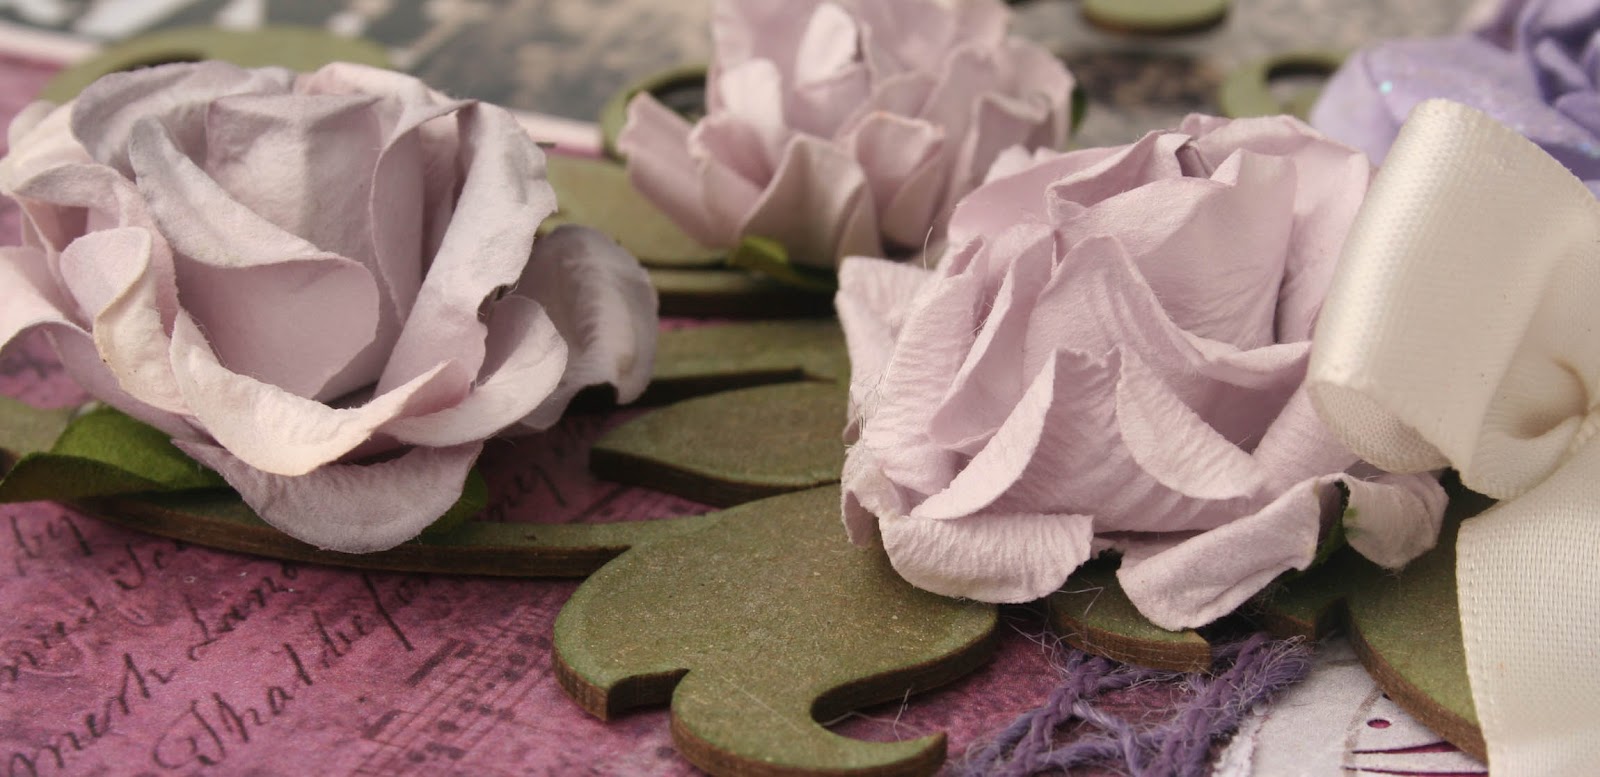
I  used Lindy's Cattail Copper Brown and  Gator Gumbo Olive mist stains to color the Dusty Attic piece.  I just dabbed it on and it gave such a pretty patina effect.  I painted the Copper Brown onto the roses.  I love the old metallic effect.


Thanks for stopping by my blog, I really appreciate it!  I hope your day is scrap filled and fantastic!!


Monday, July 4, 2011

Genuine Grace

I love this photo of my Mother, not because its a good picture of her, its not, but it's such an artistic photo from the perspective of standing in the door frame.  It really conveys a look.  I know I've seen a painting of a woman in a door frame but can't remember the artist.  The photo was a black and white that I converted to a sepia tone to better match the mood I wanted to capture.

I did this for the July round robin at Swirlydoos which, is always so fun, using one of my favorite kits, the Bo Bunny spotlight kit.  I added the laces and fan from my stash and a few other bits from other SDs kits.  I made the flowers from Tim Holtz glassine paper and achieved the glittery look by brushing with Perfect Pearls and then heating the flowers with my heat gun.  The glassine paper coating then sets the Perfect Pearls.  The flowers are so pretty and shimmery IRL.  Its kind of hard to capture in a photo. 

Painting the lamp post was fun.  I started by misting with graphite Glimmer Mist, then painted on some tattered leather Glimmer Mist, and finished by brushing the edges with walnut stain Distress ink.  I still wasn't satisfied so I added some bronze rubon.  I don't see that much anymore, but it is a metallic cream that you rub on, its fun messy stuff!!  I used scraps of white handmade pp stained with Distress antique linen to make the globes in the lamps.

The letters were first covered with Distress walnut stain and then I used gold rubonsto bring out the embossed areas. I used gold UTEE embossing powder on the watch casing.

I have to change the journaling a little as I got some additional information from my Mom yesterday but it  will read:

1953 Verdun, France – Dad had already gone to his duty station in Verdun, so you had to fly to France with a baby, Margaret, and Craig, almost 5 at the time. The plane was struck by lightening and caught fire so the plane made an emergency landing in Newfoundland. By that time, you must have been scared out of your mind and wondering why on earth you were traveling to this foreign land.


But there you were, in France, living in a house with a bullet holes from WWII in the front door. Our french landlady & her son had hidden in a cabinet in the kitchen when the Germans forced their way into her home.  Fortunately they didn’t look there and she was ok.

You and Dad lived on the French economy and with the grace that you’ve had all your life, you accepted the situation and set about learning to speak French. You and our landlady, Madam Gaillard, sat with the French/English dictionary and learned to communicate. By the time we came home from France, you were speaking fluent French.


Thanks for visiting my blog, I appreciate it!

Tuesday, June 28, 2011

Your Beautiful Life - Dusty Attic June sketch challenge

My Mother, unfortunately the early photos aren't dated, but I think the one on the left is circa 1930, the middle 1946-1948. I imagine the center photo was taken at Easter since she is wearing a corsage, they did that back then and there are a number of EAster photos. The other thing is to look at the lovely suit she is wearing. I am sure that she sewed it. My mother was an incredible seamstress and made all my clothes when I was growing up. She tailored sports jackets for my Dad, what a talent she had, I did not inherit her love of sewing!!


I used the the beautiful Glitz Love Games for this LO.  I love the poppy red in these papers.  I made the red poppies, see my poppy tut, link on my sidebar.  The wonderful swirly leaves are cut with a Heartfelt Creations/Spellbinders die.  The black swirls are stamped images.  They are Inkadinkadoo and I  got them at Michaels.  I like them, I bet you will see them again! 

Oh the Dusty Attic chipboard colum and pot with the ferns.  They are so lovely and add the perfect touch fo class to a layout.  I painted the column first with a whitewash of acrylic antique white.  Then I used biscotti perfect pearls to paint inside the column and the accents on the column.  The pot was painted first with a good coat of biscotti perfect pearls.  After that dried I took a very find paintbrush and lightly painted random lines with capuccino perfect pearls to imitate marbling.  After that dried I added a coat of Crackle Accents which i discovered does not stick very well to perfect pearls so I painted over it all with Diamond Glaze and it seems to be holding just fine.  I also added some gold perfect pearls to accentuate the design on the pot.
Ther fern leaves are also Dusty Attic and they have been coated with Olive Vine Glimmer Mist.

Thanks for visiting my blog and I hope all your days are stellar!!


Saturday, June 25, 2011

Fly - Bella Creations challenge

I did this LO for the Bella CreationsTake Flight Transformation group.  This is a bit different from my typical LO, but I sure had fun creating it! I used the BasicGrey Curio collection  which I am finding is just perfect for nature LOs - you really wouldn't think so but I've done several nature themed pages with it and love the results.  Anyway, I started out with the solid sheet, Cabriole, and put a Crafters Workshop template over it and using distress ink in Tattered Rose and Tumbled Glass, creatied the floral and bird background image.  The Dusty Attic column, bowl and wings were painted with Liquid Pearls in Bisque.  On the column, I used a little antique white acrylic paint under the Liquid Pearls.  I fussy cut the two floral patterns from the Gouache pp.  I used a journal stamp to create my journaling card.  I cut the birdcage using the Alterations large cage die and I cut the pp over it from some very very old pp,  Michaels Slab V I think it was.  Whew, never thought I'd use that again but I like the woven basket pattern.  I painted some Dusty Attic leaves with Olive Vine glimmer mist.  I used the BG letters in green that came with this paper pack but I painted them with glimmer mist olive vine to darket the color a bit.I added the strip of paper at the bottom and fussy cut along the top to give the illusion of grass.  Then I clustered my flowers and that's all there is to it!

Friday, June 24, 2011

Puppy Love

I made this Puppy Love tag over a year ago and haven't had the right LO to use it with.  Ah, but the papers and the tag came together perfectly for the LO that I did for the DT sketch at   Sketches: Creatively Yours where Ali hand draws these great sketches.

Here's this week's  sketch, why don't you give it a try?  Be sure to post a link to your LO at S: CY.


And here's my take on the sketch.  Yeah, I went wild, I just can't seem to stop until all the usable space is crammed full!! 
These are K & Co papers designed by Susan Winget, I love the bright floral colors.  Just perfect for scrappy my girly poodles!!

My good scrapping buddy, Jennifer (jrrabs) hosts a Friends  and Family Showcase challenge at Scrapbook.com every month and I'm going to enter this LO in the challenge.  Well really, Escape Kitty is the host, Jennifer is Kitty's admin assistant and thus handles all of Kitty's correspondence and postings.  If you don't know who Escape Kitty is, well you are missing out on a great story!  Click on the Escape Kitty and Chena label to find out more about this dynamic duo.

Monday, June 6, 2011

WAR - Swirlydoos June kit

A while back I challenged Krissy, our wonderful Swirly leader, to create a manly kit and WOW, did she deliver!  This month we got an eclectic collection of pps from Bo Bunny Timepiece, TPC Studios and My Minds Eye along with aawesome chippies, glimmer glass, and stamps!  Thanks Krissy!  I made this layout as my entry for the Round Robin challenge that we have at Swirlydoos every month and I also used it as my example LO to the gals at SOS to challenge them to try some different techniques.

I love this picture of my Dad with the rifle slung over his shoulder.  He was lucky in thta he was not on the front and was safely tucked away in England for most of his time during the war.

Journal:  Lady Luck sure was with Dad during WW II. The Army sent Dad to teletype school after he got out of basic training. That kept him out of the infantry. After completing teletype school he joined with a unit scheduled to go to Africa. For whatever reason, his unit never made the ship to Africa. Again, Lady Luck smiled on him as that ship sank on its way to Africa! Dad ended up in England where he stayed until just after VE day when he went to Paris and stayed until he came home in January 1946.

I embossed the gear with gold UTEE, I think it resembles a ship's wheel and that is what it is representing on this LO.  I love the paper rosettes cut with Alterations die.  I think they add a nice touch to manly LOs without being overly feminine as some flowers can be.  Love the little  Making Memories dog tag I found in the $1 bin at Michaels - perfect for military LOs as all the soldiers had dog tags.  As an army dependent, I even had dog tags!

The circle is actually a plain piece of off white cardstock that I stamped with a screen print stamp from Tattered Angels and a Bo Bunny clock face stamp.  This is a great way to "dress up" your plain cardstock and give it some texture and dimension.


Here's a close up of the embellie cluster:


Thanks for visiting, I really appreciate your comments!


Wednesday, May 18, 2011

Canis Lupus


I used the Get Picky sketch #8 for this layout.  Get Picky has two challenges each month, an inspiration challenge and a sketch challenge.  Check it out, lots of great work going on there!

Wolves fascinate me and my top priority while we were at Denali was to observe this creature in his home.  I had high hopes, so many of our campers were going out during the day and coming back with wonderful stories of their wolf sightings.   I don't know how many times I got on that bus in Denali to ride through the park to see wolves but it was mostly a bust for us, everytime!

The photo at the bottom is the only one I took from the bus.  That was fun, we were actually observing a lone bear and off in the distance we see this wolf.  Well the bear had been lazing in the grass until he spied to wolf.  Then the bear gets up like he's  going to chase the wolf; the wolf sees the bear and starts running while looking back over his shoulder.  It really was quite comical. The bus driver said that the bear was probably bored and just wanted to play with the wolf.  I don't know about that!

The top right wolf pictures I took from the car through the front window of the car and the other two I shot from the motorhome on the day we were driving out of Denali to go home. 

I used the BasicGrey Curio papers for this, they seem to work well with my nature photos.  On the right behind the photos I've used a piece of Core'dinations black magic that I embossed using a Cuttlebug Victoria folder.

I love the Dusty Attic ferns and Tribal Design that I sprayed with Olive Vine Glimmer Mist. 

I see I need 1 more follower to make 100, yipee.  Only 50 more to go to give away my blog candy.  Check out my blog candy at the top of my sidebar. If you're not a follower, please become one.  If you are, please tell your friends!  I appreciate it!! Thanks for stopping by!

Monday, May 9, 2011

Fall at Denali National Park


Well I really loved the Swirlydoo's April kit that showcased Bo Bunny's Gabrielle but I think I love this May kit with Glitz Laced with Grace at least as much!!  The oranges and olives so perfectly offset each other and the colors are so vibrant, I really love it!!

This is a picture I took in 1997 of a grizzly bear fattening up on berries for the coming winter.  I took these pictures in September on a beautiful fall day.  In September, winter is just around the corner and it can snow anyday.  In fact, I have been at Denali in September when there was snow on the ground.

I really had fun making the flowers and leaves on this layout as I tried out my new Moonshadow mists on the leaves.  It really does give them a beautiful patina look.  AND something new I have discovered, I bought a set of 16 pearl watercolors at Michael's for a whopping $5 and used it to paint my flowers.  Really gives an effect similar to Glimmer mist but it's easier and a lot cheaper!!  I used the paints on the orange flowers.  The green flowers were sprayed with olive glimmer mist.  The Dusty Attic vine is painted with acrylics and then glazed with Diamond Glaze.  I like Diamond Glaze better than Glossy Accents, its a little thinner and therefore brushes on nicer.  It seems to have the same glue qualities as Glossy Accents too.

I used the May sketch at Dusty Attic for this layout and I'm entering it in their sketch challenge.  Also made the layout for Glitz Challenge #2.


Thanks for stopping by my blog!  I appreciate the time it takes and I'd love you to leave a comment so I'll know that you were here!

Friday, April 22, 2011

Time Passes

Here's the newest sketch at  Sketches: Creatively Yours and I used it to do this layout for the DT.  There are some great interpretations of this sketch, hope you'll check it out!


 I used the gorgeous Bo Bunny Gabrielle papers and the clock and leafy vine are Dusty Attic. The vine is painted with acrylic paints and then glazed with Diamond Glaze.  The circle part of the clock is inked with Distress brushed corduroy.  The outer swirls are painted with gold Perfect Pearls.  The pink flowers are some that I made and the other 3 are Prima.  I also used a new Prima mask on the inner square.  TFL!!

Supplies:
Patterned paper: Bo Bunny Gabrielle collection -Base paper - Stripe
Fairest, Unwritten, cutouts for journal card and picture frame
Letter stickers: Thickers – Salutations fabric
Chipboard: Dusty AtticVines DA 0486; Vintage Clock DA0261
Flowers: Prima The Roosevelt Collection Deland
Ribbons/Lace: Lace Heaven stretch lace
Ink: Distress Brushed Corduroy,black soot, Victorian velvet; ColorBox Chestnut Roan
Glimmer mist – Crรจme de Rouge
Other: Clock painted with Perfect Pearls perfect gold and inked with Brushed Corduroy
Unknown: Acrylic paints to paint chipboard, leaves covered with Diamond Glaze

Thursday, April 21, 2011

Being 40

My RR entry for the Swirly Divas at Swirlydoos is a scraplift of Denise who scraplifted Rae.  This page goes along with the other page I did of my 40th birthday.  In so many ways, it seems that was just yesterday but in realtiy it was nearly 20 yrs ago.  WOW.  Dick's daughter just had her 40th birthday, that kind of puts it in perspective!  Again, I used the Prima Moulin Rouge pps for this, I made the purple flowers.  The spray is from Prima.  TFL!!


Friday, April 15, 2011

When I turned 40....

Ah, here I am, a very youthful 40, divorced, very much in love with my current husband.  Life couldn't have been much better than it was on my 40th birthday and I'm happy to say that it still is wonderful.  Oh, I have a few more aches and pains but still life is good!

I really worked the Dusty Attic chipboard on this layout.  We are having a chipboard contest at Swirlydoos.  I may enter this one, I just haven't decided yet!!  The frame chipboard is painted black and then painted over with silver translucent glass paint and then a thick coat of Crackle Accents.  Then the swirls on the frame are heat-embossed with marcasite embossing powder.  The swirls on either side of the frame are really neat, they are two piece.  The bottom layer has  been painted with Shimmerz pearl grammie berry .  Then the top layer has also been heat embossed with marcasite powder.  I guess I was in a blingy mood as I also added alot of burgundy stickles and bisque liquid pearls as well as lots of rhinestones.  I made the light pink flowers and actually made my own mist for the first time by using 2 colors of alcohol ink mixed with water and some perfect pearls.  I think it turned out rather well for the first time!  The papers are from Prima's Moulin Rouge line - I have found them hard to work with but I am pleased with this result.

Dusty Attic shout out!!

I was so honored that I won the sketch challenge at Dusty Attic with this LO, that I wanted to show you the wonderful prize package I got in the mail the other day from Dusty Attic.


Just look at all that awesome chipboard and that frame in the back!!  Dusty Attic has the best chipboard, it is laser cut and has the most perfect details!!  Thank you Dusty Attic!!


Friday, April 8, 2011

Mother & Daughter

It's reveal day at Sketches: Creatively Yours and it was so fun to see my layout as I did this layout several weeks ago and had just about forgotten what it looked like!  I hope you'll take a minute and check out what the rest of the DT did with Ali's great sketch!  AND I hope you'll use the sketch and post a link at Sketches: Creatively Yours as Ali is going to have a ribbon PAK for some lucky person!!   Go check it out!!


I did this LO using some of my favorite G45 papers from the Domestic Goddess, Fashionista, Playtimes Past, and Le Cirque collections. These colors are so bold and rich!  Oh and that beautiful chipboard dress form is from Dusty Attic, isn't it awesome?  I don't usually roll my Mom's hair but her hairdresser was gone for some reason so she asked me to do it.  Yikes, I really don't do hair but I managed to get the job done.  Dick snapped this photo when we weren't looking, he's sneaky like that.


Thursday, March 3, 2011

Yippee!! I won the sketch challenge at Dusty Attic!

Wow, did I ever get a nice wakeup this morning.  I turned on my computer, as usual, opened my email, and there was a message telling me I had won the February sketch challenge with this layout, Imagine. this layout!  What a wonderful way to wake up!!  Here is the Dusty Attic Feb sketch that I used.  Dusty Attic lasercut chipboard is just the best , they have such beautiful products.


Friday, February 25, 2011

Imagine & antiquing a frame


Every now and then I do something that I really ,really like and this is one of those!  I just love the way that the Dusty Attic Frame turned out on this, IRL, it is soooo pretty and french antique looking!  I did this layout for the February  sketch challenge at Dusty Attic.

The journal says:  This photo was taken shortly before Mom and Dad were married.  Did they imagine that they would be married for more than 67 years?  Today, they are almost 89 years old and they are still working on their love story.

 
Method for Antiquing the Frame
The effects I used on the frame are really easy and here's how I did it.  First I painted the frame with clear Gesso so that my acrylic paint would adhere better.  I used Plaid Antique White acrylic paint and I applied 2 coats.  After that dried I used Ranger Crackle Accents and applied a heavy coat on the frame with a paintbrush.  I let that dry for several hours and then I rubbed Distress Antique Linen ink into the cracks.  That still didn't quite give me the effect I wanted so I rubbed Ranger Copper Perfect Pearls into the cracks and it was Perfect, LOL!!  The perfect pearls gave the frame a nice sheen.

Layout Supplies:

BasicGrrey Curio –
• Needle Lace – back pp
• Ophelia – floral rectangle
Bazzill CS – french vanilla
- peach
Glitz – Vintage paper layers – printed pp
Kaisercraft pearls- chocolate colored
Prima e. – black and peach pearls
Dusty Attic frame
Kaisercraft rubons – Devonshire collection “Imagine”
half flower – Petaloo
Other handmade with Alterations Tattered florals
McGill starburst punch &  leaf punch
Colorbox cates eye ink –
• bisque
• olive
Distress ink –
• forest moss
• wild honey
• antique linen
• black
Ranger alcohol ink – pitch black
Tsukineko Fantastix brush point coloring tool
Martha Stewart edge punch
Venetian lace – Lace Heaven
Glimmer mist –
• sunkissed peach
• olive vine
Ranger perfect pearls – perfect copper
Plaid acrylic paint- antique white
Gesso
Autumn leaves clear stamps - journaling stamp

LinkWithin

Related Posts Plugin for WordPress, Blogger...