Pages

Tuesday, February 21, 2023

Eileen Hull's Pockets and Tags Work on Layouts too!

 Last summer I spent 2+ months touring the Canadian Maritimes.  It was a fabulous trip and definitely is one of my favorite vacations ever!  This year I'll be doing a lot of layouts with photos from our trip.


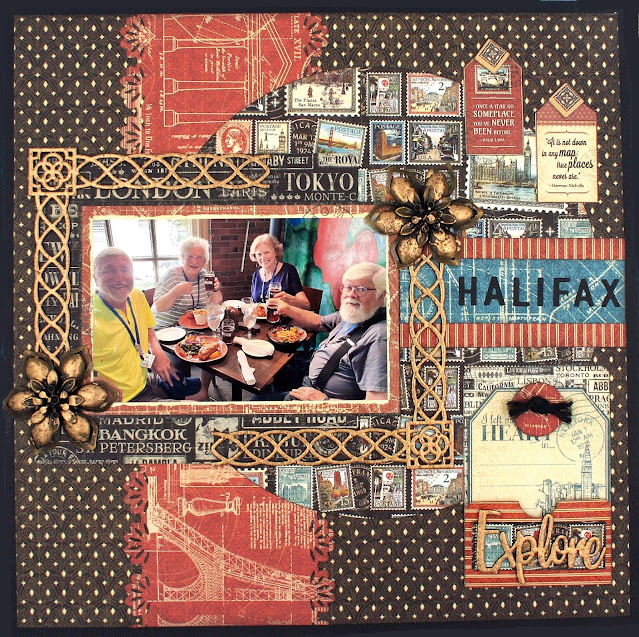
We were on a tour with 23 others, all of traveling in our own RV's.  It's great to have your own bed and bathroom!   This photo is of us with friends of many many years that joined us on the tour.  We were in Halifax, Nova Scotia enjoying lunch.

When I begin a layout, I first pull out whatever paper collection I'm going to use.  (I find it easier to work with a collection as that way, the colors combine well.)  Then I go through the papers looking for papers that work well with my photo.  I'm realy miserly with my paper so I always go through my scraps looking for things that will work.  Ha, the circle and red strips were papers I had cut long ago for some other project that didn't work out.  Then I move papers and embellies around until I get a rough idea of where I'm going with my design.  Next, I take a photo!  I have learned through experience that being able to refer to a photo gets me back on track when I get lost in my design.


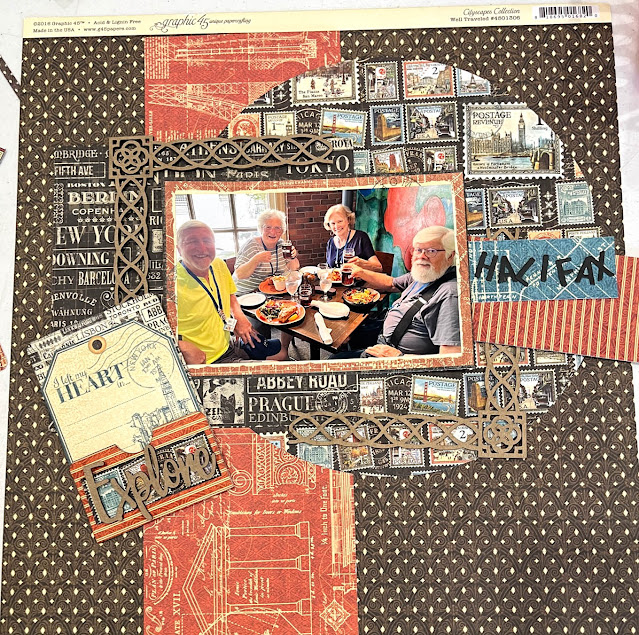
Yes, miserly.  I cut out paper that is going to be hidden by other paper/  In this photo I've cut a 1" frame from black cardstock; no need to waste the 11" x 11" paper that is covered!


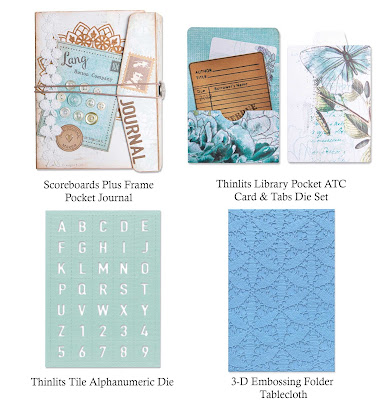
Have you used pockets on your layouts?  They are great for hidden journaling, ephemera, extra photos, there are endless uses! I am using a library pocket from Eileen Hull's 2023 Sizzix Chapter 1 Release on this layout as a fun place to put a journaling card.  


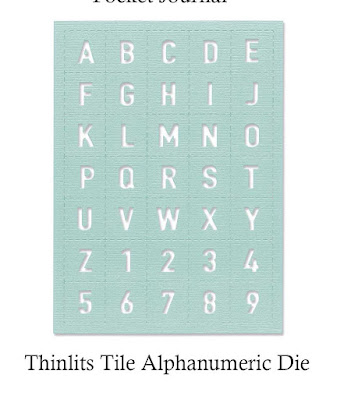
I ended up placing the pocket underneath the title, Halifax.  The title is cut with Eileen's Alphanumeric  Thinlit, also from the Chapter 1 Release.  These letters are so easy to read and just the right size for making layout titles.


I also used a Creative Embellishments word, Explore to embellish the library pocket. 


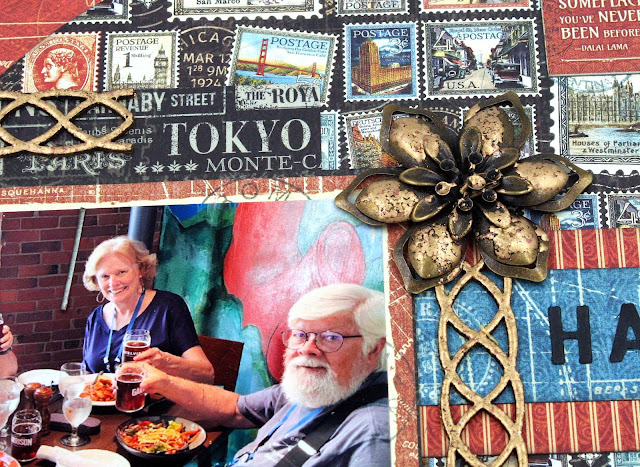
I also framed my photo with Creative Embellishments chipboard accentuated with metal flowers.  I used Stampendous Aged Gold Embossing Enamel to emboss eac h piece of chipboard.  I also enhanced to look of the bronze flowers by adding gold embossing powder to the petals.  Its easy to do, just paint a little embossing ink on the petals with a paint brush, sprinkle with embossing powder and heat.  CAUTION:  Allow the metal to cool down before handling because it gets really hot!

Photo: Embossing powder on teh petals before heating.


Thank you for joining me, keep an eye out for lots more layouts this year!


Supplies


Graphic 45 City Scape Collection (retired)


Tuesday, February 14, 2023

Love Journal with Eileen Hull's Frame Pocket Journal

It's love day and I've made a smashingly romantic journal to celebrate using Eileen Hull's Frame Pocket Journal released in January.  The die cuts not only the journal cover, but also a frame and a pocket.  I've used the frame here on the front to frame the roses.  I've used Graphic 45's Mon Amour collection for this journal which was just re-released!


The closure is a simple elastic band.


Inside, on the front cover, I've used the pocket.  It nicely holds a mini journal.


This journal holds 3 signatures, one for photos, one with lined pages and one with blank pages for any use.


On  the right side you can see the first signature which is designed to hold photos.  I used Eileen's previously release Snail Mail thinlit die and stamps along with Journal Words, Love, from an older Eileen release to embellish the cover.


Pages in this signature:

On the right side I've used the January released Library Pocket Thinlit die. That's a great spot to tuck in a love note.


On the left page I added a pocket die-cut with the Folio Page Pocket Thinlit set (from 2021).


Here I added a waterfall photo section cut with Eileen's 2021 Waterfall die.  I'm so glad that Eileen designs her dies to work together in her many different style journals!


Alphanumeric Die

Eileen also released the Thinlits Alphanumeric Die last month.  It is such a great alpha die, (and includes numbers too!), the size is perfect for titles like this "Love Notes".


I used a flowery fiber piece along the spine.  I love that it hides the elastic bands holding the signatures.


Thanks for stopping by!  xoxo Maggi


Tuesday, February 7, 2023

Birthday Cards with Eileen Hull Designs

 Time to make cards for the new year!  This first one is simple, a printed cardstock base (Graphic 45 Cafe Parisian), embossed and inked panel, and then a library pocket holding a card for a message.

I used two products from Eileen Hull's 2023 Chapter 1 release, the Library Pocket and Tablecloth embossing folder. I love the blue embossed panel! It's a 3D embossing folder so it gives a really deep and detailed impression. I swiped a white ink pad over the panel to bring out the embossed details.

Then I die-cut a library pocket and put together for the card front.  Graphic 45 has notecards that when trimmed, fit nicely into the pocket.  You could also tuck in a gift card or cold hard cash!  The recipient would really love this card then!  🤣 A bit of bakers twine, a cake charm and simple flowers complete the look.


Inside I added some fussy cutting, a collection tag and a die-cut label with an  "indulge" word sticker.  The Library Pocket Thinlits Set not only includes the pocket, it also includes 2 tab dies, the label die I used on this card and an ATC die.  That's a great value as you can used these dies with so many things.  The label and tabs work really well with journals.  AND the ATC card with the library pocket, oh my, match made in heaven.  Stay tuned to see what you can do with thrdr two dies.


I thought I'd try a bit of stamping on this card.  I am not a stamper but I do try!  The two birthday cakes and the sentiment were all stamped with Eileen's Maker Forte Snail Mail Stamp Sets and die-cut with Snail Mail Thinlits.

Behind the stamped images is an embossed panel using Eileen's Tablecloth embossing folder, part of the Sizzix 2023 Chapter 1 release.


This is a trifold card, I used some design paper from Stamperia to breakup the cream cardstock.


Once again, I've used the library pocket to hold a sentiment or gift card.


Eileen Hull by Maker Forte Snail Mail - Everyday Sentiments


Thanks for the visit
xoxo Maggi


Tuesday, January 24, 2023

Thank You Cards with Eileen Hull's New Release


Thank you Card

I needed a thank you card the other day and I needed it fast so I quickly came up with this.  


The key to this quick card is that I had some beautiful 2 sided paper (Graphic 45 Let it Bee Collection).  The paper was 8" x 8" and I just folded it in half.  Bam, it's a slim line card! 


I quickly cut some letters with Eileen's new Alphanumeric die.  I seriously love this die as it is so easy to cut the entire alphabet or cut individual letters.  Why is it so easy you ask?  Well it's one big plate at 5.75" x 7.75" AND you can use the negative of the letter because each letter is a tear apart section.  I love it!!


So back to my quick card, I cut the letters and grabbed a scrap of embossed cardstock left from something else and lined up my letters.  I find it much easier to line up my letters on a separate strip than directly onto a card.  OMG, when I adhere directly, it's usually running uphill or downhill or maybe even both!  I also started gluing the letters from the end beginning with the "U".  That way I get proper spacing and I can lop off the other end to get whatever size I need.

Ok then, adhere that sentiment along the side of the card, glue some flowers on if you are so inclined.  This card looked good either way but I just had to add a little something!  😄


Now that red inside was just too in my face red so I glued on some nice neutral cardstock; besides, I needed somewhere to write!  Then a strip of design paper caught my eye so that went on the left side.


I thought a library pocket would be cute with a G45 journal card in it so I used Eileen's new Library Pocket die inside.


These are so quick and easy to make, just die-cut, glue each side of the pocket and that's it!


Supplies for this Card


Masculine Thank You Card

I love Sizzix's Cork Roll Surfacez and I'm amazed at all the things I've been able to do with it.  Today I decided to try it as a card base.


The only issue with using it as a card base is that it is one-sideed paper.  I solved that problem by gluing cardstock to the backside of the cork.  Because the cork comes in rolls and it's not real heavy, I found using an adhesive sheet the easiest way to adhere.  I also cut my cork and cardstock a little larger than I need. 


In this photo I've adhered the carstock to the backside of the cork paper.  You can see the cork peeking out on the sides.  Now I just cut this assembly to the size I want, score and there I have my card base.  Doing i this way ensures that the cardstock and cork are perfectly aligned.


I adhered an embossed panel that I made with Eileen's newest 3D Embossing Folder, Tablecloth. After embossing, I lightly went over the embossing with silver Sizzix Lustre Wax to bring out the beautiful embossed details. For added interest I clipped the corners with We R Memory Keepers Corner Chomper.


At the top I added a strip with Thank You cut with the Alphanumeric Die and a metal xoxo charm.  At the bottom some paper lace fussy cut along with some tiny flowers.  


Supplies for this Card


2023 Chapter 1 Release for Eileen Hull Designs by Sizzix


That's all for today but I have lots of projects to share with you using Eileen's newly released Sizzix products.  Be sure to stop by Eileen's blog to see inspiration from all the design team. 
xoxo Maggi


Tuesday, January 17, 2023

Cookbook using Eileen Hull's Frame Pocket Journal by Sizzix

 My other hobby is cooking so I love making cookbooks!   I made this one with Eileen Hull's new Frame Pocket Journal die.  The die is plus size, meaning that you need a large format die cut machine that has a 9" opening..  The die is approximately 8 3/4" wide and 12 1/2" long. The paper I used is Graphic 45 Farmhouse.


Eileen's 2023 Chapter 14 release includes 2 thinlits dies too.  One that I'm sure you're going to love is the Thinlits Tile Alphanumeric Die that I used to cut my "recipe" title.  The letters are just the right size for titles and you can use both the positive and negative cuts which is great!

Underneath the letters I used the label included with Eileen's traveler's sized Journal.


Here you can see the journal opened up and the flap on the back cover that wraps around the front.


On the inside cover I've use the Pocket that comes on this same die.  It holds a 3" x 5" index card which is perfect for recording recipes.  I made a strap to keep the cards in place.  It's easy to make, just fashion a strap about 1" wide and 5" long. Score at the top at 1" and fold and then at 1 1/2" and fold.  Adhere the 1" folded piece to the back of the journal being sure to leave enough room for your cards to fit.  Then use a magnet to secure the strap to the outside of the notepocket.


View with the strap raised to access recipe cards.


There are two lined paper signatures inside for writing recipes or even attached notecards to the paper.  Notice the black tabs on the signatures.  These are from another Thinlits Die Set in this release, the  Library Pocket ATC Card & Tabs.  The tabs have so many uses in journaling.  Here I'm using them to section off different kinds of recipes.


View from the  back of the journal.


Tuesday, January 10, 2023

A Journal with Eileen Hull's new ScoreBoards Plus Frame Pocket Journal

 Eileen's newest journal is so awesome and I love that there's a pocket and frame included on the die!  The die is a Plus Die meaning that you need an diecut machine with a 9" mouth like the new Sizzix Switch, Sizzix Big Shot Plus, or Spellbinders Platinum.  There are other machines that will work too, I just don't know all their names.  

I was going for an old world vintage look and  I think combing lace and paper contributes to that look. I used an old Prima collection, Time Traverler's Memories for the journal.

The backcover of the journal has a flap that wraps around the front cover which really creates a tidy closed journal.  I used a magnet closure on the flap.


I've recorded a flip thru video so that you can see all the pages.


Inside the front cover is the Notepocket, and on the right side is the Photo Frame, both part of the  Frame Pocket Journal Plus Die.


View of the back with the journal opened.


How to make the magnet closure:

The closure on the journal is magnetic which I really like because it is so neat, clean and effortless.  It's easy to make.  I like the magnets hidden so when I adhere the papers I leave a little space for the magnet. (If you're really organized you can glue the magnet on while you're building the cover.  I never seem to get that organized and end up doing it at the end.)  I use a little Undo if I need more space.  Just take tweezers and poke the magnet under the paper.


It's important to get the magnets lined up correctly, so take the second magnet and place it on the first magnet like show in this photo.  Now remove the adhesive cover and press the cover flap over top the magnet.  The magnet will adhere to the flap and voilà, it will be perfectly placed!  After doing that, I cut another flap from design paper and adhered over the magnet so that it would be hidden.


Supplies


Thanks for joining me today!


LinkWithin

Related Posts Plugin for WordPress, Blogger...