Pages

Tuesday, March 8, 2022

Mixed Media Journal with Fabrics and Laces for Eileen Hull Designs

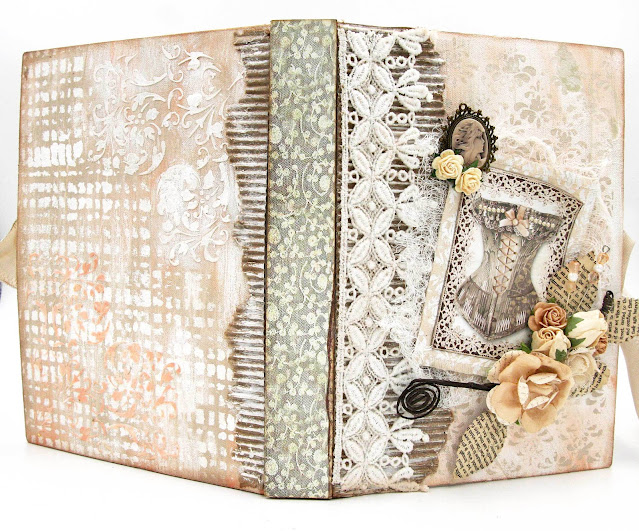
 The theme for Eileen's  March creations is fibers, fabrics and felt.  It's been a while since I created a shabby chic journal so I just dove right in to this project using fabrics and laces and lots of fun mixed media techniques!
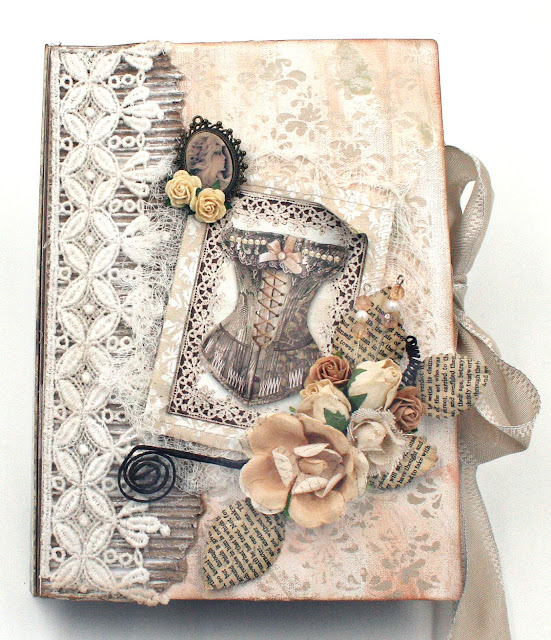


I have lots of photos and a tutorial for the cover to share with you so get comfy and let's go!

Tutorial

This journal is a great size at 6.25" x 8.75"; plenty of room for notes and lots of photos.  I used Eileen Hull by Sizzix Full Size Journal to cut the cover.  You do need a BIG machine to cut the cover and I just got Sizzix's new Switch Machine.  Woo-hoo!!  I confess, I made this particular journal because I wanted to see how my Switch worked.

Okay, okay, πŸ˜„πŸ˜„let's get to the tutorial part!  

Step 1:  First thing I did was adhere sticky back canvas to 2 pieces of chipboard and diecut the two covers. 
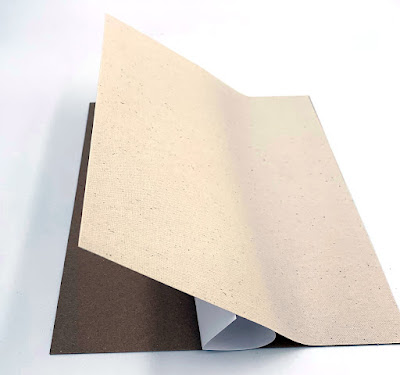


Step 2:  I used thin chip board for the covers and the score lines were about to come apart so I reinforced the area where the scorelines are with fabric washi tape to keep the chipboard from separating at the scorelines. 


Step 3:  Now we get to the fun part!  I prepared a Gel-Press plate with white, beige and peach acrylic paints and the outsides of the front and back covers.  Sorry, I didn't photo this process but you can learn more about Gel-Press in this blog post.

Step 4:  After allowing the paint to dry, it's time to do some stenciling.  On the front cover I used a stenciling brush to dab paint instead of using molding paste.


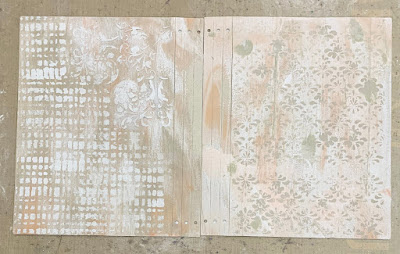
Step 5:  On the back cover, I used white molding paste and after stenciling on the pattern, I went over it with white paint (before removing the stencil) so that the stenciled image would be bright white.  
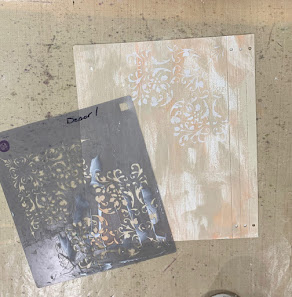


Step 6:  Here are the two covers together.  You can see that I did some additional stenciling on the back cover with a different stencil.


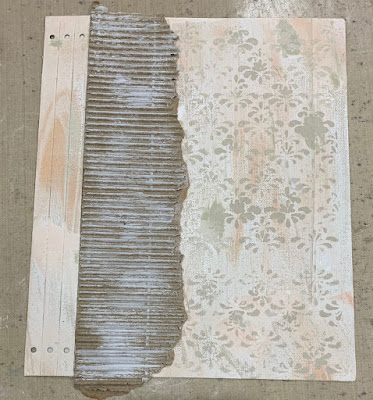
Step 7:  Add some corrugated cardboard near the edge and dry brush with white paint to add to the shabby chic look.


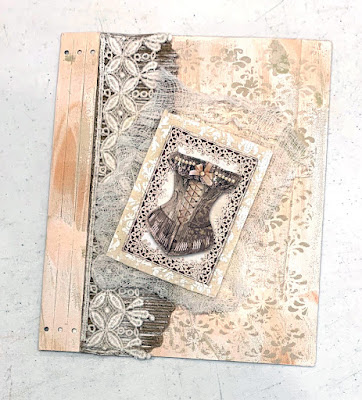
Step 8:  Add a strip of lace over the cardboard using mat medium to adhere it.


Step 9:  Then I layered the vintage corset image over a scrap of fabric and and some distressed cheesecloth.


Step 10:  Of course the final step is to add flowers and leaves, along with a vintage cameo and a couple of stick pins.
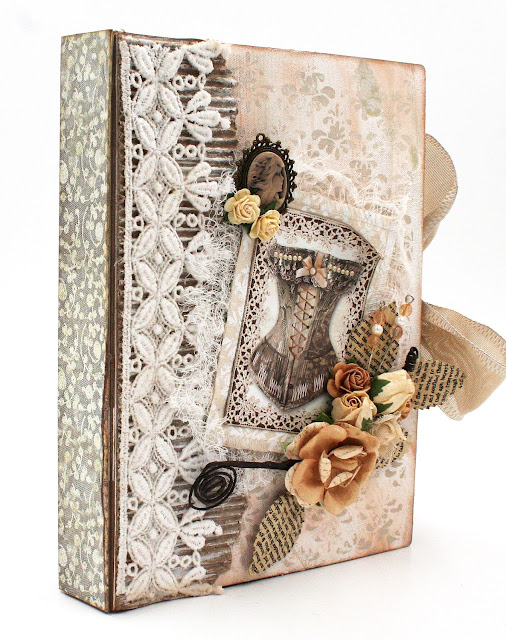
I added a ribbon closure by gluing ribbon on the inside of the covers.  I used design paper overtop the ribbons as you can see in this photo.  The chipboard sentiment on the right is heat embossed with Aged Ivory embossing enamel.  


I embossed a piece of black cardstock with Eileen's Vintage Buttons folder and then went over the embossed images with Sizzix wax in rose gold.  I love the effect of the wax on black cardstock.  I added fussy cuts from the paper collections and bits and pieces of lace and trim from my stash.


The page on the left has a little page that opens up to reveal a journaling spot and another place for photos.
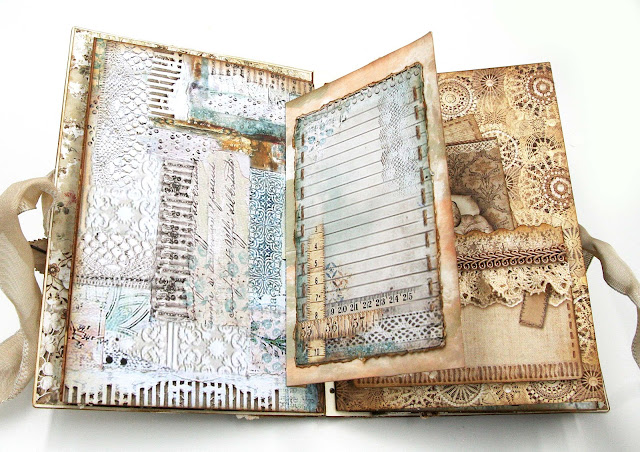


I made a pocket on the left by covering a piece of cardstock with lace.  On the right is a tuck spot and more of the Vintage Buttons embossed cardstock.


On the right is a pocket for tags, notes, etc.
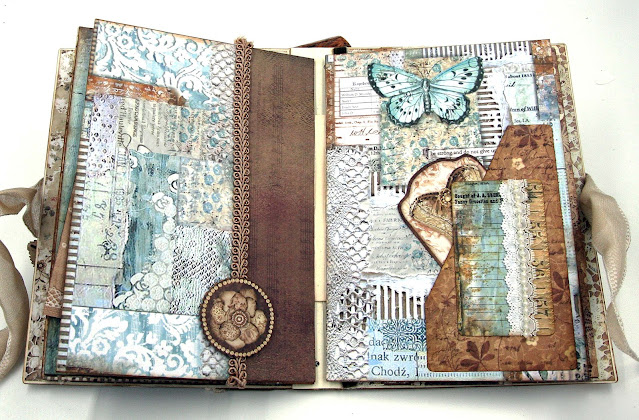


On the right is an envelope that is one of the images in the design papers. I just cut it out and folded it into an envelope. Its a perfect spot for notes and photos!


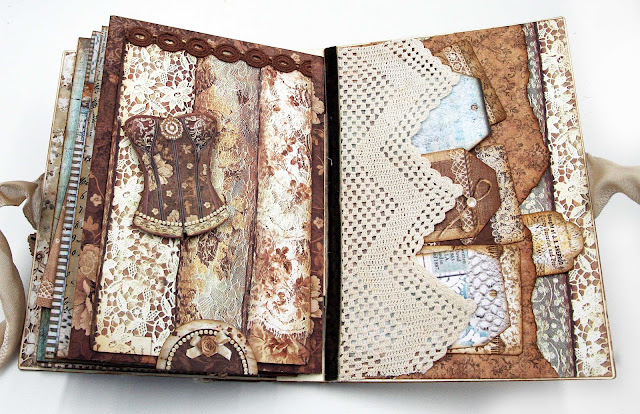
The left side has a page that lifts up and the right side has two pockets.  Making the lace pocket was fun.  I adhered the lace onto a piece of vellum and then glued it onto the brown paper which is also a pocket.  Iliked the torn edge on the brown scrap and decided to just leave it au naturel!


All of the pages in this book are made from covered thin chipboard, so I guess it's technically a "board" book right?
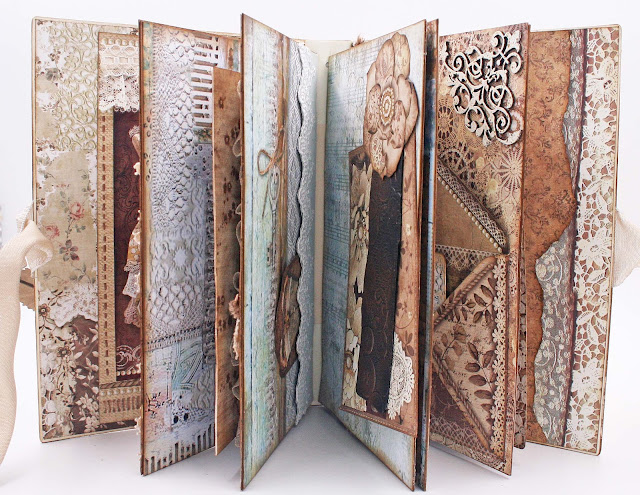


To make the spine stronger, I covered a piece of chipboard with design paper and glued it to the spine.

If you've managed to stay with me through this entire post, thank you!!  It's a long one.  This was a really fun journal to make, I enjoyed working with vintage images and laces!  Thanks for stopping by.

Maggi xoxo

Supplies


Stamperia Atelier Paper Collection
Stamperia Old Lace Paper Collection
Creative Embellishments Chipboard Quotes
Stampendous Aged Ivory
Ranger Sticky Back Canvas
Assorted Flowers, Laces, Fabric from my stash




Monday, February 28, 2022

More Fun with Eileen Hull's New Stamp Release

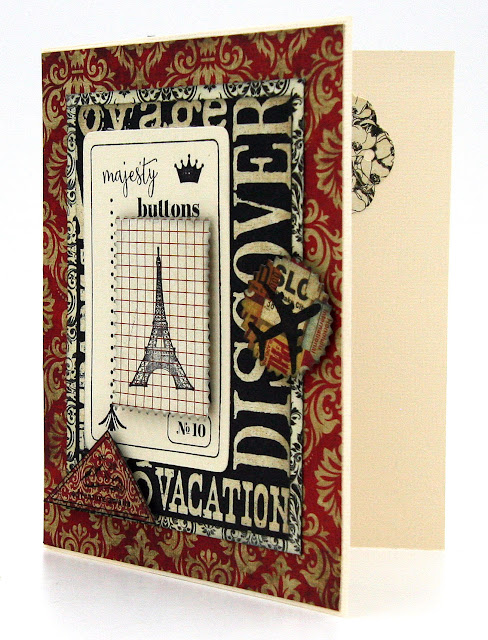
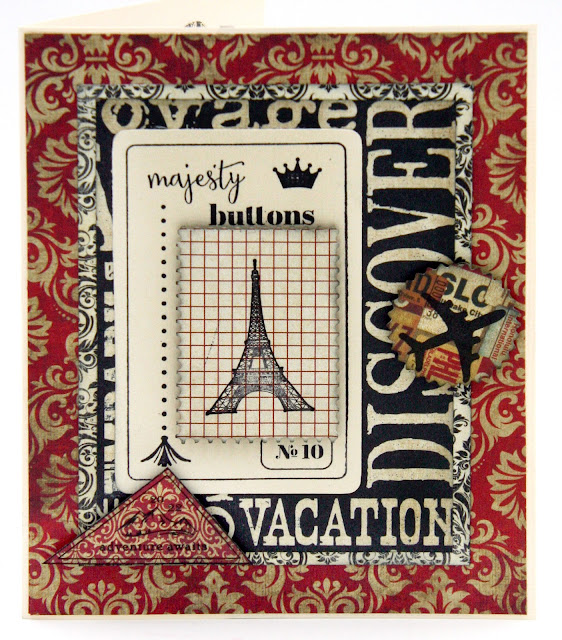
I used Eileen Hull's newest stamp releases to make this fun vacation card.  The Snail Mail Postage set has so many great images to use for card making.


I love this airplane, so evocative of days gone by when we had to choose between regular and air mail postage.  I diecut this with an older Eileen thinlit from the Bookplate, Hinge & Label set. 


This is a fun stamp, easy to cut out too!


The Eiffel Tower is a great stamp and always makes you think of travel, right?  I stamped it on a scrap of design paper and die cut it with the Snail Mail Thinlits set.  That is such a great pair of dies as it cuts postage stamps that can be torn apart just like real stamps.  I used foam squares to pop up the "Eiffel Tower stamp" I made and placed it on another stamped image from the Button Card 2 set.


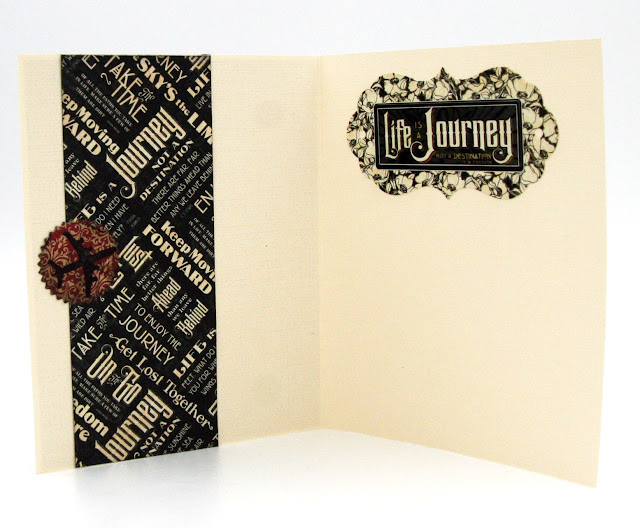
I like to embellish the inside of my cards too so I just used a sticker and a scrap from Graphic45's Lifes Journey collection.  And there's that airplane again!


Thanks for stopping by today!  You can get Eileen's stamps here from Maker Forte.

Maggi xoxo

Saturday, February 26, 2022

Button Easel Card

Easel cards are so pretty because they stand on their own.  AND, bonus, they are easy to make!  This one is made with some old papers and new stamps from Eileen Hull by Maker Forte.


The only part of making this card that is a little bit tricky, is the easel and it's really quite simple.  For this card, I used a 12 x 12 paper and cut it into two pieces, each 6″ x 12″. Then cut one of the pieces in half so that it is 6″ x 6″. Take the long piece and score on the long side at 3″ and 6″; this will be the card base.  Fold at the 6" score line creating a "mountain" and then fold at the 3" score line to create a "valley". It should look like this. (note this is for illustrative purposes and is not the paper I used for this card.)


To create the easel glue the 3" top of the front of the card base (above the scoreline at 3") to the back of the 6" square.  It should look like this when displayed.  Be sure to only glue the top 3" flap to the 6" piece.  You can see how this is done in this video.

The easel should look like this after assembly.


The front of the card is composed of several layers.  First I added a 5 3/4" design paper layer, then I  topped that with Eileen Hull's Heart Mandala, die-cut from a scrap.  


View of card opened up where you can see both the inside and the easel.  On the insdie of the card you need to create a mechanism to hold the easel upright.  I used a strip of paper along with a button placed about an inch from the bottom of the card.


Next I stamped with Lang Button Company onto a paper design created with Gel Press and acrylic paint.  (more about Gel Press here.)  Then I trimmed the button card out and adhered it to the front of the card.  I diecut some mannequins from embossed paper made with Eileen Hull's new Vintage Buttons embossing folder.   I show you different ways to use the  Vintage Buttons embossing folder in this video.   I stamped the two circle stamps and then diecut them with an older die from the Eileen Hull Framlits set, Bookplate, Hinge and Label.


Eileen Hull Products


Eileen Hull by Maker Forte Snail Mail - Postage Stamp Set
Eileen Hull by Maker Forte Button Cards #2


Thanks for visiting, time to go make an easel card!  πŸ˜‰

Friday, February 25, 2022

Look at These New Stamps from Eileen Hull!

Eileen Hull has just released two new stamp sets and they sure are a lot of fun!  I confess that card making really isn't my forte but I am getting in the groove with these fun stamps!


My Cards

Here's a fun easel card measuring 6" square.  I used stamps from both new sets to create this card.   I stamped the "Lang Button Company" card onto paper I created using my Gel Press (more about Gel Press here.) and sewed on some buttons I've had forever!  I stamped the two circle stamps and then diecut them with an older die from the Eileen Hull Framlits set, Bookplate, Hinge and Label.  The mannequins are diecut from papers embossed with Eileen's new Vintage Buttons embossing folder. 


I used stamps from both new sets to make this simple card.  I just layered up some very old papers and added the stamps that I either diecut or fussy cut.  The Eifel Tower stamped image was die cut with the Snail Mail Thinlits die set.  It cuts the coolest stamps that can be torn apart just like postage stamps!


And finally, a birthday post card using several stamps  from the Snail Mail Postage set.  I like to stamp my images and then cute them out so that I can play with the arrangement on my card.  I'm just not so good at stamping directly onto a card.  When I do that, I end up not liking the placement of the stamp.  I also like to add a little dimension by popping up some of the stamped images.


To make this card, I cut a piece of cardstock, 6" x 4".  I stamped the images below on separate papers and then adhered to a small paper layer and glued it all to the "post card".  The birthday cake is popped up with dimensional foam.


These images are also stamped, cut and glued to the post card.  The "post card" stamped image is also popped up with dimensional foam.  Easy peasy, stamping onto separate paper and cutting out the stamped images, gives me the flexibility to play with the arrangement of the different elements and I love being able to pop up some of the images.


Eileen Hull Products

Eileen Hull by Maker Forte Snail Mail - Postage Stamp Set
Eileen Hull by Maker Forte Button Cards #2


I'll be posting mor details on these projects in the next few days so stay tuned!


Tuesday, February 15, 2022

New Phone Stand Die from Eileen Hull Designs

Here's a great new die from Eileen Hull Designs, ScoreBoards XL Die - Phone Stand.   I am always looking for my phone and it's usually buried under a pile of something!


With this phone stand, I always have a place to put my phone and because its a stand, I can always see/find it!


I created the background color of both phone stands using Gel Press plates.  On this stand I used pink, green and white acrylic paints and the 5" x 10" Gel Press plate.  I made several pressings and then cut to fit and glued to the stand.  I also cut a strip to make a 2nd layer and glued to the front of the stand.  Then I stamped Hello on a strip of paper and glued.  The eyes are Dyan Reavely washi tape.


I used brown, yellow, green, and white acrylic paints to create the backgound on this stand and made the Gel Press print directly on the matboard that I used to make the stand.  I was experimenting a lot when I made this one, using a variety of stencils and Gel Press Impressable Squares in Squares.  I felt like I needed a focal point, so I added strips of Tim Holtz washi tape.

If you have n't tried making prints with Gel Press, you are missing out on a lot of messy fun!

The phone stand is a great die and one that you can use over and over to make little gifts for your friends!

Sizzix Products Used


Gel Press Products


Thanks for stopping by!
Maggi xoxo


Tuesday, February 8, 2022

Valentines with Eileen Hull Designs


With Valentine's Day right around the corner, I thought this box would be perfect to fill with candy for a special person!  I made the box using Eileen's new Book Box die which is just the perfect size for a small gift of chocolate or anything else!


I created the cover of the box using pink, white, and blue acrylic paints and a Gel Press plate. (Tutorial for using Gel Press here.)

I embellished the front cover with a Heart Mandala die cut.  I placed a fussy cut image from Stamperia in the center of the Mandala.  Flowers from Little Birdie and a seam binding bow finish off the look.


I added a closure to the box.  You can see how I made the closure from a link in this post.


The flowers and bow add lots of dimension to the cover.


On the left side I added a pocket and tag using dies from Eileen's pockets set and Waterfall and Tags set.


Products Used to Make the Box

Eileen Hull Designs Sizzix Products


Valentine's Card


This is such a fun Valentine that I made with Eileen's new Snail Mail thinlits set and Snail Mail Sentiments stamps.  These two sets were made to go together and I just love them!  The really cool thing about the thinlits set is that you can cut one big sheet like I used on the front of this card OR you can cut the set of stamps and then tear apart just like real stamps. That's how I made the stamp on the envelope.


To make this card, I cut a stamp panel using just the panel die and then stamped the panel with different stamps from the Stamp - Snail Mail Everyday Sentiments - 6x8 Stamp and a couple other stamps from my stash.


Eileen Hull Designs Products Used to Make this Card


Thanks for stopping by today!  Maggi xoxo


Sunday, February 6, 2022

Graphic 45's Well Groomed Collection


I was just having a little fun with a large tag from Creative Embellishments and Graphic 45's latest dog/cat collection, Well Groomed.


I am owned by 2 standard poodles so I am well acquainted with "Well Groomed".  My dogs are my children and I love them soo soooo much but they do required alot of upkeep!  Here they are after a doggie spa day.


I used to groom them myself but after 17 years of grooming my poodles I decided to let someone else do it.  It is hard work and made my back and hands hurt!  My groomer here in Tennessee just opened her own shop and I thought this would be a cute little decoration!


Graphic 45 Well Groomed Collection
Creative Embellishments Chipboard


LinkWithin

Related Posts Plugin for WordPress, Blogger...