Pages

Tuesday, July 5, 2016

Build a page with the Flying Unicorn July kit!

Today I'm sharing a build a page tutorial featuring the July Flying Unicorn Kit.  Here's a list of the products that I used for this layout.


49 and Market Vintage Artistry Paper Collection
49 and Market Rustic Barn Medium Blooms
49 and Market Rustic Barn Small Blooms
Prima 6 x 6 Collection Kit Vintage Emporium
Prima Stencil 960155
Prima Color Bloom Tea Stain
Prima Paint Art Alchemy 963057
Prima Cork Stickers 576189
May Arts ribbon
Prima Wood Veneers
Other supplies:
Petaloo Darjeeling blooms
Lindy's Gator Gumbo Olive mist

Don't feel like you have to use exactly what I've used, change it up and use what you have on hand if you don't have all these supplies.

Step 1

I like to assemble all my pieces and take care of all the little things before I put a layout together.  With that in mind, I am starting with the chipboard frame and title.  I've used the smaller corners included in Creative Embellishments Page Corners Set 3 and the word Friends from the Friends Word Set.  I made quick work of this by simply misting the chipboard and allowing it to dry while I worked on some of the other layout components.


Step 2

These are chipboard fern pieces and I colored them with Lindy's Gator Gumbo Olive.

Step 3
I fussy cut these ferns and the butterfly from the Vintage Artistry Flora and Fauna Cut Out Sheet.


Step 4

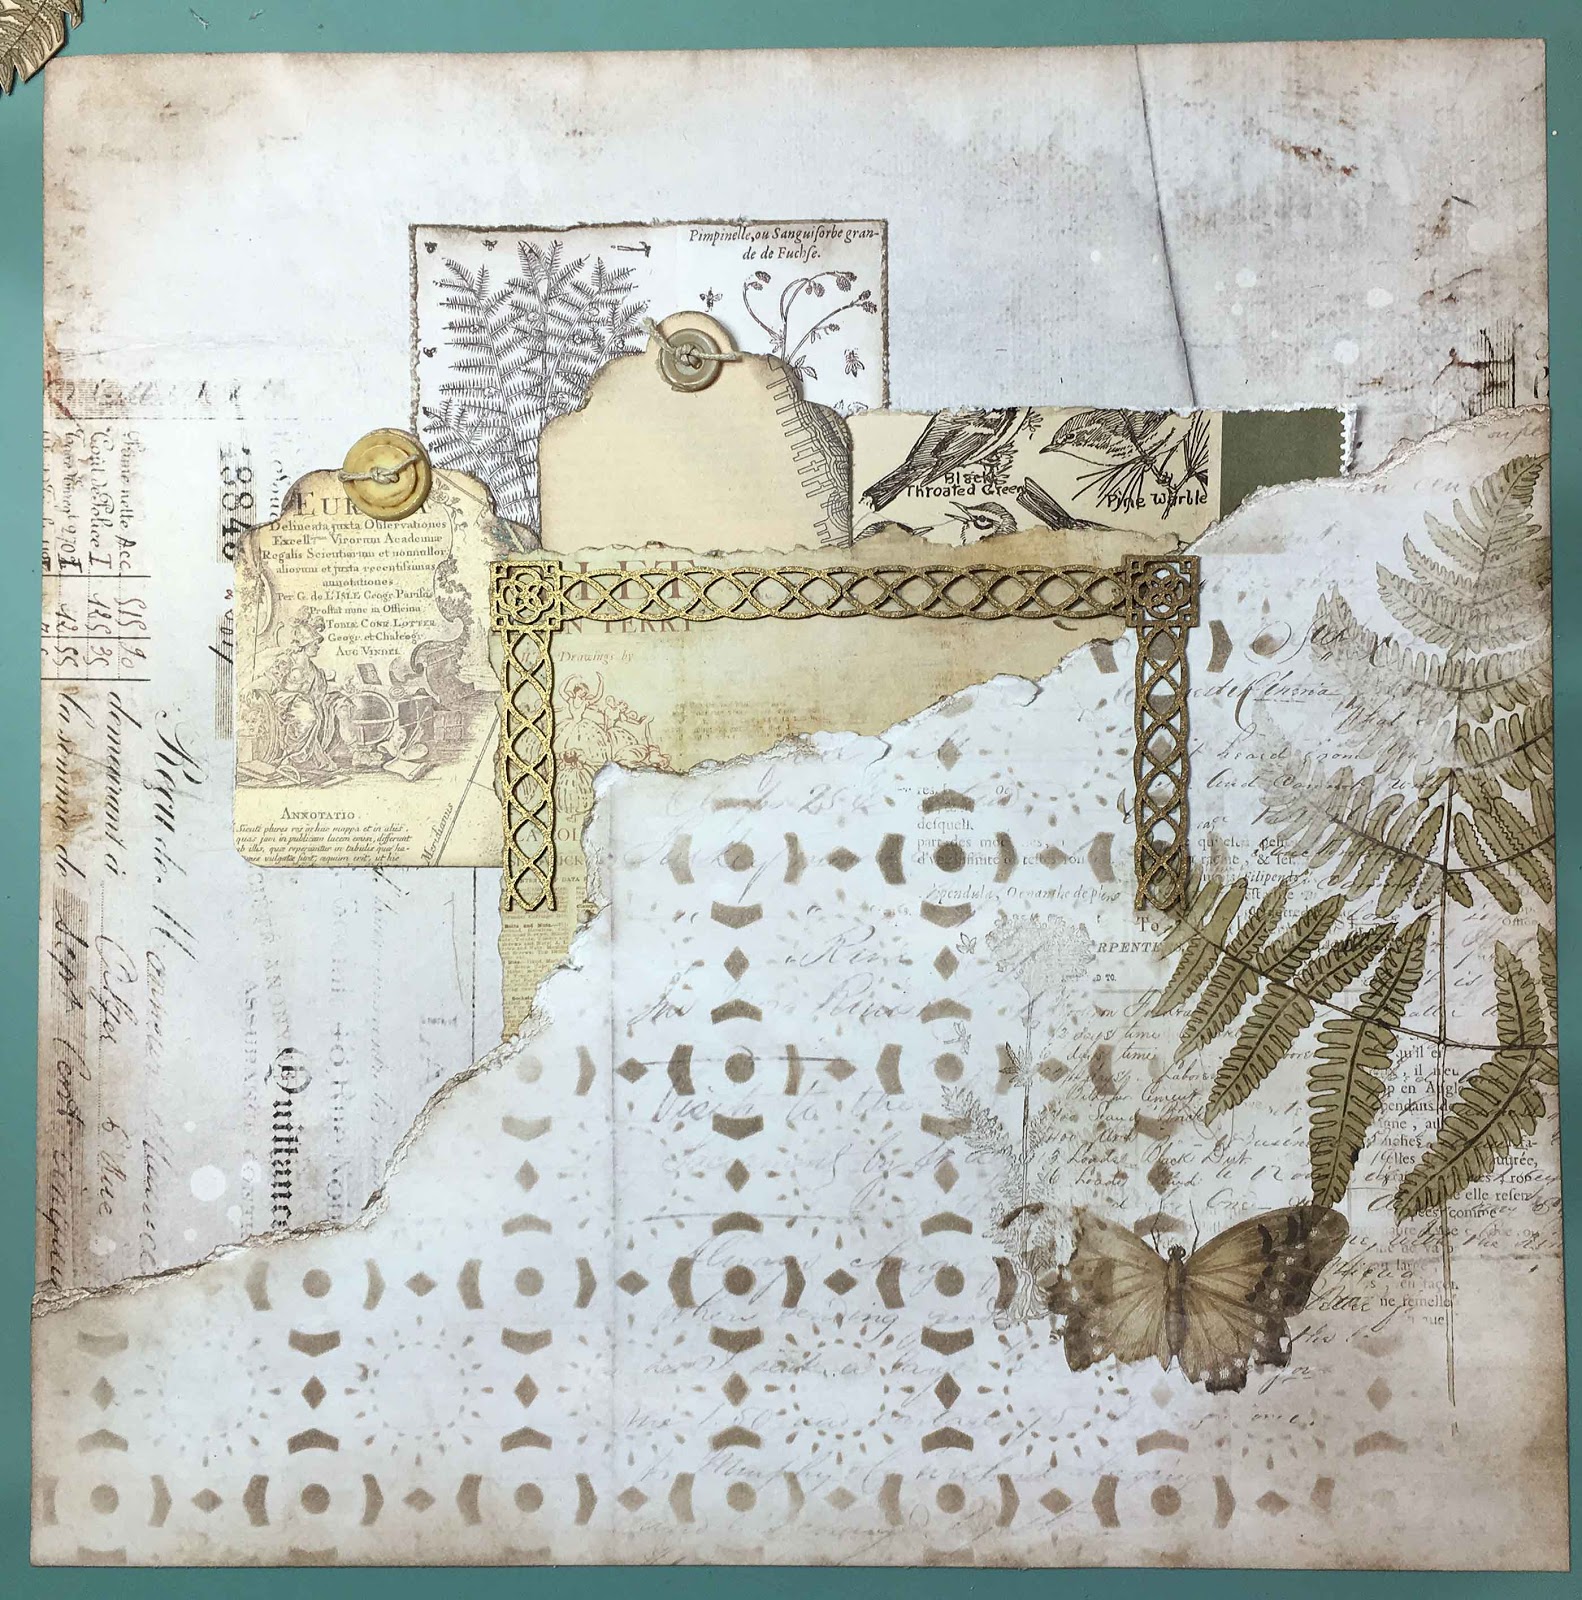
Locate the 6 x 6 sheet shown on the left below in the 6 x 6 Vintage Emporium paper pad and tear around the edges.  

Cut the piece out on the right from the Vintage Artistry Ephemera Cut Out Sheet. 

Distress and ink the edges as desired.


Step 5

Cut the piece out on the left from the Vintage Artistry Ephemera Cut Out Sheet. 

Locate the two tags in the kit.  Thread some twine thru a couple of buttons and adhere to the tags.

Distress and ink the edges as desired.


Step 6
Tear the paper,Vintage Artistry Specimen, in a manner similar to that shown below. Set the top piece aside for another use.

Step 7


Distress and ink the edges as desired.

Step 8

Cut the Vintage Artistry paper The Report diagonally so that it and the torn piece from Step 6 for a 12 x 12 sheet.


Step 9

Glue the two pieces of paper together, on the sides leaving the middle part unglued so that you can tuck some layers under the torn sheet.  Distress and ink the edges as desired.

Step 10

Add some stenciling to the bottom using the stencil in the kit and Distress Ink in Pumice.


Step 11
Adhere the small piece shown on the left about 1 1/2" from the top and 3" from the left side.  Ad the piece with the birds on it about 3" from the top and 1 1/2" from the right side tucking it under the torn piece as shown.

Step 12

Add one of the tags as shown below, about 3" from the top and 1 1/2" from the left side.


Step 13

Now find the placement of  the larger rectangle, about 4" from the top and 3 1/2" from the left side.  You can either tuck this piece under the large torn piece or layer it over top.  I tucked it under but you know, I think I meant to layer it on top!  Don't adhere this piece just yet, just mark it's placement.    Tuck the 2nd tag underneath.


Step 14

Now lift the rectangle and 2nd tag and turn them over.  We're going to make a hidden tag pocket.


Step 15

Use double sided tape to make a pocket  for the tag to slip into.  Then glue the rectangle in place and slip the tag into the pocket.


Step 16

Now glue the two chipboard page corners onto the layout as shown.


Step 17

Now add your photo.


Step 18

Glue the fussy cut ferns on the left side as shown.  Use foam tape to pop them up.  Glue the title chippy in place as shown.


Step 19
Add two of the  chipboard ferns on the right as shown.  Layer the 3rd fern piece over the fussy cut ferns.  Tuck in the little wooden veneer leafy branch.


Step 20

Now comes my favorite part!  Add your flowers in a pleasing manner. Tuck in some of the cork stickers and add a couple of butterflies.  Tie a bow and tuck under your flower on the left.

Flower and bow detail.


That's all there is to it.  Thanks for joining me today.  Be sure to post your creations to the Flying Unicorn Facebook page so that we can share your work with everyone on Facebook!

Sunday, July 3, 2016

Off the Page project with the Flying Unicorn July KOM

The off the page project this month is a fun little tea light holder that I painted with Prima Paint included in the kit.  Then I embellished it with metal flowers and leaves.


 I dabbed on  Stampendous aged gold embossing powder here and there to add some fun texture and then sprinkled on a few Prima beads.

 Then just a touch of Bolivian Blue Silks for some color.


Tea Light Lantern
Prima Art Alchemy 963057 Metallique Ancient Coin
Other:
Stampendous Aged Gold Embossing Enamel
Stampendous Aged Marine Embossing Enamel
Prima Glass Beads Butter

Thanks for stopping by today!


Saturday, July 2, 2016

Flying Unicorn July kit!


Hi friends!  Yep, its that time again, the July Your Art, Your Passion, megakit from the Flying Unicorn Store  has been released and it's really a beauty filled with the gorgeous 49 and Market Vintage Artistry collection.

This layout is a photo of me and my two furkids, Tisha and Nika!  In addition to the gorgeous kit papers, I tucked in a few things from my stash,  chippies from Creative Embellishments and Petaloo roses.

On the background I did some masking with Prima Texture Paste using the mask that came in this kit.  I also added some stamping here and there with different stamps.


The largest flower is handmade.  I used a die from Paper Artist. to cut the blooms from the kit papers, Paper Artistry.  I layered the flowers over a Creative Embellishments vine and some fussy cuts from the design paper and a metal water pump from the kit.

I anchored the floral cluster with a Prima lace stamp and Creative Embellishments chippie that has been colored with Prima Color Bloom Tea Stain Mist that was included in the kit.


I like to pop up my layers with foam tape.

 Aren't these new Petaloo blooms gorgeous?  They are from my stash.

Supplies - from the July Flying Unicorn Kit:
49 and Market Paper Artistry Paper Collection
Prima Shabby Chic Treasures Garden 892456
 Prima Stencil 960155
49 and Market Rustic Barn Small Blooms
Prima Color Bloom Tea Stain

Other Supplies:
Petaloo Darjeeling Garden Rosette x 6 Spice
Creative Embellishments Dripping Heart Lace Border
Creative Embellishments Everlasting Love 
Paper Artist Bodacious Blooms die
 Die-namites Large Ivy die
Black acrylic paint
Prima Texture Paste
Prima Clear Stamps 960988
Lindy's Gator Gumbo Olive

Next up, a fun Julie Nutting doll tag!  These are so fun to make!  This is Haley, wishing you a great day.  I've layered up the tag with lots of diecuts using foam tape to pop up the different layers.


These Petaloo roses go so well with the Prima Vintage Emporium papers that I used for this tag. 


Supplies - from the July Flying Unicorn Kit:
49 and Market Design Paper
Prima 6 x 6 Vintage Emporium paper pack
Prima Shabby Chic Treasures 892456
Prima Stencil 960155
Prima Wood Veneers
Prima Art Alchemy Metallique Ancient Coin
Other Supplies:
Prima Metal Die and Cling Mounted Stamp - Halie
Spellbinders  Fleur de Elegance die
Petaloo Darjeeling Garden Rosette x 6 Spice
Cherry Lynn Die Victorian Romance Flourish

Thanks for stopping by!  You can be certain of receiving a Flying Unicorn kit by ordering your kit during preorders on the 20th of each month.  Check out the details here.


Friday, July 1, 2016

Time for a new challenge at Creative Embellishments

Time for another challenge at Creative Embellishments!  Can you believe that it is mid-year already?  I imagine that many of you in the US are enjoying a long holiday weekend.  Hurray for that.  It's time for a cookout for sure!

Our monthly challenge is up on the CE blog now and it's a fun patriotic one!  Here's the inspiration photo:

 I love this photo of Old Glory that my husband took deep in Denali National Park at Eielson Visitor Center and it is perfect for the July challenge.


Don't you just love this fireworks burst chippie?  I heat embossed it and then added some Diamond Stickles to really make it sparkle like fireworks.    Unfortunately, that doesn't show up so much in the photo but it's there!

Here's Uncle Sam's hat, love this!  It was perfect for tucking in to my cluster.  I also tucked in some pieces of chicken wire so that the flowers appear to be climbing on them.


Creative Embellishments Supplies:


Other Supplies:
Graphic 45 Children's Hour Collection-
July Collective
August Collective
July Montage
Patterns and Solids 6 x 6 pad
Alphabet Stickers
Graphic 45-Time to Flourish-July Flourish
Graphic 45 An ABC Primer Alphabet Stickers
Petaloo Dahlias x 10 Teastained Spice 1467-108
Petaloo Petites x 24 Teastained Blue 1465-103
Silver paint
White corrugated paper
May Arts ribbon
Stampendous Aged Ivory embossing enamel
Stickles  - Diamond


Challenge Rules:

  • Create a NEW project layout, mini album, tag, card, canvas, etc….as of Jun 1st 2016.
  • Please add your entry to the InLinkz box in the June challenge thread on the Creative Embellishments blog to be eligible for the prize. You have until the last day of each month 11:55 pm eastern time to enter.
  • It is required that you mention in your blog post that you are playing along at Creative Embellishments together with a link back to our blog. Please make sure to reference our challenge. Please no back linking.
  • Combining with other challenges is permitted.
  •  We would love to see you USE AT LEAST 1 OF CE products on your projects but it isn’t required to play along. However everyone that does will get and extra chance at winning.
  • WINNERS will have 2 weeks to claim their prize. The winner will be announced on this post the day after the challenge ends. Keep an eye out to see if you are a winner.


Thanks so much for joining me today!  Be sure to stop by the Creative Embellishments store often and check out the new products  and don't forget to enter the challenge!


Thursday, June 30, 2016

Flying Unicorn July kit has been released!


The Flying Unicorn monthly, Your Passion Your Art kit is now bigger than ever - overflowing with all the goodies you desire with all our previous kits rolled into one GRAND collection...

ONE month, ONE kit.

The Flying Unicorn now includes papers, an "Off the Page" project, a mixed media collection, and all the coordinated embellishments in one kit, and at one crazy magical Price of 59.99!!


Get excited and enjoy what the creative team has done with the

Flying Unicorn JULY 2016 Your Passion. Your Art Kit.


Paper - 12x12 and 6x6 for smaller projects


Embellishments - Flowers, Trim, Chipboard


Layouts from the Design Team


Cards


Tags and Mixed Art


Off the Page


Are you visiting the Tallahassee area soon?
Stop in and say hello!
Plan a day trip! Crops -Classes-Fun
1168 Capital Circle SE
Tallahassee FL 32301
Tel: 850.270.6366 Toll Free 800.231.7119


LinkWithin

Related Posts Plugin for WordPress, Blogger...