Pages

Tuesday, August 12, 2014

G45 Come Away with me!

Some of the swirly savages from the Swirlydoos kit club gathered at the fabulous Memories Manor mansion in St Clair, MI this past weekend.  Oh my, what a wonderful weekend it was!  The mansion was just incredible as was the food and service.  Jan, the owner, surely knows how to make her guests feel like queens!

I was inspired to use this post card of Memories Manor with Graphic 45's new Come Away with Me collection.  The ivory paper behind the floral is a piece of french vanilla cardstock that I have stamped all over with a french script stamp using Vintage Photo Distress ink.

I used a We Are Memory Keepers Lucky 8 Fancy Scroll to cut the floral paper.

Three of the flowers are handmade and 2 are Petaloo Botanicas.  I used McGill's Floriano and Retro Flower to make my flowers


Supplies:

Graphic 45 Come Away With Me paper collection:
Floral & pink dot - Cosmopolitan 4500920
Pink base - Wanderlust 4500915
Petaloo Botanica Blooms coral
Petaloo Botanica Minis - ivory
Lace, mini roses, 

Monday, August 4, 2014

Fabscraps Oh Sew Beautiful

My Mother was an incredible seamstress and tailor until Rheumatoid Arthritis robbed her of the ability to use her hands to the degree required for intricate sewing.   When I was a teenager, I dreamed of being a fashion designer and my Mom would make my designs come to life.  She had such a talent with a needle and thread.  She even made my wedding dress.  I was living in Florida at the time and she was in NC.  She just mailed pieces to me for fitting and I would mail them back to her.

I wish I had a photo of her at her sewing machine,  That really makes me think of the importance of capturing those kinds of photos.  It may seem so inconsequential now, but in years to come, someone will cherish that photo of you doing something you love and that everyone will think of when they remember you.  For me, one should capture me in the kitchen cooking a big family meal!  What picture of yourself do you think someone would really cherish?

Fabscraps Oh Sew Beautiful is a gorgeous paper line and its chipboard sewing machine that I used on this layout is perfect to accompany my journaling about my Mom's talent.  I've put the journaling on the back of the page as it just didn't fit on the face.

 All of the roses on this page are handmade rolled roses.


Love the chipboard sewing maching and title.  The machine is painted with Silks and the title is heat embossed.

This collection includes a couple of chipboard and diecut paper dressforms that I really love!
For this project you will need:

  • Fabscraps Oh Sew Beautiful paper collection:  C68  002, 006, 008
  • Chipboard pieces Sewing Machine DC68 010, Title Oh Sew Beautiful 005, Mannequin 0013
  • MC68  001A Journal piece to fit Mannequin 0013
  • Ranger Gold Paint Dabber
  • Silks Vavoom Red
  • Dripping mediums, I used Ayeeda Ink Bordeaux and Izink gold
  • Pumice Stone Distress Ink
  • Masks - white and gold masking paste.  I used Shimmerz Tidy Widy and Studio 490 metallic gold
  • Martha Stewart corner punch Deco Fan or something similar

Instructions:

  1. Dab gold paint all around edge of sheet 006.
  2. Do some random masking on sheet 006 with a white masking paste.  Set aside to dry.
  3. Cut an oval from sheet 008 6" x 9", distress and ink the edges.  Mask around the edges using gold masking paste.  Set aside to dry.
  4. Cut another oval from sheet 002 7" x 10", cut an oval from the inside of this oval 4" x 7", distress the edges of the small oval.
  5. Punch around the larger oval (7" x 10") with a Martha Stewart corner punch, I used Deco Fan.  Ink the edges.
  6. Cut a piece of cardboard slightly smaller than 6 x 9 and adhere it to the 6 x 9 oval.   Layer this over the punched 7 x 10 oval.  Now adhere the smallest oval in the center of the larger oval. 
  7. Adhere the Mannequin journal piece 001A to the matching  Mannequin chipboard piece 013.  Ink the edges.
  8. Position the Mannequin chipboard on the right side of the oval and use foam tape to stand it off the oval.
  9. Frame a small photo and adhere on the left side of the oval, again using foam tape.
  10. On the right side of the base sheet 006 add some drips about half way down.  Set aside to dry.
  11. Paint the Sewing Machine chipboard piece 010.  I first painted it black and didn't like that so I painted over it with Silks Vavoom Red.  The black paint underneath gives it a dark appearance without being such a stark black color.
  12.   Paint the title chipboard piece 005 using the gold paint dabber.
  13. Adhere the oval to the left side of the page as shown.
  14. Use foam tape to secure the sewing machine chipboard piece next to the oval where shown.
  15. Then add the title chipboard piece over top of the sewing machine and pop it up with foam tape.
  16. Finally add flowers and greenery.  All of my flowers are handmade (except the tiniest roses) rolled roses.  I used Spellbinders Spiral Blossom Four for the large roses and La La Land large Rolled Rose die for the small roses.  I brushed the tops of all the flowers with the gold paint dabber.  The leaves are cut with the Sizzix Alterations Garden Greenery die.
  17. I like to add color to my greenery and I have used Lindy's Frosty Forest Green, Gator Gumbo Olive to add a little varied color to my leaves.
  18. That's it!
I appreciate your visit to my blog!  Thanks so much.

Saturday, August 2, 2014

More new Fabscraps and a Swirlydoos challenge!

I am totally in love with Fabscraps Industrial Chic collection!!  It is so shabby and so gorgeous!!  Here's another LO that I did with Industrial Chic and I've created a challenge at Swirlydoos with this layout.  Check out my challenge here.


For this layout you will need:

  • Fabscraps Industrial Chic paper collection:  C67 005,  006
  • Fabscraps windmill diecut from Journal Box MC67 001A
  • Fabscraps chipboard piece DC67 007 Rustic Beautiful
  • 12 x 12 sheet cardboard
  • Flowers, leaves, embellishments of your choice
  • Water spritzer
  • White paint or gesso
  • Embossing powder
  • inks
Instructions:

  1. Spritz the cardboard and tear off some of the facing so that you expose the ribs of the cardboard.  Randomly paint the cardboard with white paint or gesso.
  2. Cut C67 006  to approximately 10 x 10".  Distress and ink the edges.   Center and adhere to the cardboard leaving the edges free of adhesive so that you can slip the strips from the next step underneath.   Randomly mist with a coral colored mist.  I used Heidi Swapp Georgia Peach.
  3. Tear four 3/4" strips from C67 005, ink the edges and then tuck underneath the large C67 006 square.
  4. Fussy cut some flowers from C67 005 and adhere to the left side of the page so that they are underneath your chosen photo.
  5. Adhere the windmill to the right side of the page such that it is partially covered by your photo.
  6. Mat your photo with cardstock and then pop up and place on your layout.
  7. Alter the chipboard title to suit your needs.  I have heat embossed it with Ranger Antiquites California Stucco.  You could also paint or ink it or even leave it plain.  Adhere the title to the lower left photo.
  8. Embellish to your liking with flowers and leaves.  I have used Petaloo Botanica Coral flowers and I am Roses small roses.

I'll be sharing amother layout from Oh Sew Beautiful tomorrow so be sure to stop by!


Friday, August 1, 2014

Fabscraps Oh Sew Beautiful!

Oh Sew Beautiful is another gorgeous line just released by Fabscraps!  Like all of their lines, it includes some really awesome chipboard pieces.  Don't you just love this hanger?  The hanger, title, large scissors and manequins are all apart of the chipboard pieces in this collection.


I used embossing powders to alter my chipboard pieces.

The collection also includes diecut paper to cover the chipboard mannequin on the right.  The other mannequin is heat embossed.

Instructions for this project and what you will need:

  • Fabscraps chipboard:   DC68 001 Coat Hanger and plaque with scissors and bobbins; DC68 006 Pins & Needles, DC68 008 Scissors & Mannequin, DC68 013 small mannequin.
  • Fabscraps Journal Box MC68 001A - small dress form and 2 tags
  • Fabscraps paper C68 001 Stitch in Time
  • Mask and modeling paste
  • Mist
  • Die cut oval frame
  • Flowers, ribbon, lace, embellishments 
Instructions:

  1. Use a mask and modeling paste to do some masking on the Coat Hanger DC68 001.   After it dries, spray with a mist (such as Lindy's Cosmopolitan Pink) to give it a bit of colors and sparkle.  Ink the edges.
  2. Cover the scissors from Fabscraps chipboard DC68 008 with gold embossing enamel.  (I used Stampendous Aged Gold.) 
  3. Cover the dress form from Fabscraps chipboard DC68 008 with of white embossing enamel (I used Ranger Antiquities weathered white.) 
  4. Use silver embossing enamel to cover the bobbins from DC68 001. (I used Stampendous aged silver.) You could instead, paint these pieces.
  5. Treat the title chipboard DC 68 006 Pins and Needles either with embossing enamel or paint.
  6. Adhere one of the dress form die cuts from Fabscraps Journal Box MC68 001A to the smaller Fabscraps chipboard dress form DC68 013.  Ink the edges.
  7. Cover the Fabscraps plaque DC68 001 with C68 001 Stitch in Time paper.  Ink the edges.
  8. Glue a piece of lace to the bottom of the plaque.
  9. Fussy cut 2 of the smaller  and 1 large thread cards from Fabscraps Journal Box MC68 001A.  Wrap a thin piece of cord or heavy thread around the larger card.  Ink the edges of all three tags.
  10. Mount an oval frame on the right side of the plaque and adhere the two dress forms to the frame.
  11. Layer the scissors, bobbin, thread card, and title on the left side.
  12. Embellish with flowers and ribbon as shown. 
  13. Use the provided rings to attach the plaque to the hanger.


 Here's the complete Oh Sew Beautiful collection:


As always, I really appreciate your visits!

Thursday, July 31, 2014

Industrial Chic - Fabulicious new Fabscraps collection!

Fabscraps just debuted a new paper line, Industrial Chic at the Paper Arts show in Atlanta and it is fabulicious and oh so perfectly shabby!  The line includes chipboard pieces with matching diecuts, tags and stickers, all coordinated to go with the papers.


 I especially love this chipboard windmill that I've covered with a paper diecut that perfectly matches and covers the chipboard, I just love that!


Beautiful Petaloo Botanica blooms!


Instructions to make this project

For this project you will need:
  • Fabscraps Industrial Chic collection C67:  Wood Chic 002, Paint Chic 006,
  • Co-ordinating sheet of card stock
  • Chipboard windmill DC67 014
  • Windmill punched out from Journal Box MC67 001A
  • Lindy's Icy Primrose Gold and Cosmopolitan Pink mists
  • Pumice Stone Distress Ink, Wisteria Mix'd Media Inx
  • Flowers, Butterflies
  • Martha Stewart Punch Around the Page punch
  • Petaloo Botanica flowers: mini whites  and pink, large yellow and pink 
Instructions:
  1. Paint the plain side of Paint Chic 006 with clear gesso and dry.
  2. Spray a little water on paper 006 and then spray randomly with Lindy's mists.  Immediately blot with a paper towel.  You want to get just a lightly tinted look.
  3. Tear small strips of paper off Paint Chic 006 all the way around so that the paper is approximately 11.5 x 11.5.
  4. Dampen the edges of Paint Chic with your fingers and scrunch the edges slightly.   You can add some random tears if you like.  Dry and then ink the edges.
  5. Cut an  8 x 8 square from the center of the card stock and set aside.  Distress the 12 x 12 edges and then glue Paint Chic to the card stock so that it is centered.
  6. Cut a 5 x 10.25 piece from Wood Chic C67 002.  Be sure to include the florals in this cut.  Then either  Punch Around the Page with a Martha Stewart punch (I used Flourish Lace) or distress the edges, then ink all the edges.
  7. Cut another rectangle 3.5 x 8 also from Wood Chic C67 002.  Distress and ink the edges using the opposite side of the paper from the 5 x 10.25 piece.
  8. Adhere the 3.5 x 8 piece about 3.25" from the left side and centered top to bottom.  Adhere the larger rectangle about 1.5" from the right side.  Pop up this piece to give your layout additional dimension.  Cardboard works great for this purpose or you can use foam tape.
  9. Take one of the windmills from Journal Box 001A and glue to the chipboard windmill.  Use foam tape to pop it up and adhere to the left side of the layout as shown. 
  10. Add your photo, embellish with flowers, butterfiles, a title, etc.
  11. Stand back and admire your work as we are all done!


Here's the entire range of Industric Chic:


I'll be back tomorrow to show you another new Fabscraps collection, Oh Sew Beautiful!


Tuesday, July 29, 2014

Creative Embellishments chippies and Prima Time Traveler

I recently got a nice order of chipboard in from Creative Embellishments, lovin' their chipboard!  They have so many great designs and new ones coming out seems like every day!

I did this layout for the Swirlydoos July Round Robin and I used Prima Time Traveler papers, that's my current favorite paper!  I also got my hands on Memory Box's Rings and Puddles mask that I have been coveting for a couple months now.  I heat embossed the chipboard circles with 2 different embossing powders to give them a multi-colored effect.

The photo is of me and sweet Chena in 2010 taken at Denali National Park in Alaska.  We were so lucky that we got to spend 6 weeks 29 miles inside the park as campground hosts.  We had a wonderful time and met so many nice people from all over the world.  It was a perfect summer!


Here you can see the multicolor effect on the Creative Embellishments circle chippies.


Thanks for your visit, I appreciate it!

Saturday, July 26, 2014

A tag and altered chipboard tutorial with Prima Romance

It's Saturday, hurray!  And do you know that on every Saturday the Swirlydoos blog features a tutorial?  Today is my tutorial day and I've put together a video showing you how I altered a beautiful Creative Embellishments flourish and start to finish instructions on building my tag.

Prima Romance Novel is one of my favorite collections and at this point I only have bits and pieces left so I thought it would be great fun to make a tag with it.

One of my favorite scrappy things in the whole world is embossing enamel and using it on chipboard!  I've altered a Creative Embellishments chippy with embossing enamel and then used it on a tag in a start to finish tutorial.


Enjoy!


Friday, July 25, 2014

Swirlydoos July KOM - more creations!

Our July kit has a beautiful collection of Blue Fern Studios papers, Ombre Dreams.  This is my first chance to use Blue Fern's papers and I must tell you they are fabulous!  Definitely the heaviest weight papers I have used so they work really well with mixed medias.

On this layout, I used a photo of my younger brother. He was the cutest kid ever, with blonde hair and blue eyes. I chose one of my favorite color combinations, using blue cardstock from the cardstock add-on and those gorgeous Petaloo yellow Botanica blooms from the flower add-on. The daisies are from I am Roses.

The chipboard pieces came in the Embellishment add-on and are a Blue Fern flourish that I cut apart and heat embossed. Those pretty doilies are part of the main kit.


 I love Prima's wooden embellishments and this one came in a set included in the Embellishments add-ons.


I did a little masking using Golden's Crackle Paste and a Prima mask - both from my stash.  You can see Prima's wooden rose embellishment peeking out here, also from the Embellishment add-on.

Supplies:
Cardstock: Core'dinations Vienna Lake
Patterned paper: Blue Fern Ombre Dreams collection: base - Susan's Dream, rectangle - Ginger's Dream, torn rectangle - Blue Fern packaging
Letters: Maya Road
Chipboard: Blue Fern Flourishes
Embossing powder: Ranger Antiquities Weathered White
Flowers: Petaloo Botanica Blooms yellow 1102 103, I Am Roses daisies
Masking paste: Golden Crackle Paste
Paint: On letters, Shimmerz Dimensionsz Blue Lagoon, then covered with glitter
Other: Melissa Frances Doilies, Prima Wooden Embellishments


I have used nearly every smidge of paper that came in the kit but I did manage to put together this little card using scraps from Prima Princess paper that was also part of the kit.  I added the bit of lace and the small flowers.  The leafy branch is a die cut using a Memory Box die from the store.


Tomorrow I have a video tutorial up, hope you'll stop by and check it out!


Monday, July 14, 2014

Graphic 45 - An Eerie Tale

Graphic 45's An Eerie Tale is such fun and pretty paper.  Although it is their halloween collection, it has plenty of other applications for your favorite fall photos.  As always, the colors are so rich and deep.

This is my great niece  in the pumpkin patch, she is such a cutie with her little scarecrow and pumpkin dress!

That fabulous pumpkin border is a Creative Embellishments chipboard piece, just perfect for this layout.


Supplies:
Patterned paper:  Graphic 45 Eerie Tale collection:  green base - Abracadabra 4500940, floral - Enchantment 4500931, orange stripe & patterned - Grand Illusion 4500 939, Journaling chipboard 4500949, Decorative Chipboard 4500948
Chipboard:  Creative Embellishments Pumpkin Borders
Diecuts and punches: Martha STewart Wild Flowers, WRMK Lucky 8 Frilly Lace.
 Flowers:   I am Roses
 Ink:  Distress black soot, Prima Coltsfoot & Rusty Keys

Thanks for stopping by!  Can you hardly wait for G45's Raining Cats and Dogs collection?  I am excitied beyond words and can't wait to get it!

Saturday, July 12, 2014

Fun with Prima and Creative Embellishments!

Oh I've been having some fun with Prima's Time Traveler, what a gorgeous collection!!  It's one of those collections that should have my name on it because the colors are everything that I adore!

I wanted to do a vintage styled LO with this collection so I chose this picture of my parents taken just after then end of WWII.  Dad was just home from France, they were young and so in love!

I did some subtle masking in the background with Tim Holtz's burlap mask and bronze Glimmer Mist.  The lace was white and it got sprayed with a lot of different colors and painted with white gesso!  I just couldn't quite get it be the color I wanted but I'm finally happy with it.


The gorgeous chippies I've used are Creative Embellishments Love Birds Set.  I heat embossed the birds with Antiquities Weathered White.  Then the birdcage and words are heat embossed with Stampendous aged embossing enamels.


I've use one of my favorite vines here, Prima's Bretton Vine.  I wish I have a couple dozen of these vines!!  The black diecut around the flowers is a Prima diecut doily that I cut in half and fitted in around the roses.  Its kind of a cool look don't you think?


Supplies:

Patterned paper:  Prima Time Traveler collection:  base - No. 70 813888, floral border punched - Forever Roses 813864, black stripe - Dark Lines 813895tags - Journal Spt Sticker Sheet from the Collection kit, outer frame - The Traveler,
Chipboard:   Creative Embellishments Love Birds Set
Embossing powder:  Stampendous aged gold, ivory; Ranger Antiquities Weathered White
Diecuts and punches:  Prima Doily
Flowers:   Prima Bretton Vine 552640, I Am Roses
Ink: Distress black soot
Mist:  bronze Glimmer Mist,
Masks:  Tim Holtz Burlap mask

Thanks for stopping by my blog, I appreciate your comments and your visit so much!


Wednesday, July 9, 2014

July Scrapbook Kit Reveal & Blog Hop!

Welcome to:
July Scrapbook Kit Reveal & Blog Hop!

If you came here from Debbie's blog, then you are on the right track. If not, go back to Swirlydoos' blog and start from there. We have some amazing projects for you to see today !! Make sure to leave a comment on all of the blogs for a chance to win!!! Make sure you have LIKED & FOLLOWED Swirlydoos on Facebook!!!

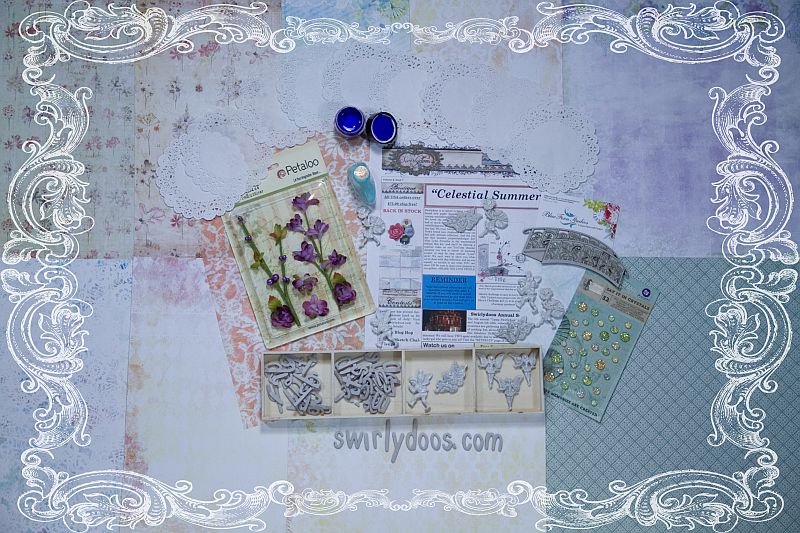
Swirlydoos is proud to bring you our beautiful July collection:


Celestial Summer 


And check out these coordinating add ons that perfectly compliment our July scrapbook kit!


Are you a subscriber? If so, your kit is on it's way! If not, check out the Swirlydoos store to see if there are any July kits or add ons in the store!

Has it sold out? - become a subscriber and not only will you never miss a kit again, but you'll also pay less for your monthly scrapbook kits!
*Mention this blog hop and save 10% on your first kit*


Right-click here to download pictures. To help protect your privacy, Outlook prevented automatic download of this picture from the Internet.
 Never miss one of our kits again!


We have some absolutely beautiful scrapbook projects for you to see!

The July kit features Blue Fern Studio's Ombre Dreams papers and I have to tell you, this paper ROCKS!! It is the heaviest weight paper I have used and thus works so well with wet mediums, masks, etc. AND it is absolutely GORGEOUS!! I love the soft color palette of this kit, it works so well with any theme.

The papers work so well with vintage styled layouts such as this one.   This is a vintage photo of a close friend's Mom, it's such a pretty photo, I had to scrap it for her!  I did some masking with Prima's Doily #3 and Crushed Shells Glimmer Mist in the upper left and bottom right corners.  Then I turned the mask over and pressed the mist that remained on the mask into the paper.  That makes a really pretty negative image.  The large roses are from the flower add-on kit and the small roses are from my stash as are the letters.


 That sweet fairy perched on the roses is Prima resin and a package of 12 fairies comes in the main kit!  Sweet!

The butterfly is another of Prima's wooden embellishments included in the embellie add-on.  That awesome garden sink is from a previous kit.


Supplies

Cardstock:      Core'dinations Persimmon
 Patterned paper:  Blue Fern Ombre Dreams collection:  base - Leslie's Dream, longest rectangle - Ginger's Dream, floral rectangle - Prima Princess Collection Lily 950989
 Letters:  Pink Paislee foam letters
Diecuts and punches: Martha Stewart Flourish Lace
 Flowers:   I Am Roses mini roses, Prima Roses 574932
 Ink:  Color box rose coral, Prima Pastel Peach, Shabby Tote
 Mist:  Glimmer Mist Crushed Shells
 Masks:  Prima Doily #3
 Masking paste:  Liquitex super heavy gesso
Other:  Prima Wood Embellishments Princess 572907, Prima resin icons 573324, Prima Shabby Chic Treasures 

These next two layouts are a bit unusual for me as I seldom work with purples.  Why?  'Cause they don't usually work for me but these gorgeous papers just brought out my inner purple, LOL!!

This layout was done with our July sketch.  The lace is included in the Embellishments add-on and was a pretty off white, however, I wanted it to be purple so I dyed it with the Snapdragon Silks paint that was included in the main kit.  You can easily dye fabrics and trims with paint; all you need to do is water down the paint a bit and I find it easier to apply if I dampen the fabric or trim first.


This gorgeous bridge came in the main kit and is Blue Fern's Layered Iron Bridge that I have heat embossed.


I've added a Manor House pink vine and some small fuschia roses from my stash to the purple flowers from the flower add on.


This next layout shows a photo of my sweet great niece, I love the sparkle in her eyes!


I first painted this paper with clear gesso.  I do this so that I have more control of my mists and inks, i.e. if I don't like how it looks I can use a damp paper towel and remove all or most of the mist and reapply.  I used this technique on this page and the previous.


I used Mix'd Media Inx in wisteria and Prima's pastel peach inks to color this paper.  First I lightly mist my paper and then lightly swipe on the ink.  Often I dip the ink applicator in water so it is somewhat like painting with water colors.

One product that came in the Embellishment add-on that I really liked is Darice wire.  Its what looks a bit like stitched circles on this layout.  Its actually a crinkled wire that I wrapped into circles, love how it looks!


 The chippy is Blue Fern and comes in the Embellishments add-on.  I first painted it with white gesso and then randomly applied here and there Ranger Antiquities Tanzanite embossing enamel.  Then I dabbed on Emperor's Gold Silks.  After that dried, I covered the entire chippy with Ranger Frosted Crystal embossing powder.

These two large flowers are handmade from cardstock (addon) and fabric like paper included in the main kit.  I used McGill's Floriano and Retro Flower punches and followed the techniques in this tutorial:  cardstock and woven paper flower.  The pretty berries and leaves are from the flower add-on.


Supplies:

Patterned paper:  Blue Fern Ombere Dreams:  Background - Juliana's Dream,  Prima Princess collection scraps under photo
Letters:  Maya Road chipboard letters
Chipboard:  Blue Fern Corner Flourish
Embossing powder:  Ranger Antiquities Tanzanite & Frosted Crystal
Diecuts and punches: McGill Floriano & Retro Flower
Flowers:   Petaloo Epherma Lavender/purple 1100 107, Petaloo Spring Berry Clusters Lav/purple
Ink:  MIx'd Media Inx Wisteria
Mist:  Prima Color Blooms Pressed Petal
Masks:  Prima Doily #3 under photo
Paint:      Silks Vavoom Red & Emperor's Gold
Other:  Darice wire, cardboard, Petaloo butterfly, Prima wooden Embellishments


My special word is : Battle

So, let's get started! Make sure to leave a comment on all of the blogs for a chance to win!!! 

You have until midnight, eastern time, on Thursday, 7/10 to complete the hop. Winners will be announced on the Swirlydoos Blog on 7/11. In order to qualify to win here is what you need to do:
1: Visit all of the blogs and leave a comment on each. This way we know you were there. Take your time. There are REALLY beautiful things to see along the way.
2: Before you leave each blog, look for the “special” words and write it down. 
Once you have visited all the blogs and collected all the special words, they will create a sentence. 
3: Finally, go back to the Swirlydoos blog and leave a comment letting us know how much fun you had, tell us the sentence that was created with all of the special words you collected. Can't wait to hear from you.
I'm the end of the blog hop so go back to the Swirlydoo's blog from here.  Hope you enjoyed the hop! 
****************

LinkWithin

Related Posts Plugin for WordPress, Blogger...