First let me write this disclaimer - there may very well be a better way to do what I am going to show you and if you know a better way, please leave me a message and enlighten me! Otherwise, join me on my journey as I stumble through the ins and out of Photoshop Elements version 9.
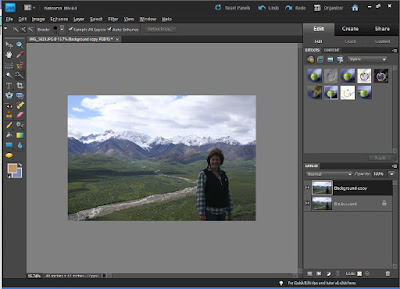
Let's get started. We'e going to use the Quick Selection Tool to lighten the person (me) in this image so that we can see the features of the person in the photo as well as the landscape. The Quick Selection tool looks sort of like a wand with a dotted circle attached. In my photo, it is the 4th tool down on the inside column.

The Quick Selection Tool is used to select the parts of an image that you want to adjust.
Follow these steps:1. Go to Layer, Duplicate Layer, to create a layer where you will make your adjustments.
2. Working on the background copy, click on the Quick Selection tool. Above your picture you will see some symbols. The first is the "normal" selection brush. Make sure you click on this one to start with. The 2nd is the add to your selection brush and the 3rd is the subtract from your selection brush. (See the + and - symbols.) The next box is how you chose the size of your brush.
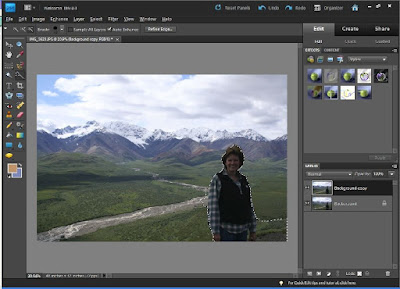
3. Now use your brush to outline the subject you want to enhance. In my photo I would like to lighten my image so that you can better see my face. I am going to use the first brush tool and outline my entire body.
4. Note in the screen image below that I have selected more than my body on the right side so I am going to use the subtract brush and click right at the outside of my sleeve and hand.
5. Now that I have the image selected the way that I want it, I can adjust the lighting to bring out my features.
6. Now you can go to Enhance and correct your selected portion of the image for lighting and color.
7. You can press Ctrl+ D and the "marching ants" line goes away and you can clearly see your edit. Don't forget that you can go to Edit, Undo if you don't like your results.
8. Now over in the layers box, you can hold down the control key and click on both your layers and then right click and select merge layers to put your layers together. After I did this, I worked on the color and lighting of the overall picture.
And the finished edit!
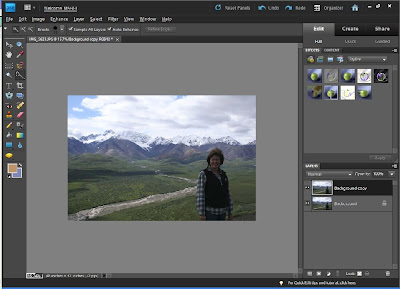
Here are better views - hard to see within the PSE frame.
Before editing:
Leave me a message if you have questions and I will try to help!


Maggi, thanks for this!!!!! <3
ReplyDeletethat rocks I am going to print this I think :) hehe
ReplyDeleteOh, Sistah! You got the PSE thing going on!! Thanks for the tut. It was awesome!
ReplyDeleteDebbie Y.
wow...great tutorial Maggie. I have PSE version 5.0..yeah I know it's old...old like me..hehe
ReplyDeleteanyway it worked on my old version.
I didn't know you could do that! will keep an eye out for more tutorials!
Thanks :o)
Great information here. I appreciate learning in layman's terms,and I will certainly being using your tips on some of my photos that desperately need to be corrected. I will be checking in periodically to capitalize on your learning experience. :)
ReplyDeletewow, tfs, just found you on bella's and so need to learn to use my PSE i have the 8 version..... i have always wanted to take a class and never works out...
ReplyDelete